 Modify Subdiv Crease
Lets you edit creases in your subdivision objects including creases that were created in other applications such as Autodesk Maya or Autodesk Fusion 360.
Use this tool to create transitions between creased and non-creased areas of an edge, adjust the sharpness of the crease, and offset the position the crease.
Access the tool from the Subdivision Palette:
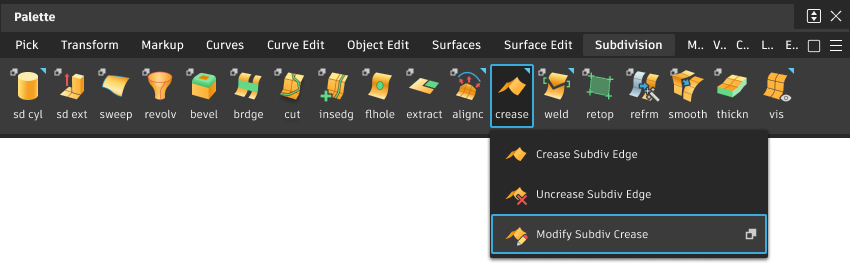
Subdiv Modify Crease settings
Crease transitions
Selecting a creased edge displays an in-canvas manipulator, which allows you to select a transition Length value. You can choose a transition Length between 3 and 6 edges. The greater the transition Length, the smoother the transition. The default value is 3.
For best results, your creased edge should consist of at least four edges from its end point to the start of the transition. You cannot add a transition to a crease that only consists of two edges.
Sharpness
Adjusts the amount of creasing to make the crease softer or harder than the default crease. By default, creases have a Sharpness of 1, which generates a G0 crease. Reducing this value softens the crease to a point where 0 removes it. Values greater than 1 increase the sharpness to create exaggerated creases. A value of 2 makes the crease twice as sharp as a default crease.
Bias
Offsets the highest point of the crease to either side the edge center point. Use this option to change the shape of the crease.
Modify crease workflows
Modify fades between creased and uncreased areas
Select the tool.
Select the crease fade you want to modify.
The crease is now highlighted in green, and a default crease transition is applied to the selected crease. When you deselect the creased edge, it displays as a dashed line, which indicates that it has been modified. The surrounding topology wireframe displays green, indicatiing that it now has construction history.
To choose another transition Length, in the viewport, do any of the following:
RMB-click under Length and select a value from the list.
LMB-click under Length to cycle through the Length values.
Click a point along the edge where you want the crease transition to end.
Remove the crease transition
In the viewport, right-click under Length and select Off or click the first edge in the transition. When you turn off a crease transition, the subdivision control cage is not modified. Only the underlying surface is modified, which has history and can be query edited and turned on again.
Note: To delete the transition, delete the Modify Crease tool construction history. After deleting, the creased data is no longer part of the subdivision limit surface. The data can be retrieved as templated surfaces with each surface appearing in the Object Lister as individual nodes.
Adjust the sharpness of a crease or offset the crease position
There are some scenarios when the Sharpness and Bias parameters cannot be modified. These include the following:
- There is a curve along the creased edges.
- A CV along the crease is not connected to quad topology. For example, a CV along the crease is a valence 5 vertex or higher, which is also known as a star-point.
- A crease fade is set to Off at either end of the creased edge.
Select the tool.
Select the crease you want to modify and do the following:
- To soften or sharpen the crease, adjust the Sharpness value. By default, subdivision creases have a Sharpness value of 1.
- To offset the crease position, adjust Bias.
About modifying creases
Before modifying creased edges, note the following:
- Crease modifications made by the tool are only supported by Alias subdivision objects. Edits, such as the crease fades, applied to subdivision objects in Alias do not persist when the subdivision object is exported to other applications such as Autodesk Maya and Autodesk Fusion 360.
- Modifying a crease changes the underlying limit surface of the subdivision object. This means that the crease modifications have construction history, which is indicated by the green wireframe. The subdivision control cage is not affected by the tool.
- Since crease modifications change the subdivision limit surfaces, these modifications persist when opened in applications that support Alias surfaces.
Guidelines for modifying crease fades
After selecting a creased edge, Alias displays areas in red when the subdivision topology does not support a crease fade. This can happen in the following situations:
- The crease starts at a boundary. To add a crease transition, uncrease one or more edges at either end.
- Two or more adjacent creased edges are not available to create the transition.
- The selected crease intersects with another creased edge.
- There is less than two edges between the end of the crease and a sharp curve along the edge.
- The creased edge is adjacent to a face with more than four edges, which is also known as an n-sided polygon.