 Skin
Skin
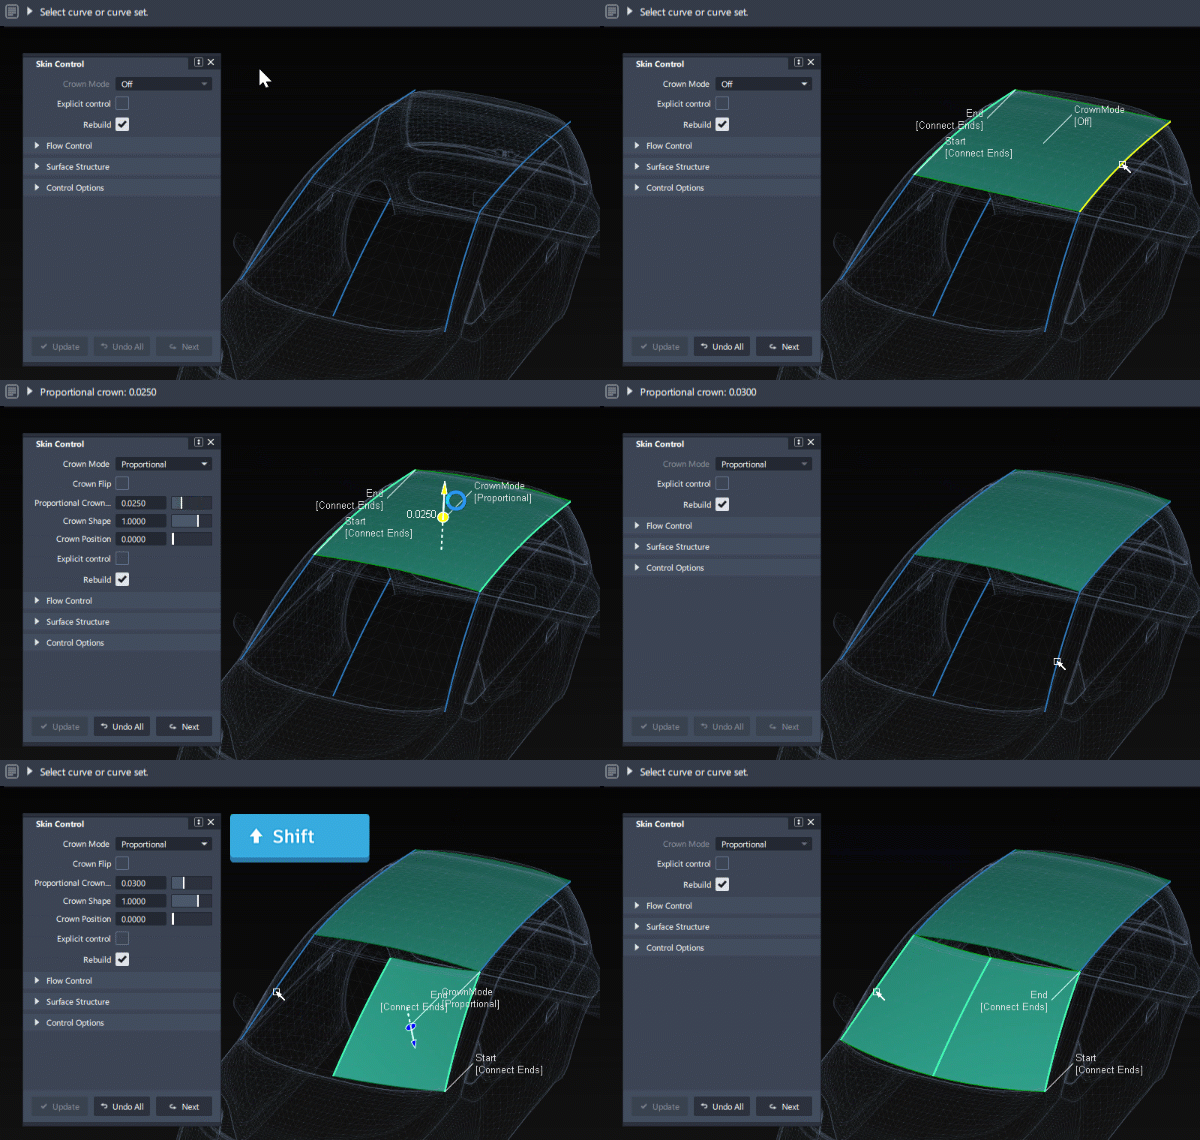
Skin can be used in two ways:
- Skin between two curves/edges (or sets of curves/edge). A straight surface (degree1) is created, with the option of adding crown and shape to create degree 2 and 3 surfaces.
- Skin between more than two curves by using the Shift key to select additional curves. In this case a surface will be blended through all curves selected.
Access this tool from the Surfaces palette:

Related video
Skin settings
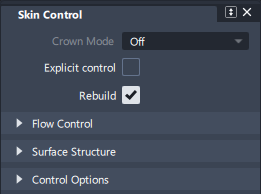
Rebuild
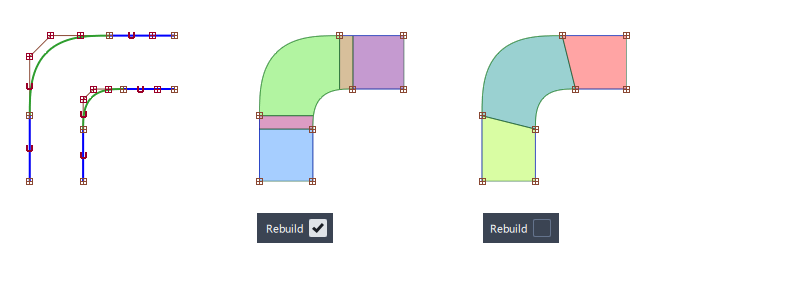
The Rebuild option defaults to 'on' and aims to simplify the topology of the skin surface by removing unwanted spans or multi-knots.
In practice, turning Rebuild 'off' only affects the skin surfaces in one specific situation:
- Same number of input elements on each side (curves or surface edges/isoparms).
- Each element has the same degree and spans as it's matching element on the other side.
- If the input sets are surface edges, they must be natural (untrimmed) edges.
- Multiple Surfaces are selected in the Surface Structure section.
The term 'Rebuild' as used in Skin and Profile is a different calculation to the rebuild option in Square and Rail.
Surface Structure : Topology
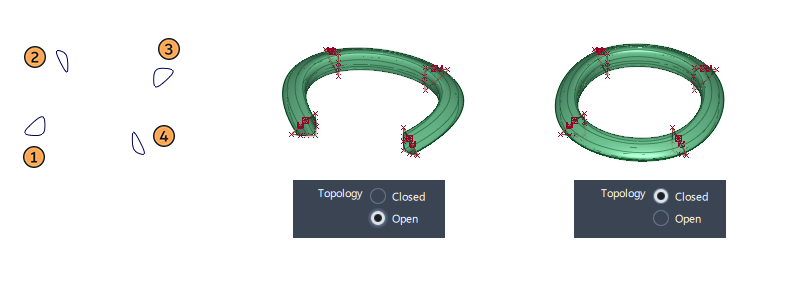
These settings only apply when more than two input curves are selected.
- Open – Leave the resulting surface open (default).
- Closed – Connect the first curve to the last curve to create a closed (periodic) surface.
Skin common parameters
Skin has the following Surface Tool Common Parameters sections:
- Explicit Control
- Flow Control
- Surface Structure
- Control Options
Skin workflows
Selection sequence for Skin
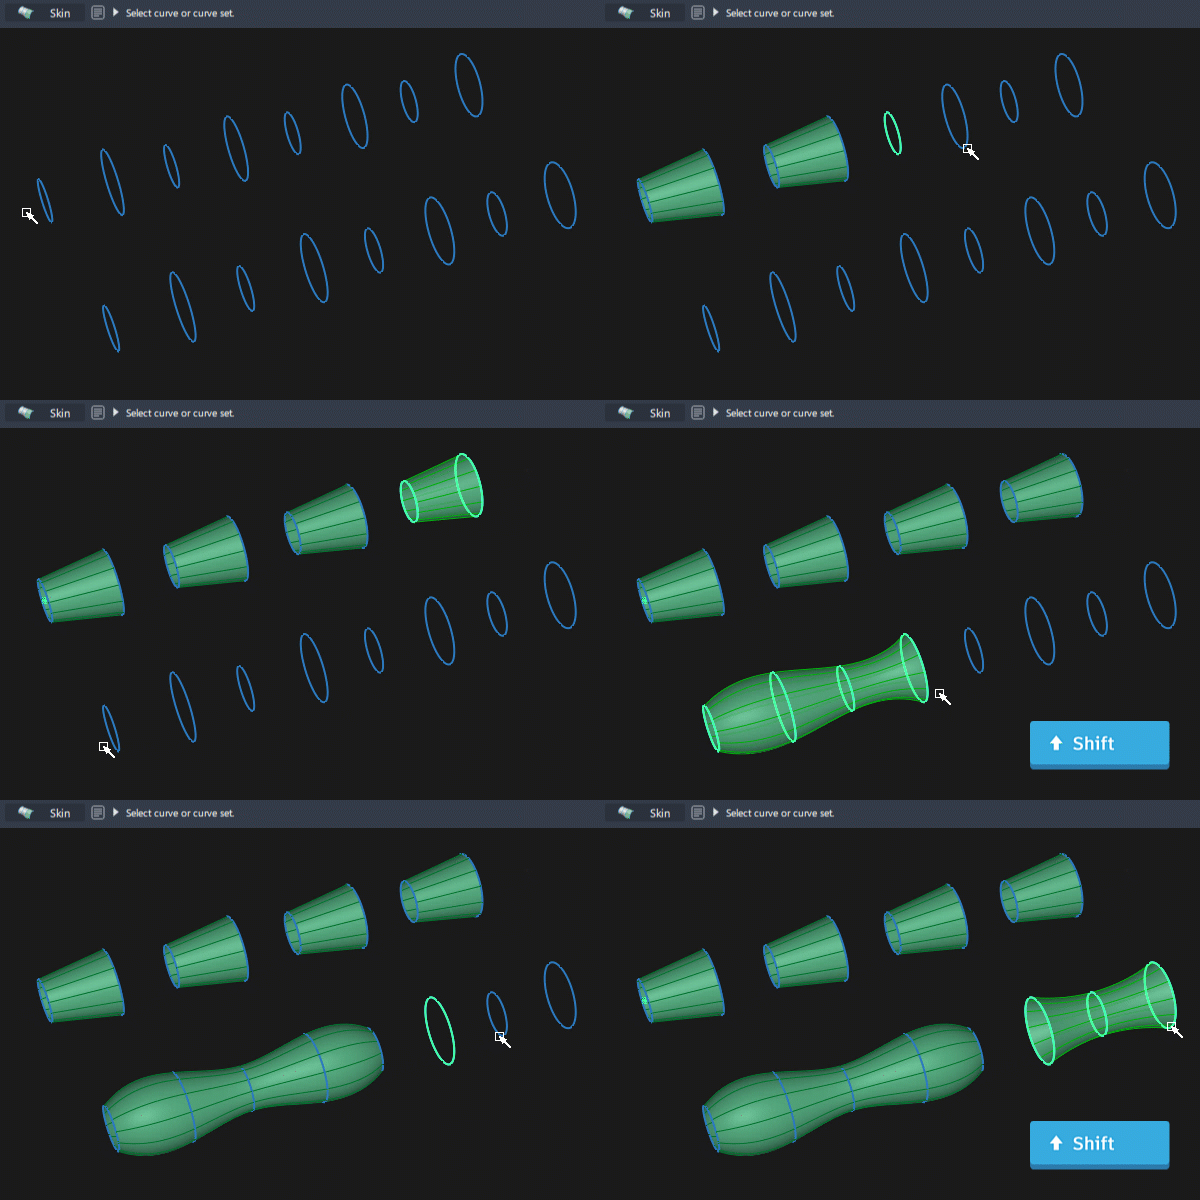
By default the Skin tool accepts two inputs and builds a skin between them. A third selection begins the next skin surface, allowing you to quickly create a series of simple skin surfaces, one after the other.
Using the Shift key includes the third (and subsequent) selections to create a blended skin between all the selected curves.
Box selection can also be used to select curves for Skin, but for more than two inputs the order of selection cannot be controlled.
Chain Select and Multiple Select for Skin
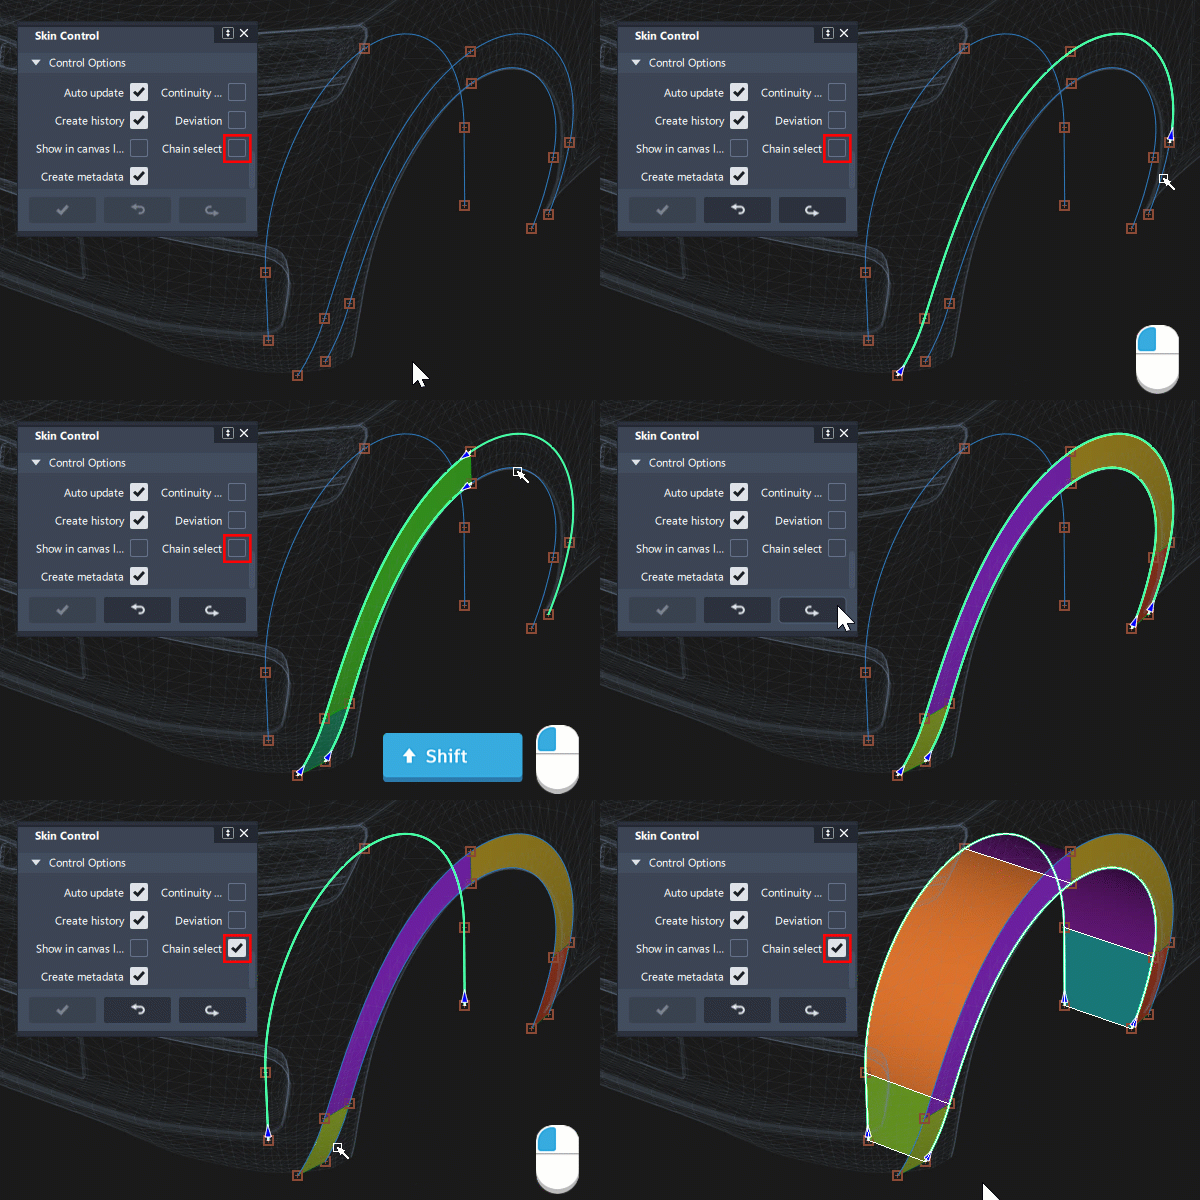
Using Chain Select in the Control Options allows a set of tangent G1 continuous curves to be selected as one input. Output surfaces are grouped under the Skin node.
To select multiple edges without using chain select:
- Input set 1 - use LMB to select adjacent edges that are G1 Tangent continuous. (Using Shift is optional but not required).
- Input set 2 - use LMB to select the first edge, then Shift+LMB to select additional, G1 Tangent edges.
Adding Input Curves after Creation
Activate the history for the Skin surface using Query Edit.
Use the Shift key to add extra input curves or edges to the end of the sequence of inputs.
Skin between layer symmetry curves
A skin can be created between a curve, and it's symmetry instance (using Layer Symmetry). Construction history will be maintained during the work session. However, once the file is saved and reloaded, the skin will not build successfully - instead of spanning between the original and the mirrored curve, it builds between two instances of the curve on the same side (which gives the impression of it having disappeared.)
The workaround for this is to either delete the construction history for the skin before saving, or use a mirrored curve instead of a symmetry curve.