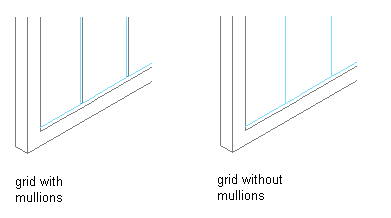
Use this procedure to remove a mullion from the door/window assembly. You can create a mullion definition whose edge width and depth are zero. Adjacent infills expand to fill in the space that was occupied by the mullion. This is an effective way to represent butt glazing.
Removing a mullion from Door/Window Assembly grid
- Click
 .
. 
- Expand Architectural Objects Door/Window Assembly Styles. . Note: Alternatively, select a door/window assembly in the drawing, and click .

- Select a door/window assembly style.
- Click the Design Rules tab.
- In the left pane, select the grid in which you want to remove a mullion.
- Create a new mullion assignment, and enter 0 (zero) for the width and depth.
- Under Mullion Assignments, select the mullion definition you created for mullion edges of any mullion assignment where you want to remove the mullions.
- Click OK.