Use this procedure to subtract extruded 3D spaces from one another in order to create a hole in a space.
To create a hole, you need to select spaces that intersect one another. Alternatively, you can select a closed polyline as the shape to subtract. You can choose whether to keep the subtracted space or polyline in the drawing as a separate unit. For example, you may want to keep the space if you need to subtract the same shape from other spaces.
When you subtract one space from another, the base boundary of the subtracted space is subtracted from all boundaries of the first space. The other boundaries of the subtracted space are just deleted without interacting with the first space. Depending on whether the first space has style-defined offsets or manual offsets, the boundaries around the hole are either re-calculated according to the style offsets or cut off at the intersection.
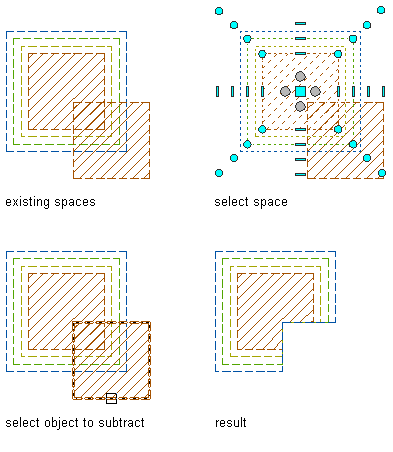
Subtracting spaces with style-defined boundary offsets
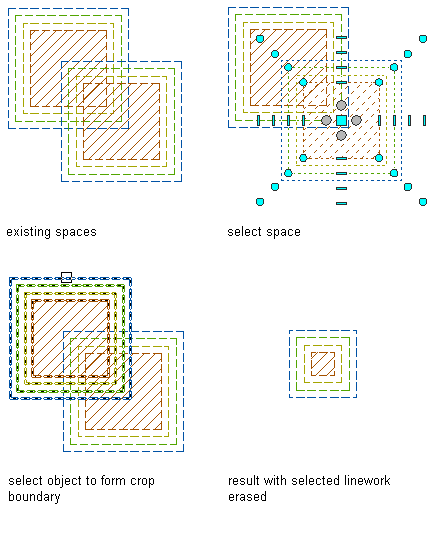
Subtracting spaces with manual boundary offsets
- Create a space in which to create a hole.
- Create a second, smaller space to be subtracted from the larger space.
You can draw the second space within or overlapping the first space, or you can draw it in another location and then move it onto the larger space.
Alternatively, you can select a closed polyline to subtract from the space.
- Select the larger space, right-click, and click AEC Modify Tools
 Subtract .
- Select the smaller space to subtract from the larger space.
- Enter y (Yes) to erase the subtracted space, or n (No) to leave the space in the drawing.