You can render the entire current view or a region within the current viewport.
Render a View
The default rendering procedure is to render all objects in the current view of a drawing. While the rendering process is faster when you render an area of a view, rendering the entire view lets you see how all objects are oriented.
If your drawing contains named or camera views, you can quickly restore a view with the View Controls in the upper-left corner of the current viewport or the VIEW command.
The following example shows a rendering of a named view.

Depending on the rendering destination you’ve chosen, the view is rendered directly in the viewport or to the Render window.
Render a Region
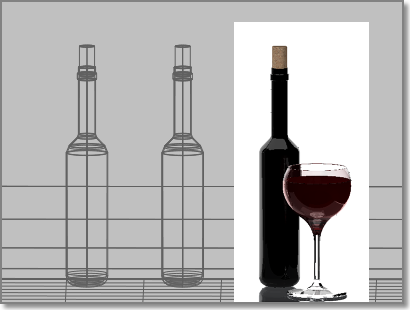
Sometimes you need to render only a portion of what is displayed in a viewport, but you still want to see some of the surrounding environment. By using the Render Region tool, you can specify a rectangular area in the current viewport to be rendered. Any objects that appear in the area are rendered. Everything outside the region is ignored by the renderer.
In the following example, only the region surrounding the third bottle and the wine glass is rendered.