- Click

 .
Find
- In the Customize tab, Customizations In
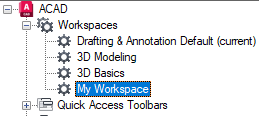
<file name> pane, expand Workspaces, and select the workspace containing the palette that you want to modify.

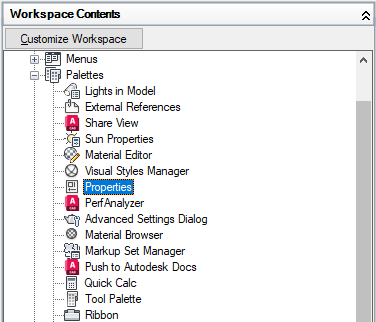
- In the Workspace Contents pane, click the plus sign (+) next to Palettes to expand it.
- Select the palette that you want to modify.

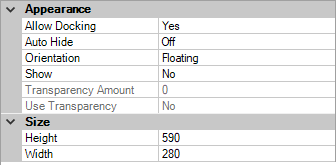
- In the Properties pane, do any or all of the following:
- In the Show box, select an option (No, Yes, or Do Not Change).
- In the Orientation box, select an option (Floating, Top, Bottom, Left, or Right).
- In the Allow Docking box, select an option (No, Yes, or Do Not Change).
Note: To specify that a window should be anchored, set Orientation to Left, Right, Top, or Bottom, and set Auto Hide to On.
- In the Auto Hide box, select an option (On, Off, or Do Not Change).
- In the Use Transparency box, select an option (No, Yes, or Do Not Change).
- In the Transparency Amount box, enter a number (if applicable).
- In the Default Group box, select a tool palette group (Tool Palettes window only).
- In the Height box, enter a number. A value of 0 is equivalent to Do Not Change.
- In the Width box, enter a number. A value of 0 is equivalent to Do Not Change.

- Click Apply.