Edit a PLC module to add I/O descriptions.
You can add description text to a PLC module using the Edit Component tool. You can change the descriptions at any time. However, edit each split PLC piece separately.
Add description text
- Click


 . Find
- Respond to the prompts as follows:
Select component/cable/location box to EDIT:
Select anywhere on the top portion of the PLC module
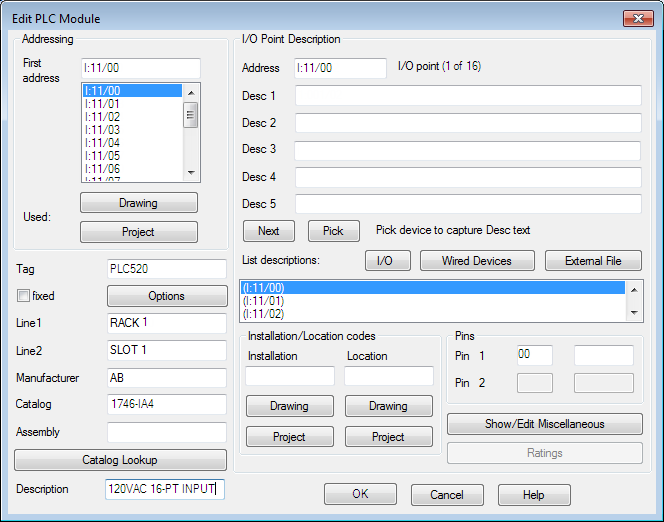
The Edit PLC Module dialog box displays.

This dialog box provides spaces for you to enter description text for each I/O point. Assume that the descriptions already assigned to the connected limit switches are like what you want to use for the PLC I/O point descriptions.
- In the Edit PLC Module dialog box, click Wired Devices.
AutoCAD Electrical toolset follows the connected wire for each I/O point backwards. If it finds a connected component, the component description text is retrieved. Each description displays in a dialog box list.
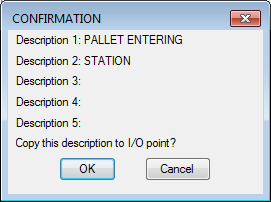
- For the first I/O address (I:11/00), select the first description (PALLET ENTERING STATION) in the extracted device list.
The Confirmation dialog box displays.

- Make sure that the correct description is specified and click OK.
- Click Next to highlight I/O address 1:11/01 in the Addressing list.
The corresponding device description highlights automatically.

- Select the highlighted description, PALLET INSIDE STATION, and click OK.
- Repeat this process for the remaining I/O point.
Note: Alternately you can use Pick to capture existing description text from a connected device. To do so, in the Edit PLC Module dialog box, click Pick, and then select the component whose text you want to copy. AutoCAD Electrical toolset reads the existing DESC text values on the component and transfers a copy to the DESC boxes in the Edit PLC Module dialog box.
- In the Edit PLC Module dialog box, click OK.
Your descriptions appear on the module.
 Note: If your PLC description is not where you want it, use the Scoot tool to scoot the description to a new location.