Create your own dynamic block with different table and chair configurations.
With visibility states you can create a block with any number of different configurations. In this example you'll create a block that can represent either a round table with 4 chairs, or a rectangular table with 8 chairs.
Create a Block
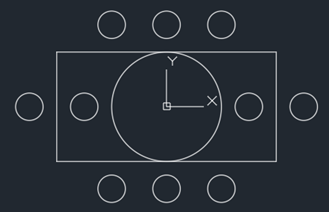
- On a blank drawing, draw the geometry to represent the round table and 4 chairs. The chairs don't have to be fancy, they can be simple circles. Place the center of the circle at 0,0.

- Draw the geometry for the rectangular table with its center also at 0,0. Copy the chairs so you have 8 around the rectangular table. It's ok if some of the geometry is used in both configurations, such as a couple of the chairs.
- Click . Find
- Name your block and select all the geometry and click OK.

Add Visibility States to Make it Dynamic
- Back in the drawing, double-click the block and select OK on the Edit Block Definition dialog. This opens the Block Editor environment and the Block Editor ribbon tab.
- If the Block Authoring Palette is not open, click
.
Find
Now you are ready to define the dynamic part of this block. For this example, you'll define 2 visibility states. A visibility state defines what geometry is visible when that state is selected. Don't worry, it will become more clear when you try it at the end.
- On the authoring palette, click
.

- Place the parameter control near the geometry. This parameter is what you select to change states after this block is inserted on a drawing. The location is not critical.
- Click . Find
- On the Visibility States dialog, you'll create two states, one for the round table and another for the rectangular table.
- Click Rename and enter Round to rename the default state.
- Click New, enter Rectangle, and click OK on the New Visibility State dialog to create the second state.

- Click OK to exit the Visibility States dialog.
This creates the two states but you still need to define which objects to turn off in each state. There is now a drop-down list on the ribbon that includes the two visibility states you created.
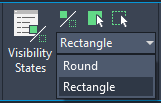
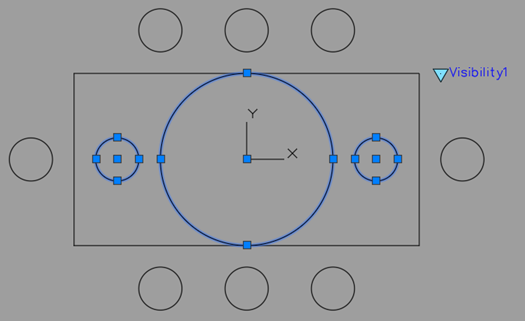
- Select Round from the drop-down list.
- Select all of the objects that are not part of the round table configuration.
- Click Find
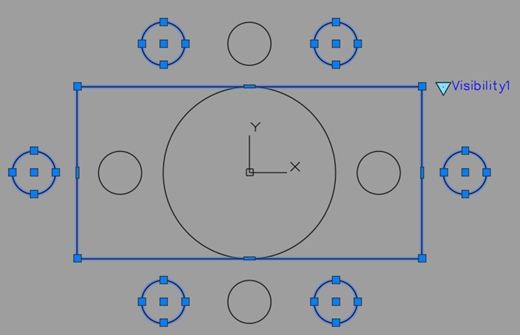
- Select Rectangle from the drop-down list.
- Select all of the objects that are not part of the rectangular table configuration.
- Click . Find
The block is now ready to use, but let's test it first.
Test and Save the Block
- Click . Find
- Select the block and click the parameter control that you placed near the block.
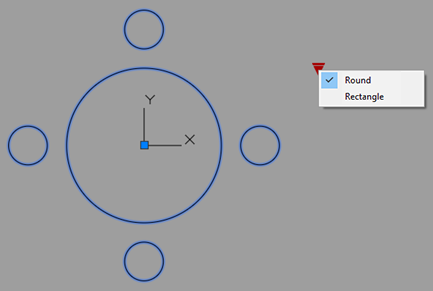
- Select a state to see the block configuration.
- Repeat to test each configuration.
- Click .
- Click .
- Save the changes when prompted.
You can now try your block on the drawing. Don't forget to select the block first to see the dynamic block parameter control. Use the WBLOCK command to save your block to a folder and use it on any drawing.