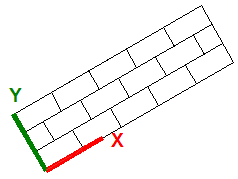
By default, hatch patterns are aligned with the origin point of the user coordinate system. However, sometimes you need to move the origin point of the hatch object. For example, if you create a brick pattern, you can start with a complete brick in the lower-left corner of the hatched area by specifying a new origin point.
- Click
.

- In the Hatch and Gradient dialog, Type and Pattern panel, click Pattern from the Hatch Type drop-down list.
- On the Pattern panel, click a hatch pattern.
- On the Hatch Origin panel, select Specified Origin, and specify a point in the drawing.
Tip: For example, if you create a brick pattern, you can start with a complete brick in the lower-left corner of the hatched area by specifying a new origin point.

- Specify a hatch angle, edit the hatch properties.
Tip: In some cases, it might be easier to move or rotate the UCS (user coordinate system) to align with existing objects before you create the hatch object.

- Specify a point inside each area that you want to hatch.
- Press OK to apply the hatch and exit the command.
Note: The hatch origin and its behavior depend on settings in the user interface that control the HPORIGIN, HPORIGINMODE, HPINHERIT system variables. Alternatively, you can control hatch patterns by changing the location and orientation of the user coordinate system.