Project Explorer
Project Explorer offers a simplified approach to understanding Civil 3D design and helps users to review, validate, report, export and edit drawing data.

Civil 3D drawings are often accompanied by a daunting amount of project data. As a result, managing this volume of project files and reports can be exceptionally difficult.
In this month’s Have You Tried article, we’ll take a closer look at the Project Explorer feature in Civil 3D. Project Explorer is a fairly new feature so now is a great time to learn how you can use it to streamline your workflow.
For a detailed look at Project Explorer, be sure to visit the Civil3D Project Explorer online help.
Each month, we profile a useful feature or workflow in Civil 3D. We look across what's new, what's been around for a while, and identify features that could improve your experience with Civil 3D while making you and your team more productive.
Have a feature you want to see covered? Tell us about it in the comments.
What is it?
Project Explorer is an all-in-one hub for managing Civil 3D project files and data. This extension offers a simplified approach to understanding Civil 3D design and helps users to review, validate, report, export and edit drawing data.
Using Project Explorer you can develop a better understanding of a design, and can more efficiently control the distribution of geometric information to project stakeholders.
Why use it?
At its core, Project Explorer functions as a central hub for managing and easily accessing project data. Here are a few of the ways you can leverage Project Explorer to streamline project workflows.
- Project Explorer allows users to simplify access and navigation to important project data
- Simplify project data navigation, review, and design model editing.
- More easily discover and evaluate design criteria warnings to help meet design standards.
- Efficiently generate custom reports and tables that help meet delivery requirements.

Where do I find it?
After installing, the Project Explorer window is found under the Add-in tab of the Civil 3D ribbon. You can also access the product Project Explorer by typing “ProjectExplorer” at the Command Prompt.
Visit the Project Explorer learning path to learn how you can use Project Explorer inside of Civil 3D to streamline your design process.
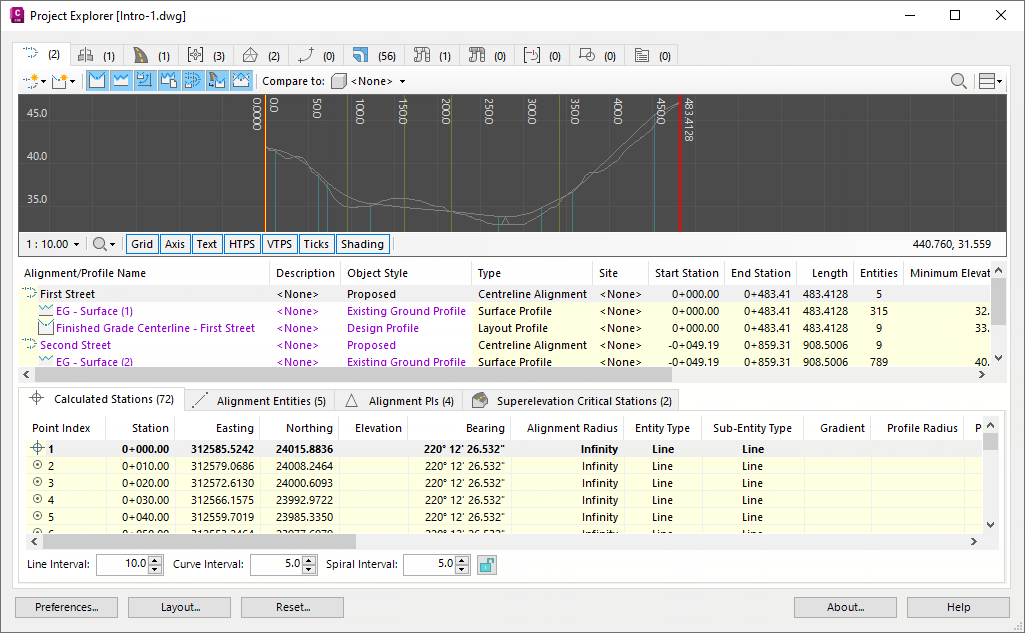
Working in the Project Explorer Window
The Project Explorer window displays live geometric project data used in the Civil 3D model. When project data is modified or added to the model, the content displayed in the Project Explorer window will automatically update. To offer greater control over how project data displays in the window, you can customize the window.
The Project Explorer window displays live geometric project data used in the Civil 3D model. When project data is modified or added to the model, the content displayed in the Project Explorer window will automatically update. By selecting an element in the Project Explorer window and pressing the CTRL button, you can highlight the element in the AutoCAD viewport. To offer greater control over how project data displays in the window, a template based approach is used to customize the window.
Using dynamic profile and section views in Project Explorer can help to review the design more efficiently. Additionally, support for multiple object editing can help to streamline the process of making multiple design changes in Civil3D.
Create Reports and Spreadsheets
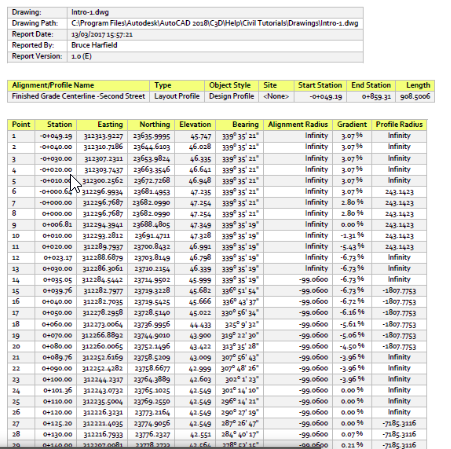
Using Project Explorer, you can quickly generate tables, reports, and spreadsheets from project data. The workflow is fully template driven using Layout Styles, Table Styles, and Report Styles.
You can use the Quick Report Window to generate your reports and spreadsheets. To use the Quick Report feature, first select one or more objects from any object list pane in the Project Explorer window and select the Quick Report to File options from the right-click menu.

Create AutoCAD Drawings from Civil 3D data
Generate 2D AutoCAD drawings from Project Explorer by using the Quick Export or by generating using an Object Set for greater control over the content and scope of a drawing.
Using Object Sets
In the Project Explorer window, the Object Sets tab allows the production of multiple tables, reports, and spreadsheets to be automated. Using Object sets can be especially useful while automating report generation from the drawing. Actions can be associated with each Object Set and can be triggered manually or dynamically.
Object Sets are typically used to automate the production of pre-configured reports, spreadsheets, AutoCAD drawings, or AutoCAD tables, and the exact combination of styles, filters, and output instructions used controls the layout and content of the generated file or table.
As an example, report generating actions can be used to create a report file using a preconfigured style and file path.
Object Sets can also be used to create dynamic AutoCAD tables which are linked back to Civil 3D design content.
Version Control
Using Project Explorer, you can easily manage all report or spreadsheet file generation events from the current drawing. In the Version Control window, each file is assigned a version and a revision number that can be written to the file or reviewed using Project Explorer.
To review the history of all spreadsheets and reports generated from the current drawing, click the view history button from the main Object Sets toolbar within Project Explorer.
For each file event, the following information is listed:
- Output file name.
- The name of the user who generated the file.
- The date and time when the file was generated.
- The version number and revision number assigned to the file. The way in which version and revision numbers are incremented is controlled from the Project Explorer Preferences Window.
- The size of the file in its latest form, if the file still exists at the listed path.
- The output path for the generated file.
- The Object Set (if any) from which the output file was generated. If the file was generated using the Quick Report option instead of an Object Set, this will be indicated in this column.