In this exercise, you will import survey data from an existing field book file that contains linework codes that can be interpreted by a linework code set.
The field book file that you will import contains the linework codes that you examined in the Setting Up a Linework Code Set exercise.
Set up the project
- Open Survey-2A.dwg, which is located in the tutorials drawings folder.
This drawing is empty, but has point and figure styles that are appropriate for this exercise.
- Click tab
 panel
panel  Find.
Find.
Create a survey database
- In the Import Survey Data wizard, on the Specify Database page, under Survey Databases, select Survey 1.
If you need to create a survey database, you can click Create New Survey Database.
- Click Edit Survey Database Settings.
You use the Survey Database Settings dialog box to define the parameters of the survey database. Notice that the settings match those you specified in the Adjusting and Verifying Settings exercise.
- Click OK.
- Click Next.
Specify the file to import
- On the Specify Data Source page, under Data Source Type, select Field Book File.
- Under Source File, click
 .
. - In the Field Book Filename dialog box, navigate to the tutorial folder.
- Select Survey-1.fbk. Click Open.
- Click Next.
Create a survey network
- On the Specify Network page, click Create New Network.
- In the New Network dialog box, for Name, enter Survey Network 1.
- Click OK.
- Click Next.
Specify import options
- On the Import Options page, specify the following parameters:
- Current Equipment Database: Sample
- Current Equipment: Sample
- Show Interactive Graphics: Yes (Selected)
- Current Figure Prefix Database: Sample
- Process Linework During Import: Yes (Selected)
- Current Linework Code Set: Sample
- Process Linework Sequence: By Import Order
- Assign Offset To Point Identifiers: Yes (Selected)
- Point Identifier Offset: 10000
- Insert Network Object: Yes (Selected)
- Insert Figure Objects: Yes (Selected)
- Insert Survey Points: Yes (Selected)
Accept the remaining default values.
- Click Finish.
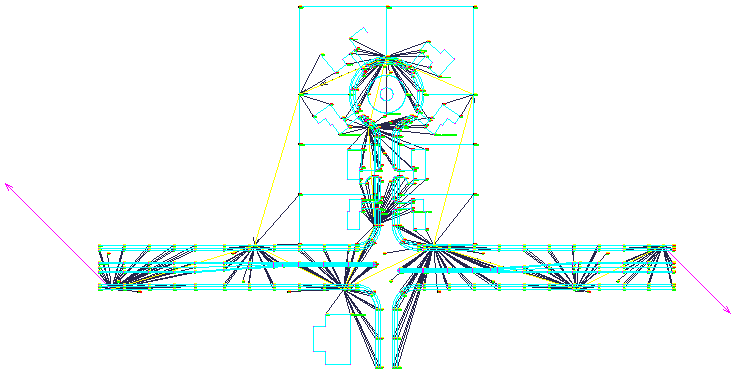
The survey data is imported, and the drawing looks like this:

- Click

 Save As.
 - Navigate to the My Civil 3D Tutorial Data folder. For File Name, enter Survey-2B.dwg. Click Save.
To continue this tutorial, go to Exercise 2: Updating Imported Survey Data.