In this exercise, you will use the ToolspaceSurvey tab to create survey data.
The Survey tab provides centralized access to survey data, settings, and various panorama vista editors, which can be used to create, edit, and manage survey data.
Create a new survey database
- Open Survey-4A.dwg, which is located in the tutorials drawings folder.
- In Toolspace, on the Survey tab, right-click Survey Databases. Click New Local Survey Database.
- In the New Local Survey Database dialog box, for the name, enter Survey 2. Click OK.
- In Toolspace, on the Survey tab, right-click the database Survey 2. Click Edit Survey Database Settings.
- In the Survey Database Settings dialog box, under Measurement Type Defaults, specify the following parameters:
- Angle Type: Angle
- Distance Type: Horizontal
- Vertical Type: None
- Target Type: None
- Click OK.
Create a survey network
- In Toolspace, on the Survey tab, expand the Survey 2 database. Right-click the Networks collection. Click New.
- In the Network dialog box, for Name, enter Survey Network 2.
- Click OK.
Create a control point
- On the Survey tab, expand Survey Network 2. Right-click the Control Points collection. Click New.
- In the New Control Point dialog box, specify the following parameters:
- Number: 1
- Easting: 1000.0000
- Northing: 1000.0000
- Description: STA 1
- Click OK.
Create a direction
- On the Survey tab, under Survey Network 2, right-click the Directions collection. Click New.
- In the New Direction dialog box, specify the following parameters:
- From Point: 1
- To Point: 4
- Direction: 45.0000
- Direction Type: Azimuth
- Click OK.
Create setups and observations
- On the Survey tab, under Survey Network 2, right-click the Setups collection. Click New.
- In the New Setup dialog box, specify the following parameters:
- Station Point: 1
- Backsight Point: 4
- Press Tab to move to the next field.
A dialog box is displayed indicating that point 4 is not defined.
- Click No, and then click OK to create the setup.
- On the Survey tab, under Survey Network 2, select the Setups collection. In the list view, right-click the setup Station: 1, Backsight: 4. Click Edit Observations.
- In the Observations Editor, right-click in the grid. Click New.
- For the new observation, specify the following parameters:
- Point Number: 2
- Angle: 90.0000
- Distance: 100.00
- Description: STA 2
- Click
 to save the new observation.
 - On the Survey tab, under Survey Network 2, right-click the Setups collection. Click New.
- In the New Setup dialog box, specify the following parameters:
- Station Point: 2
- Backsight Point: 1
- Click OK.
- On the Survey tab, under Survey Network 2, expand the Setups collection. Right-click the setup Station: 2, Backsight: 1. Click Edit Observations.
- In the Observations Editor, right click in the grid. Click New.
- For the new observation, specify the following parameters:
- Point Number: 3
- Angle: 90.0000
- Distance: 100.00
- Description: STA 3
- Click
 to save the new observation.
 - Follow steps 9 through 15 to create another setup with an observation.
Information for the new setup:
- Station Point: 3
- Backsight Point: 2
Information for the new observation:
- Point Number: 4
- Angle: 90.0000
- Distance: 100.00
- Description: STA 4
- Follow steps 9 through 15 to create another setup with an observation.
Information for the new setup:
- Station Point: 4
- Backsight Point: 3
Information for the new observation:
- Point Number: 1
- Angle: 90.0000
- Distance: 100.00
- On the Survey tab, right-click Survey Network 2. Click Insert Into Drawing.
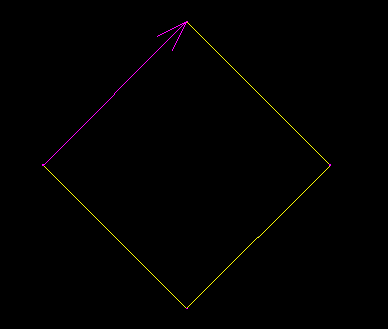
The new survey data is displayed in the drawing.
Click to see what the network should look like.

To continue this tutorial, go to Exercise 2: Creating Survey Data Using the Traverse Editor.