To import LandXML drawing data
- Click

 Find.
Find.
- In the Import LandXML dialog box, click Browse and navigate to the LandXML (*.xml) file you want to import. Click Open.
- In the Import LandXML dialog box, select sites for the alignments and parcels.
- Click Edit LandXML Settings to display the Import tab of the LandXML Settings dialog box.
- Specify the import settings and click OK to return to the Import LandXML dialog box.
- The data tree displays each of the major data collections in the LandXML file. Use the data tree to:
- Navigate a data collection and view its subcomponents.
- Expand the collections. Select or clear the check boxes to filter the data types that you want to import into the drawing. By default, all data components are selected for import.
Note: The check boxes have a tri-state display. If only some objects are selected under a collection, the check box is shaded . If all the items are selected, the check box is selected
 . If all the items below the collection are cleared, the check box for the collection is cleared
 .
.
- Click
OK to import the LandXML file or click
Browse to select another LandXML file.
After you click OK, the data is imported into the drawing. The data components are added to the drawing’s applicable data collections in the Prospector tree.
Note: Some information about the import operation may be reported in the Event Viewer Vista dialog box.
To create and apply property set definitions when importing LandXML surface data
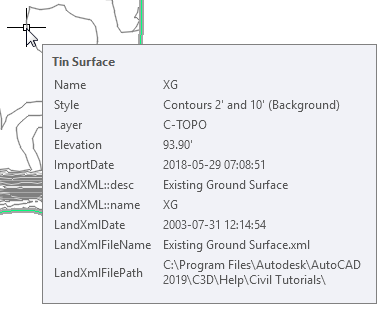
You can specify whether property set definitions are created and applied when surface data is imported from a LandXML file. For more information, see Import Tab (LandXML Settings Dialog Box).
You can view this property set data in the AutoCAD Properties Palette and in tooltips.

- Configure the LandXML import settings so that property set data is created.
- Import a LandXML file that contains one or more surfaces.
- Click
Manage tab
 Property Set Data panel
  Define Property Sets
Find.
- In the Style Manager dialog box, expand the drawing name
 Documentation Objects
  Property Set Definitions collection.
The following property set definitions may be created, depending on the import settings and file content:
- Imported LandXML File
- LandXML Attributes [AeccDbFeatureLine]
- LandXML Attributes [AeccDbSurfaceTin]
- LandXML Attributes [AcDb3dPolyline]
- LandXML Features [AeccDbFeatureLine]
- LandXML Features [AeccDbSurfaceTin]
- LandXML Features [AcDb3dPolyline]