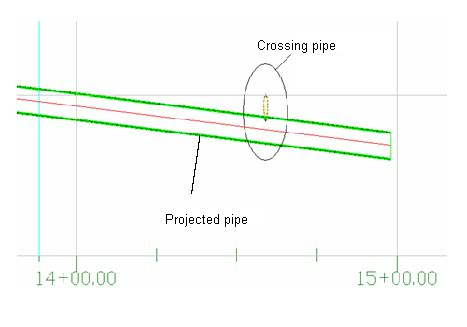
Pipes that cross or intersect a profile view or section view are displayed as pipe crossings.
Pipes that cross or intersect a profile view can be displayed as projected, or as pipe crossings. Pipes that cross or intersect a section view are always displayed as pipe crossings.
When a pipe is displayed as projected in a profile view, it is drawn as straight linework from pipe beginning to pipe end. It is important to understand, however, that when a pipe is displayed in a profile view, depending on the combination of horizontal and vertical geometry, the pipe will have some vertical deflections, even when the pipe is actually straight with no change in grade along its length. This is especially true for curved pipe. This is how Autodesk Civil 3D displays pipe in profile views.
When plotting a cross section of a pipe network in Autodesk Civil 3D, the location of an intersected pipe is displayed at the correct elevation, but the same pipe displayed in a profile view may not show the same elevation at that location due to the behavior described above.
The following illustration shows a pipe crossing and a projected pipe in a section view.
