What's New: 2024
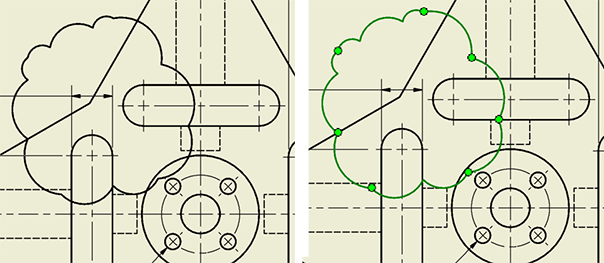
Revision clouds identify areas of a drawing that have been changed, may need special attention, or are in the act of being changed. An inverted revision cloud is typically used to show a change is in progress.

- Revision clouds have their own annotation object definition. Use the Styles Editor to modify the layer, color, line type, and thickness.
- Revision clouds respond to dimension masking and do not obscure dimension text.
- Revision clouds can be exported to DXF, DWG, and 2D PDF formats.
- Revision clouds associated to views are copied with the views, not separately.
- Revision clouds do not participate in drawing templates.
Add a revision cloud
- On the
Annotation ribbon
 Revision panel, click
Revision Cloud

- In the sheet do one of the following:
- Click in sheet space, not on a view. The cloud is associated with the sheet and can be copied and pasted elsewhere.
- Click the view the revision cloud is to be associated with.
- Click point locations to define the cloud boundary. A preview displays while you add points.
Note: Inferences and constraints are ON during revision cloud creation. As with other sketches, hold down Ctrl to pause inferring.
- To complete cloud creation, right-click and select Create or double-click the last point. The revision cloud displays in the canvas and as a browser node. In the browser, nested below the revision cloud node, is the sketch node that contains the polygon definition for the revision cloud.
Ways to edit a revision cloud
There are two ways to access the following tools, the revision cloud browser node context menu and the object (in the canvas) browser node. The edit commands are:
-
Copy. Only available when the revision cloud is not associated with a view. When associated with a view, the revision cloud copies and pastes with the view.
- Delete. Completely removes the revision cloud from the canvas and browser.
- Add Vertex. Click the location on the polygon where you want the vertex added, then click-drag the vertex to refine the position.
- Delete Vertex. Click the vertex to remove.
- Invert. Reverses the cloud arcs. Often used to describe a change that is incomplete.
- Edit Sketch. Places you in the sketch environment with the revision cloud polygonal definition and cloud preview. Perform normal sketch actions as needed.
Note: You can also use Edit on the revision cloud sketch node.
Interactively, in the canvas:
- Move the cloud. Pause the cursor over a cloud arc so the move cursor displays, click-drag to relocate the revision cloud.
Note: Movement may be limited due to constraints applied at cloud creation. Clouds, when unconstrained, can be moved anywhere on or off the sheet.
- Move a vertex. Click-drag any vertex to change its location. Constraints may limit the degrees of freedom. To remove constraints, edit the sketch and delete the constraints. Vertices can be moved anywhere, on or off the sheet.
- Merge vertices. Click-drag a vertex over another vertex (target) and drop it. The vertices are merged at the target vertex.
Note: This functionality is not available in the sketch.
- Double-click to edit sketch.
Revision cloud notifications


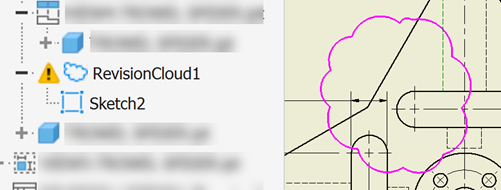
Like other drawing annotations, if the revision cloud is not closed or is improperly defined, it turns to a magenta color in the canvas and the browser node displays a caution triangle. This signifies that you need to take action to resolve an issue with the sketch content. You can:
- Right-click the revision cloud browser node or cloud line in the canvas and click Recover to activate the Design Doctor and begin assessing what is wrong.
- Expand the revision cloud browser node and edit the revision cloud sketch.
- Double-click the revision cloud to edit the sketch.