You can arrange part, surface, and assembly features in a pattern to represent hole patterns or textures, slots, notches, or other symmetrical arrangements.
About Pattern Features
In a multibody part, you can pattern a body as multiple bodies. You can create both linear and a non-linear pattern of a solid body. In an assembly, patterns are useful when creating weldment preparation and machining features.
Features you select for a pattern do not have to be geometrically identical or connected. The secondary features (corners, fillets, chamfers, delete face, chamfer of surface edges, or fillet of surface edge) are patterned only if their parent features are selected.
You can arrange features in rows and columns by a specific count and spacing, and suppress individual features. One or both directions can be a path (open or closed loop) constructed of lines, arcs, splines, or trimmed ellipses.
If possible, constraints and iMates are retained if they are included in the pattern. Some constraints do not survive and must be reapplied.
All occurrences of a feature in a pattern are one feature, but individual occurrences are listed under the pattern feature icon in the browser. All occurrences of a new body in a pattern are individual bodies. In the browser, the bodies are listed under the pattern feature icon . You can suppress or restore all occurrences, or individual occurrences.
Features You Can Select for Patterns
- Solid bodies or part features (for example extrusion, fillet)
- Work features (for example, work planes, work axis, work points)
- Surface features (for example, sweep surface, stitch, boundary patch)
- An entire solid (for example, the solid body that is the result of all solid features)
- In an assembly, only sketched assembly features can be patterned, including their dependent fillets and chamfers. Weld features cannot be patterned. Components and assembly features cannot be patterned together.
- In a sheet metal part, single flange or contour flange features that were created using multiedge select cannot be patterned.
- Features that affect multiple bodies or the entire part can be patterned.
- Fillets created using all fillets or all rounds and shell features cannot be patterned.
- Features based on the results of an intersect operation cannot be patterned.
- Features selected for a pattern do not have to be geometrically identical or connected. To pattern secondary features (corners, fillets, chamfers, delete face, chamfer of surface edges, or fillet of surface edge) the parent features must be selected as part of the patterned features.
Work and Surface Features in Patterns
Pattern work features to aid in construction of a part for skeletal modeling, or to define a pattern layout for an assembly component pattern. Pattern surface features to create multiple construction surfaces to use as termination surfaces. Pattern symmetric surface sets for use in a Stitch or Sculpt feature to form a solid.
Workflows for using patterned work and surface features:
-
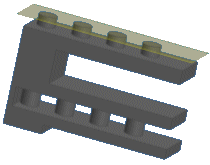
A part with work features and solid features patterned in a similar way
You want to create multiple work axes that are each offset from the axis of a pattern of holes. Workflow: You model single occurrences of the hole and the offset axis, and then pattern the hole and the axis in a single step. Then you use the work axis to create specific assembly constraints.
-
A part with multiple occurrences of a work feature along the sketched path
Create a pattern of work points along the path. Workflow: Model a part including a sketch path and a work point on the path. Then you use the rectangular pattern along the path to create multiple occurrences of the work point. In the assembly environment, you constrain the component relative to the original work point. Then you use the assembly Associative Pattern to pattern the component.
-
Symmetric part with multiple surface features
Create a create a mirror of multiple construction surfaces to form a solid part. Workflow: Model half of the part using construction surfaces (Extrude, Loft, Fillet, and so on) on one side of the mirror plane. Then you use the Mirror feature to mirror the construction surfaces about the mirror plane. You can then select the surfaces for use with the Stitch or Sculpt feature to form a solid.
To set the mirror plane, you can select a work plane, or a planar face of a surface or construction surface.
- You can select work and surface features when creating Rectangular, Circular, and Mirror Patterns.
- All patterned work and surface features have a node in the browser with a unique name, and can be selected individually.
- Work features are primary pattern features, which means they can be patterned even if the dependent features are not included in the pattern.
- Surface features are primary pattern features, except for three secondary pattern features: fillet of a surface edge, chamfer of surface edges, and delete face (surface or solid face). Secondary features can only be patterned if the features on which they depend are also included in the pattern.
- Patterned features can be of uniform or variable length. If length is uniform, the pattern calculates faster. If length is variable, each feature calculates separately.
Solid Body Patterns
To pattern a solid body with features which cannot be patterned individually, use Pattern a Solid with the Join option. Pattern a part body and all associated features as a single solid. To create a pattern composed of multiple solid bodies, use Pattern a Solid with the Create new bodies option.
Tips for creating a pattern of an entire solid body
- You can use the Pattern a solid option when creating Rectangular, Circular, and Mirror Patterns.
- The patterned solid bodies using the Join option consist of the body generated by all solid features created before patterning. Reordering a feature concerning the pattern changes the patterned body. For example, if a fillet was added after the pattern, reordering it before the pattern includes the fillet in the patterned body.
- A pattern of the entire solid can also include work features and surface features.
- For Mirror only, when you mirror the entire body, use Remove Original to get the part containing the mirrored occurrence, but not the original solid.
- A pattern created with the Create new bodies option consists of solid bodies that you can edit as individual bodies.
Suppressed Feature in Pattern
To allow a pattern to flow around another feature or irregular shape, or when creating a missing-tooth pattern, suppress occurrences of a feature in the pattern. You cannot suppress the original base feature in the pattern, or individual features within a patterned occurrence. You can also suppress and restore visibility, and on patterned surface features, you can change opacity.
Calculation of Patterns
You can choose one of the three calculation methods:
- Optimized
- Identical
- Adjust

Patterns That Calculate Faster
Large patterns, such as hole arrays or louvers, sometimes take a long time to calculate.
 |
Adjust Patterns that terminate on the model face take longer to calculate if occurrences are different in size. Occurrences display in their true proportions. |
 |
Identical You can speed up pattern calculations by specifying that all features in the pattern have identical termination. Intersection with a face determines the size of each feature, but they all display as identical. |
Orientation of Individual Features
Rectangular patterns and patterns arranged along an irregular linear path have three options for positioning features. Experiment with the options to determine the most useful orientation.
For best results, position the first feature on the start point of the path. Features offset from the start point have exaggerated rotation.
Nested Patterns of Work and Surface Features
You can pattern work and surface feature occurrences of another pattern individually. You can create a nested pattern that includes all work or surface feature occurrences of the original pattern.
For a nested pattern, you can select either all work or surface feature occurrences, or the pattern itself. A nested pattern contains all occurrences of the original pattern, even if the occurrence count changes.
Assembly work features cannot be included in patterns.
About the Mirror Feature
You can mirror part, sheet metal, surface, and assembly features to create and maintain complex symmetrical features quickly.
In an assembly, you can mirror only sketched features. In a multibody part, select the solid body to attach the mirror feature to.
Any work plane or planar face can serve as the plane of symmetry to mirror selected features. You can mirror solid features, work features, surface features, or the entire solid. A mirror of the entire solid allows mirroring of complex features such as shells or swept surfaces included in the solid.
Features can also be mirrored when a model body is in an open or surface state.
When mirroring assembly features, participants (components affected by the feature) are automatically chosen based on the original bounding box of the feature mirror. In some cases, this technique results in the automatic selection of more participants than necessary to complete the mirror feature. Removing unnecessary participants can improve feature performance.Tips for Creating Mirror Features
- Shell features and features created using the Intersect option in the Extrude dialog box cannot be mirrored individually.
- Stitch features have a surface or a solid result that matches that of the original feature.
- A base surface feature includes derived surfaces and surfaces that are imported and promoted.
- When you select Mirror a solid, you can join the mirror feature to an existing body, or select New solid to create a body.
- If possible, constraints and iMates are retained, if they are included in the pattern. Some constraints cannot survive and must be reapplied.
- In sheet metal parts, mirroring flanges or contour flanges created using multiedge select is not supported. You can mirror single-edge flanges or contour flanges.
- Only sketched assembly features can be mirrored.
- Assembly work features cannot be mirrored.
- In a part or sheet metal part, use Remove Original to remove the original solid and keep only the mirrored solid. You can use this option to model a left-hand and a right-hand version of a part.