Start by creating a map file and adding the city boundaries of Redding to it.
To create a map and add a source file
- Before you begin this tutorial, see Getting Ready to Use the Tutorials.
- Create a map file.
- Click

 NewDrawing.
- Select the map2d.dwt template.
- Click Open.
- Click
- Set the coordinate system for the map.
- Click Map SetupCoordinate SystemAssign.
- Change the Category to USA, California.
- Right-click Current Drawing and click Coordinate System.
- Click CA-I.
- Click Assign.
- Click Map Setup
- Add the city boundaries to your map by dragging and dropping a source file to Display Manager.
- Use File Explorer to navigate to the folder where you copied the sample files for the Build A Map tutorial.
- Resize the AutoCAD Map 3D toolset window and your sample data folder window so you can see both of them at the same time.
- Drag and drop the
City_Boundary.sdf file onto the Display Manager, just above the Map Base layer.
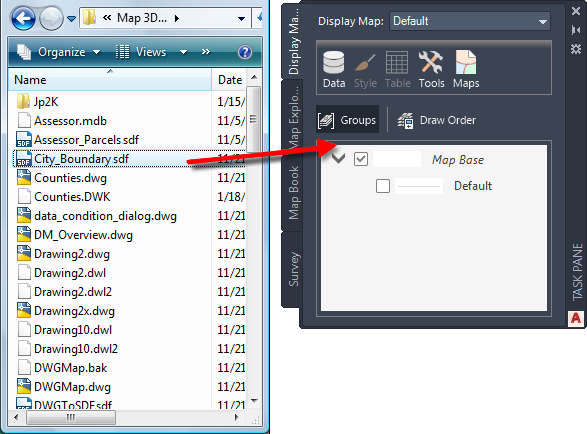
The Redding city boundaries appear in your map.
- Click
Save AsDrawing. In your tutorials folder, name the file
build_map1.dwg and click Save.
To continue this tutorial, go to Exercise 2: Attach a drawing file.