Tutorial 3 - Packaging our pyramid module as a pip package
In this tutorial we create a pip package from the code of the pyramid tutorial.
The information provided here is similar to the information provided in the official Packaging Python Projects documentation.
Before we start be sure you have completed the steps of the first tutorial and the second tutorial.
if you have re-started 3ds Max after completing Tutorial 1 and 2, you will have to re-import importlib and pyramid for to complete some of the steps in this tutorial.
To make a package for pip, we will put package meta-data and the setup script at the top level (under /pyramid), and package contents at the lower level (under /pyramid/pyramid).
Create an init file
First, create an __init__.py file in pyramid/pyramid.
This file should contain:
name = "pyramid"Create LICENSE and README.md files
Our pyramid/license file can contain something like this:
Copyright (c) 2021 Autodesk, all rights reserved.And our pyramid/README.md can contain something like this:
# Pyramid
End to end example for constructing a python component for 3ds Max.

- uses PySide2 & NumPy
- adds a small dialog to 3ds Max
Create a setup.py file
Create a new pyramid/setup.py file with the following contents:
import setuptools

with open("README.md", "r") as fh:
    long_description = fh.read()

setuptools.setup(
    name="pyramid",
    version="0.0.1",
    author="Autodesk Dude",
    author_email="some.dude@autodesk.com",
    description="A sample 3ds Max Python Package",
    long_description=long_description,
    long_description_content_type="text/markdown",
    url="https://git.autodesk.com/windish/maxpythontutorials",
    packages=setuptools.find_packages(),
    classifiers=[
        "Programming Language :: Python :: 3",
        "LICENSE :: OTHER/PROPRIETARY LICENSE",
        "Operating System :: Microsoft :: Windows"
    ],
    python_requires='>=3.7'
)
At this point we should have a directory structure that looks like this:
pyramid
|  README.md
|  LICENCE
|  setup.py
|
+--pyramid
|  |  __init__.py
|  |  graphics.py
|  |  ui.py
Installing from a file location for development (editable install)
We may or may not want to make our 3ds Max extension public. For this example we will keep it private. In this scenario we will not upload our extension to the PyPI repository, but we can still use the convenience of pip to install our package.
Open a command prompt in the directory containing the top level pyramid directory (the top level directory for the project). Assuming that pyramid is in a subdirectory of the current working directory, we can run:
[path_to_3dsmax_Python]\python.exe -m pip install --user -e ./pyramidIf successful, you should see output similar to:
PS C:\Users\avisd\Documents\pyramid> & 'C:\Program Files\Autodesk\3ds Max 2023\Python\python.exe' -m pip install --user -e .\pyramid\
Obtaining file:///C:/Users/username/Documents/pyramid/pyramid
Installing collected packages: pyramid
  Running setup.py develop for pyramid
Successfully installed pyramid
This will install pyramid in such a way that it can be still edited locally but imported (and reloaded) without having to edit the system path (as we did in tutorial 1).
import sys
sys.path.append("d:\\sources\\hacking\\python\\pyramid")
We can now make an edit to our project and use importlib.reload() to reload it.
So for example, we could change a line in ui.py from:
self.setWindowTitle('Pyside2 Qt Window')to:
self.setWindowTitle('Pyramid')And then, in the 3ds Max Listener:
importlib.reload(pyramid.ui)
# or alternately
# import(pyramid.ui)
And then:
dialog = pyramid.ui.PyMaxDialog()
dialog.show()
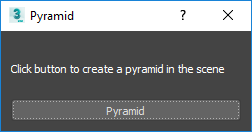
We should now see our renamed version:

Installing from a file location (not editable)
Assuming that pyramid is in a subdirectory of the current working directory, we can run:
[path_to_3dsmax_Python]\python.exe -m pip install --user ./pyramidThe package installed this way will not be editable, meaning if we modify the working version, the installed version will not be affected unless it is re-installed.
Other installations
Pip is normally intended for network base installation from PyPI. This scenario is detailed in the official python documentation.