Depending on the editor from which you set these options, you may see a subset or all of the following attributes:
- Type
-
Click the arrow to choose a light type from the drop-down list. When you change a light’s type, only those attributes common to both types retain their previous values or settings. Values and settings for non-common attributes are lost. When you change a light’s light type, the light’s position is also preserved.
- Color
-
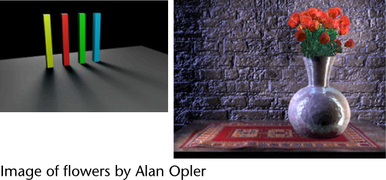
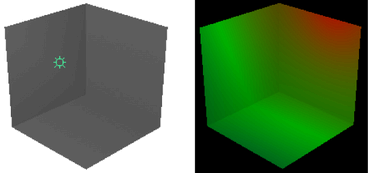
Set the color of the light. Click the swatch either to change the light’s color in the Color Chooser or to map a texture to the light. If you map a texture, the light projects it (depending on the light Type). The default setting is white. The following shows the rendered result when you map a Ramp texture to an Ambient light’s Color attribute.

- Intensity
-
Represents the brightness of the light. A light with an Intensity value of 0 produces no light. A light with a negative Intensity value removes light from a scene in the area of the light’s influence. The slider range is 0 to 10, but you can type in a larger value for a brighter light (for example, 20). The default value is 1.
Tip:Use a negative Intensity value to reduce or remove hot-spots or glare.
Intensity for area lights is based on the intensity per area units, not for the light as a whole.
- Illuminates by Default
-
If on, the light illuminates all objects and is included in the defaultLightSet. If off, the light only illuminates objects to which it is linked. Illuminates by Default is on by default.
- Emit Diffuse and Emit Specular
-
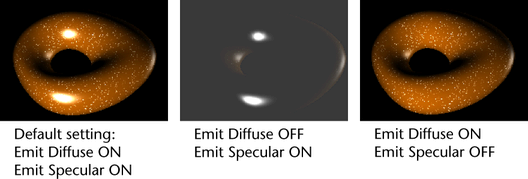
Emit Diffuse and Emit Specular are on by default. Turning them off turns off the diffuse or specular shading results for the light.
Note:The results do not show in the scene view. To see the results, test render in Render View.

To enable or disable the diffuse and specular shading for multiple lights at the same time, use the Rendering Flags window (Windows > Rendering Editors > Rendering Flags).
- Decay Rate
-
Controls how quickly the light’s intensity decreases with distance. The Decay Rate setting has no effect at distances less than 1 unit. The default setting is No Decay.
For more information on light decay, see Light decay.
Tip:The Decay Rate also controls how fog brightness decreases with distance from the light source.
In the Attribute Editor, click the arrow to display the drop-down list and select a Decay Rate. In the options window, type a value or use the slider.
No Decay
no decay; light reaches everything
Linear
light intensity decreases directly (linearly) with distance (slower than real world light)
Quadratic
light intensity decreases proportionally with the square of distance (the same as real world light)
Cubic
light intensity decreases proportionally with the cube of distance (faster than real world light)
- Normalize
-
When this option is enabled, the Intensity attribute represents the total light emitted, regardless of the size of the light.
When this option is disabled, the Intensity attribute represents the intensity of the light per surface unit. As the size of the light increases, the light intensity also increases.
You can therefore control the total light intensity and the light surface area separately. For example, you can adjust your shadows by changing the size of the light while the total light emitted remains unaffected. This option is enabled by default.
Note:Compatibility with older scenes
This option is automatically enabled for area lights upon referencing, importing, or opening a legacy scene that was created in Maya 2019.2 or earlier.
Therefore, you may see a difference in the viewport representation of your scene or in your final render if you are rendering using the Maya software renderer or the Maya Hardware 2.0 renderer.
To revert to the behavior in previous versions, disable this option.
Because the Arnold for Maya renderer always normalizes Maya area lights when rendering, you will not see a difference in your render result between Maya versions when rendering with Arnold.
- Shadows
-
For information about shadows, see Shadow attributes.
- Interactive placement
-
When you create a new area light, you can turn on interactive placement so that you're automatically looking through the light after you create it. You can then Alt + drag (or Option + drag on Mac OS X) to tumble the light and point it as you like. For information about interactive placement, see Interactively place a spot, area or directional light upon creation.