
You can store groups within each other to create sub-groups. This can be useful when you want to organize less important scene elements or actions within another heading.
To create a group:
- Select a group in the Scene browser.
- Drag it on top of a second group.
- Select Move to Group from the context menu.
The first group becomes a sub-group of the second.
You can also copy a group to another folder by selecting Duplicate to this Group from the context menu. This leaves the group where it is and adds it to another group at the same time.
To remove a sub-group:
- Select a sub-group in the Scene browser.
- Drag the sub-group on top of the Groups root folder.
The sub-group then displays under the root folder as a regular group again.

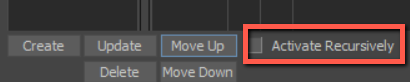
When nesting groups within another group, use the
Activate Recursively option in the
Groups window to set whether or not sub-groups contained within the parent group are affected by the Show/Pick/Trs state of the parent group. For example:
- When Activate Recursively is on, checking or unchecking the parent group makes subgroups reflect the parent group Show/Pick/Trs state.
- When Activate Recursively is off, checking a parent group, preserves the Show/Pick/Trs state the parent was using before the parent was checked. For example, when you uncheck the parent, all children are unchecked and if you check the parent, the children use the state they had before.
The Activate Recursively option