You can assign a character's travelling nodes (also known as a ghost nodes) to a Story clip. After assigning the travelling nodes to a clip, you can select where to display the node manipulator.
For more information about travelling nodes or ghost nodes, see Work with ghosts in Story.
Assign travelling nodes to a Story clip
- In the Story window, select the clip.
- In the Properties pane, expand Ghosts.
- Select
Travelling Node(s), then click this icon,
 , to browse to the node(s) you want to assign to the clip.
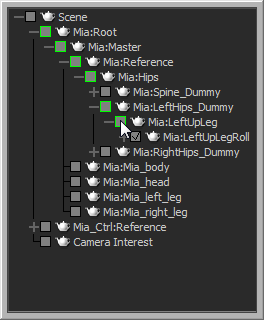
- In the window that opens, expand the hierarchy and then select the nodes you want to use, such as a dummy node.
The selected travelling nodes are now assigned to Story clip and display by way of the manipulator in the Viewer.
Set the location of the travelling node's manipulator display
- In the Properties pane, select
Tr. Node Function.
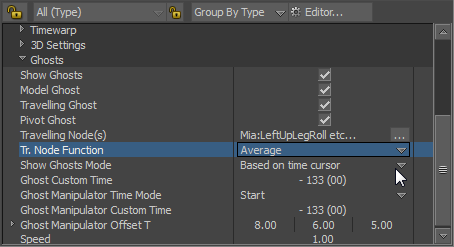
- Select one of the following options:
- Average to position the ghost manipulator at an averaged distance within the selected traveling node hierarchy.
- Project on XY Plane to position the ghost manipulator along the X and Y axis of the Viewer window grid.