This example shows how to generate two NC program files, one with two roughing toolpaths, and another with the two finishing toolpaths.
- From the
NC Programs context menu, select
Create NC Program.
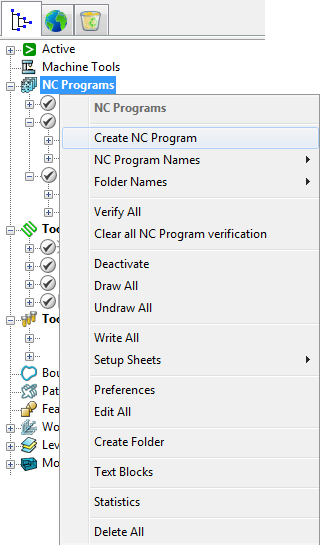
This displays the NC Program dialog.
- In the Name field, enter Cavity_Roughing.
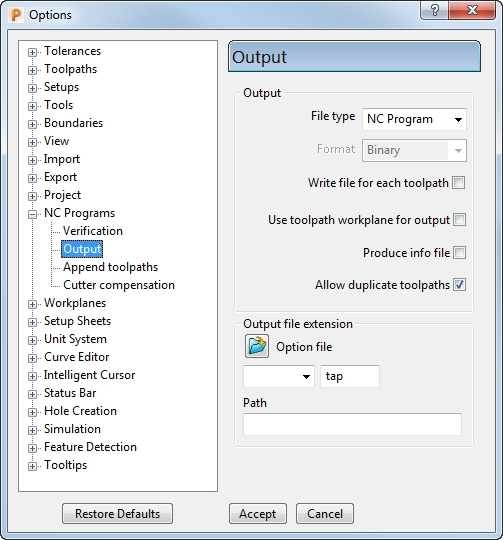
- In the
NC Program dialog, click the
Options
 button. The
Options dialog is displayed.
button. The
Options dialog is displayed.
- On the
Output tab:
- If selected, deselect the Write File for Each Toolpath option. As a result, the Output File is displayed at the top of the NC Program dialog instead of the Root Name.
- Select Option File as heid400.
- Enter Output File Extension as tap.
- Click Accept to update and close the Options dialog.
- Click the Accept button at the bottom of the NC Program dialog to create a new roughing NC program.
- From the individual NC Program, Cavity_Roughing, context menu, and select Edit > Copy NC Program.
- A new entity is added to the
NC Programs list with the default name of
Cavity_Roughing_1. Right-click it and
Rename it as
Cavity_Finishing.
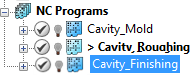
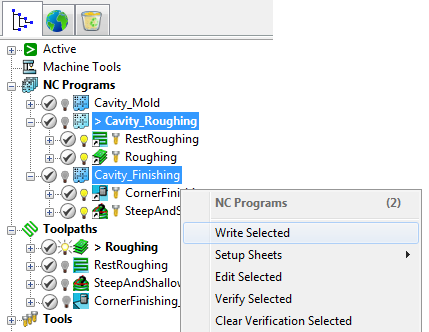
To identify which NC program is currently active, expand the NC Programs node in the Explorer; the active program is shown in bold and preceded by the > symbol.
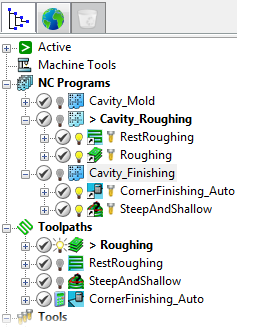
- In the Explorer, move the two roughing toolpaths under
Cavity_Roughing, and the two finishing toolpaths under
Cavity_Finishing.
- Select the
Cavity_Roughing and
Cavity_Finishing NC programs. Right-click and select
Write Selected.
- PowerMill postprocesses the NC programs using the specified parameters, and displays a confirmation window showing where the programs are saved.
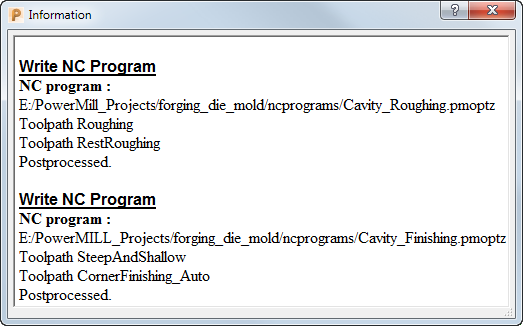
Two NC programs are written: Cavity_Roughing.tap containing both roughing toolpaths, and Cavity_Finishing.tap containing both finishing toolpaths.
- Click
 to close the
Information window.
to close the
Information window.
- To save project changes, click .