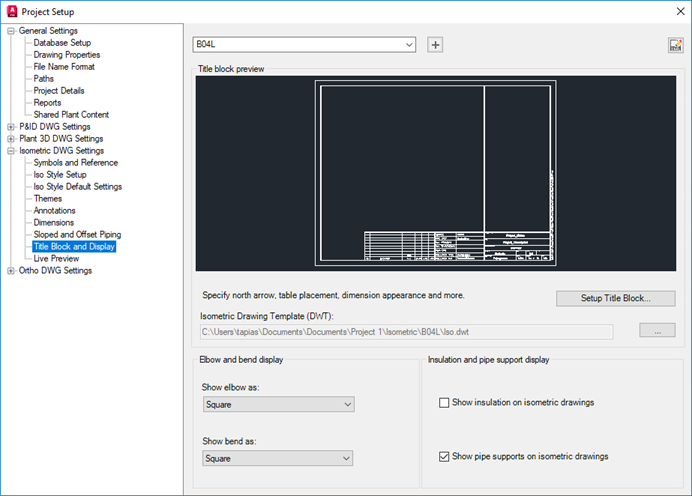
- In the Project Setup tree view, expand Isometric DWG Settings. Click Title Block and Display.

- On the Title Block Display pane, next to Iso Style, select a style from the drop-down list.
- Under Title Block Preview, click Set Up Title Block.
- On the ribbon, Themes panel, click Iso Themes
 .
.

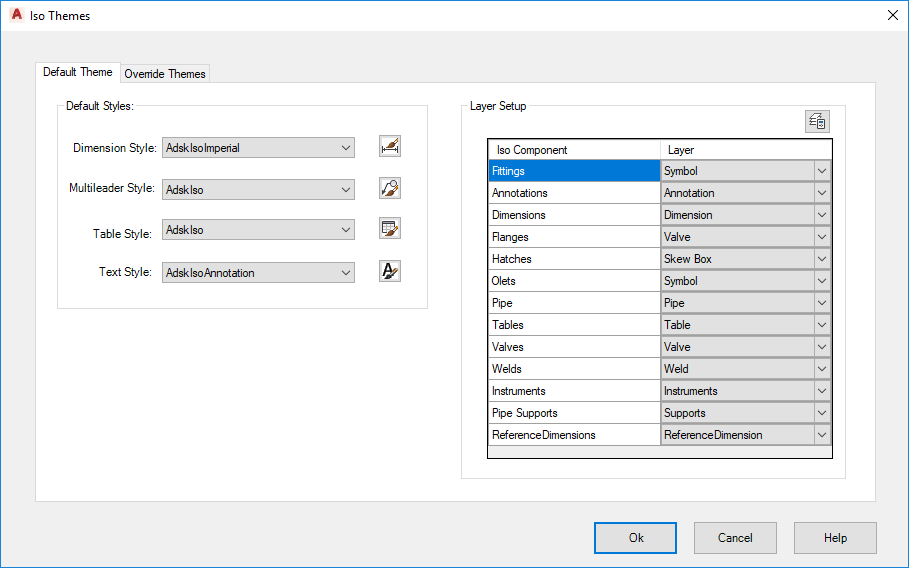
- In the Iso Themes dialog box, Default tab, do the following:
- Next to Dimension Style, select a style from the drop-down list. You can also click the AutoCAD Dimension Style button to create new styles, set the current style, modify styles and so on. See "Dimension Style Manager" in the AutoCAD Help system.
- Next to Multileader Style, select a style from the drop-down list. You can also click the AutoCAD Multileader Style button to create new styles, set the current style, modify styles and so on. See "Multileader Style Manager" in the AutoCAD Help system.
- Next to Table Style, select a style from the drop-down list. You can also click the AutoCAD Table Style button to create new styles, set the current style, modify styles and so on. See "Table Style Dialog Box" in the AutoCAD Help system.
- Next to Text Style, select a style from the drop-down list. You can also click the AutoCAD Text Style button to create new styles, set the current style, modify styles and so on. See "Text Style Dialog Box" in the AutoCAD Help system.
- Under Appearance, click the On or Off radio buttons for Annotations and Dimensions. Enter a value for Symbol Scale.
- Under Layer Setup, select a layer from the Layer drop down list for each iso component. You can also click the AutoCAD Layers Properties Manager button to create a new layer that becomes available for selection in the drop-down lists. See "Change Layer Settings and Layer Properties" in the AutoCAD Help system. Click OK.
- Make further changes to the title block as needed using the contextual ribbon commands.
- When finished, on the ribbon, Close panel, click Return to Project Setup.