To route bends as pulled pipe
- On the ribbon, click Home tab
 Project panel Project Manager Project Setup.
- In the Project Setup dialog box tree view, expand 3D Piping DWG Settings. Click Pipe Bend Settings.
- Select Treat Bends as Pipe.
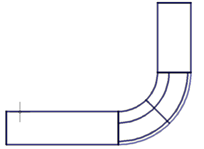
To create a pulled pipe bend
 On the ribbon, click Home tab Part Insertion panel Toggle Pipe Bends to enable pipe bends.
- In the drawing area, begin routing pipe.
- Specify a point to create a straight pipe segment.
Continue routing and create one or more turns.

- Press ENTER to end routing. The pulled pipe bend is created.
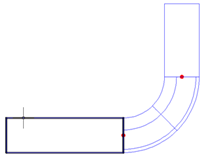
- Click to select the pipe bend.
The pipe bend is selected (as a group).
To convert pulled pipe to pipes and bends
If you have created pulled pipe and want to convert to separate pipe and bends:
- In the drawing, right-click the pulled pipe. The context menu displays.
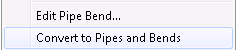
- Click Convert to Pipes and Bends. The bend is converted to separate pipe and bends.
To convert pipes and bends to pulled pipe
If you have created pipe and bends and want to convert to pulled pipe:
- In the drawing, right-click the pipe bend. The context menu displays.

- Click Convert to Pulled Pipe Bend. The separate pipe and bends are converted.
Note: The turn selected must be a pipe bend. Fittings (elbows) cannot be converted to pulled pipe.
To route bends pipe and fittings
- On the ribbon, click Home tab Project panel Project Manager Project Setup.
- In the Project Setup dialog box tree view, expand 3D Piping DWG Settings. Click Pipe Bend Settings.
- Select Treat Bends as Fittings.
To set pulled pipe bend dimensions
If you want to change the geometry (3D model) of pulled pipe created when routing:
- On the ribbon, click Home tab Project panel Project Manager Project Setup.
- In the Project Setup dialog box tree view, expand 3D Piping DWG Settings. Click Pipe Bend Settings.
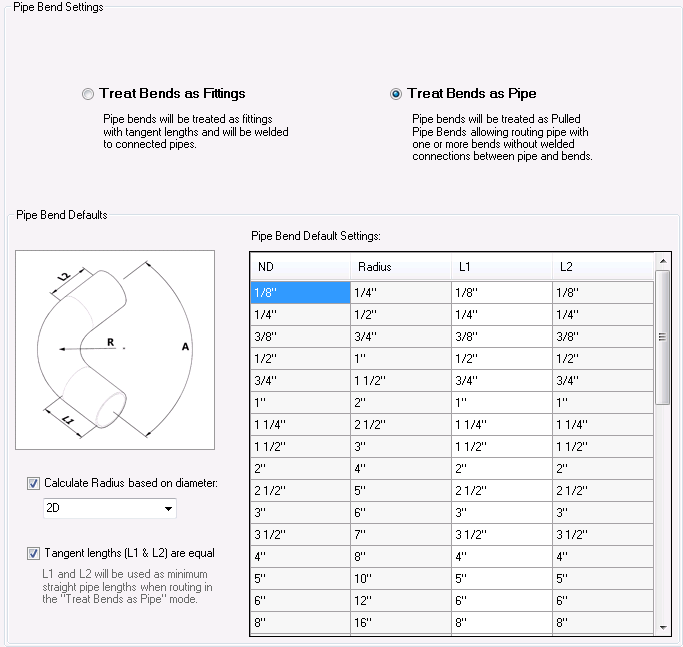
- If you want to specify the radius for each size do the following:
- Clear Calculate Radius Based on Diameter. The Radius column can now be edited.
- In the Pipe Bend Default Settings list, specify the radius for the sizes you use.
- If you want to specify the radius based on diameter for all sizes do the following:
- Select Calculate Radius Based on Diameter.
- In the drop-down list click the radius as a nominal diameter multiplier (for example: 1.5D).
- If you want to specify a different straight length before and after each bend do the following:
- Clear the Tangent Lengths are Equal box.
- In the Pipe Bend Default Settings list, specify the length for the sizes you use.