Add an Annotation to an Orthographic Drawing
- In the Project Manager, click the Orthographic DWG tab.
- In the tree view, expand the project and the Orthographic Drawings folder.
- Double-click to open an orthographic drawing.
- In the orthographic paper space, in an orthographic drawing, right-click in the viewport that contains the component you want to annotate and choose Ortho Annotate.
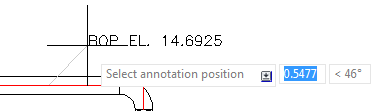
- Select the annotation you want, for example, Bottom of Pipe [BOP].

- When prompted, select a component to annotate.
- Position the cursor and click to set the annotation where you want it.
 Tip: Turning on grid snap (F9) can be helpful as you place an annotation.
Move an Annotation in an Orthographic Drawing
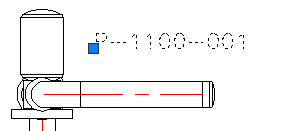
- In the orthographic paper space, in an orthographic drawing, select the annotation you want to move.
- Use the move grip to drag the annotation to any location on the drawing.
- Drag the annotation leader, if any, to an appropriate location as well.
Update an Annotation in an Orthographic Drawing
- In the orthographic paper space, in an orthographic drawing, double-click the viewport that contains the Plant object annotation you want to update.
- Click
