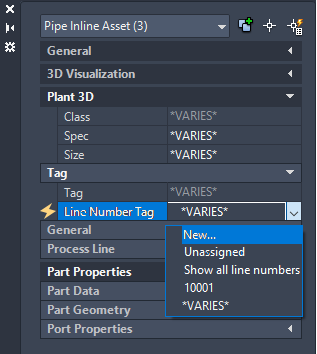
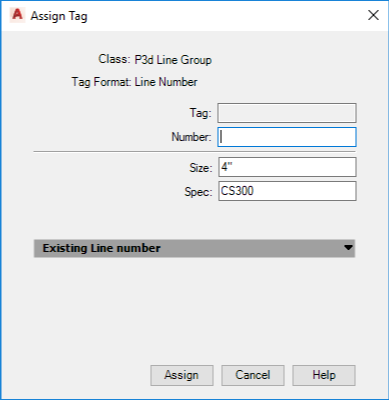
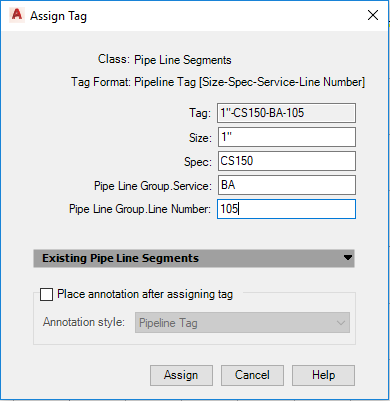
Create a new pipe line number.
To change a pipe line number
- In a Plant 3D drawing, select one or more pipe components that are connected end to end.
- Right-click in the drawing area. Click Properties.
- In the Properties palette, click Plant 3D
 Tag
Tag  Line Number Tag. Note:
The Line Number Tag list cannot be set in the Properties palette if the selected pipe is not connected.
- In the Line Number list, click New.

- In the Assign Tag dialog box, in the box labeled TargetObject.Number, enter the line number (for example: 105).

- Click Assign.
To rename a pipe line number
- In Project Setup, under Data Manager Configuration, in Order Objects in Data Manager Tree By, click Area. Note:
Exclusive project access is required to change the line number using Data Manager. Renaming a line number can modify more than one project drawing.
- On the ribbon, click Home tab > Project panel > Data Manager.
- In the Data Manager, in the drop-down list, click Current Drawing Data.
- In the tree view, expand Area. Click Pipe Lines.
- In the data view, double-click in the Tag column of the line number that you want to change.
- In the Assign Tag dialog box, in the box labeled Number, enter the line number (for example: 105).

- Click Assign.