Learn how to resolve common issues when you link a coordination model to a Revit model.
Coordination model displays unwanted lines
In Revit, the coordination model displays all lines that also display in Navisworks.
If the coordination model includes any lines that you do not want to display in Revit, hide them in Navisworks, and then reload the model in Revit.
Coordination model does not display well
If the coordination model does not display at all in Revit or if it displays in an unexpected way, use one of the following visual styles. These styles enable you to see edges of the coordination model more easily.
- Shaded
- Consistent Colors
- Realistic
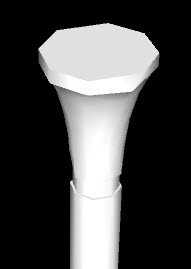
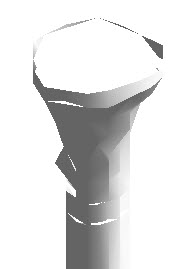
Some objects don't display correctly
| A column displayed in Navisworks | The same column displayed in Revit |
|---|---|
 |
 |
This issue may occur when the following circumstances are true:
- The objects are round or cylindrical.
- The coordination model is placed far from the internal origin of the Revit model.
To resolve the issue
- In
Navisworks, do the following:
- Open the model, and select all the geometry in the model.
- After selecting the geometry, navigate to the measure pane. The reported measurement values must be within the allowed limit in Navisworks.
- Select all and initiate the Move command.
- Apply negative transform center values to the position to adjust the values outside the allowed limit.
- Save the model to an NWD file.
- In
Revit, do the following:
- Reload the coordination model.
- Move the entire coordination model to the desired location.
For example, open the site plan view, and select all and drag the coordination model to the desired location relative to the Revit model.
Tip: Pin the coordination model in place so it is not inadvertently moved.
The objects should now display correctly.