OpenXR Preferences
Use the OpenXR tab for setting controller bindings for devices using OpenXR.
When changing the OpenXR controller bindings, VRED will need to restart the session. Click OK in the notification to restart the session and apply the new bindings.
Note that setting the controller bindings in VRED will only suggest these mappings to the active OpenXR runtime. The runtime can still decide to ignore these suggestions. In this case, you need to configure the mapping in the corresponding runtime. See Managing Controller Bindings for SteamVR.
In the Menu Bar, click Edit > Preferences, then on the left side of the dialog box, select Extended Reality > OpenXR. After making any changes, press Apply and Save to save them.
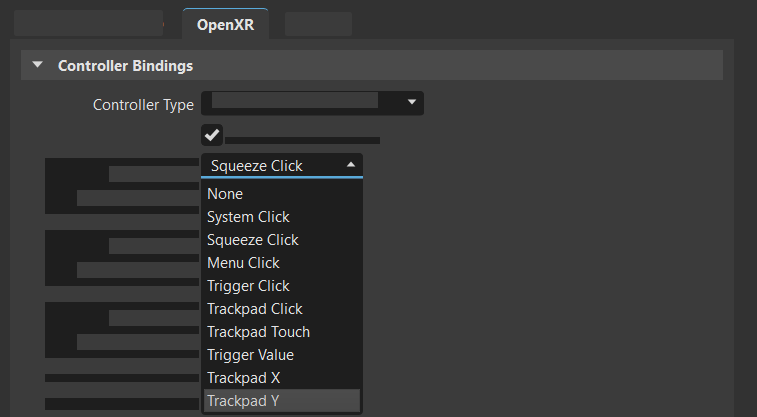
Controller Type - Set the type of controller used. Choose from: HTC Vive, HTC Vive Cosmos, HTC Vive Focus 3, Oculus Touch, Microsoft MR Motion, and HP MR.
Left = Right - Set controller mapping as the same for both left and right controllers, when enabled. When disabled, the left and right controllers can have different bindings for a controller method and action.
Now, for each action, select its controller binding from the dropdown menu next to the action. When finished, press Apply.
Place Snap - Set the controller input used for activating the snap function of the place tool.
Pointer Execute - Set the controller input used for using the pointer.
Pointer Ray Pose - Set the controller input used for positioning the pointer ray.
Pointer Show - Set the controller input used for displaying the pointer ray.
Teleport Execute - Set the controller input used for teleporting.
Teleport Ray Pose - Set the controller input used for positioning the teleport ray.
Teleport Show - Set the controller input used for displaying the teleport ray.
VR Menu Position - Set the controller input used for positioning the menu.
VR Menu Show - Set the controller input used for displaying and hiding the menu.
Set To Default - Removes any changes to the controller bindings, reverting all back to the defaults.
Add Controller - Add and set another type of controller. To remove a controller, click Remove Controller.
Configuring a Controller
To customize the configuration of your controller buttons, do the following:
In Edit > Preferences > Extended Reality > OpenXR, select your controller from the Controller Type drop-down menu.
If you want each controller to have different bindings, enable the Left = Right checkbox; otherwise, ensure it is disabled.
Open the drop-down menu next to each action and select an option.
Tip:Actions can be disabled, so they are not accessing. For instructions, see Disabling an Action. Controller buttons can also be disabled. For instructions, see Disabling a Controller Button.
When finished, press Apply and Save.
Setting Independent Controllers
It is possible to set the left and right controllers independent of one another when customizing your controller bindings.
- To do this, in Edit > Preferences > Extended Reality > OpenXR, select your controller from the Controller Type drop-down menu.
- Enable the Left = Right checkbox.
- When finished, press Apply and Save.
Resetting Controller Bindings
To reset all controller bindings to their default values, in Edit > Preferences > Extended Reality > OpenXR, with your controller selected, press Set To Default.
Adding Additional Controllers
You can add other controllers and customize their bindings.
- In Edit > Preferences > Extended Reality > OpenXR, select your controller from the Controller Type drop-down menu.
- Set the controller bindings.
- When finished, press Apply and Save.
Disabling an Action
To disable an action, so it is not accessible in a session, do the following:
- In Edit > Preferences > Extended Reality > OpenXR, select the desired action from the list.
- Open the drop-down menu next to the action and select None. Now, the action cannot be triggered during a session.
- When finished, press Apply and Save.
In the future, to make the action accessible, select a target from its drop-down, such as Menu Click or X Touch. Then, when finished, press Apply and Save.
Disabling a Controller Button
Any controller button can be disabled through the Edit > Preferences > Extended Reality > OpenXR preferences. In the controller bindings list, ensure the button is not assigned to an action. If it is, select another option from the action's drop-down menu. When finished, press Apply and Save.