Working with Cameras
In VRED, using cameras includes creating, viewing, mirroring, and editing cameras, as well as viewpoints and tracks.
For information on using cameras, see the following:
- Camera Settings section of the tutorial videos
- Working with the Track View
- Working with Fog
- Working with Perspective Matching
Loading Cameras
Have a camera from another project you'd like to reuse in your new project? Use ![]() Load Camera(s). It brings camera data into the project and the loaded data is added as new cameras or viewpoints.
Load Camera(s). It brings camera data into the project and the loaded data is added as new cameras or viewpoints.
- In the Camera Editor's Menu Bar, click File >
 Load Camera(s).
 - Navigate and locate the file with the camera.
- Double-click the file to load it into the Camera Editor.
Saving Cameras
Have a camera you want to save and use in another project? If so, use ![]() Save Selected. It writes selected data to disc, saving the camera and viewpoints. The OSB file format supports saving a camera with camera tracks and viewpoints; however, XML only supports saving the selected camera or viewpoint.
Save Selected. It writes selected data to disc, saving the camera and viewpoints. The OSB file format supports saving a camera with camera tracks and viewpoints; however, XML only supports saving the selected camera or viewpoint.
- In the Camera Editor tree, select the camera or cameras you want saved.
- Right-click and select
 Save Selected.
 - Navigate to where you want the camera or cameras saved.
- Name the file and click Save.
Loading Render Metadata
Want to load settings from a rendered image (.jpg, .png, .tiff, .exr), including its metadata, and apply it to the selected camera or viewpoint? If so, use ![]() Load Rendering Metadata.
Load Rendering Metadata.
- In the Camera Editor's Menu Bar, click File >
 Load Rendering Metadata.
 - Navigate and locate the file with the settings of the rendered image.
- Double-click the file to load it into the Camera Editor.
Creating a Camera
Video captions: Also, the Aim and Aim Up of a camera is now displayed and you can find these nodes now very easy with a right click.
Let's look at creating a camera. Once created, you might not see anything, so the next step is to make it visible. After that, you can transform and edit it. The following sections will explore each of these and more.
Since there are a few camera choices, let's select the type of camera you want to create.
In the Menu Bar, click Scene > Create Camera.
Select the type of camera you want to create.
 Camera - Creates a camera with a perspective view, which is similar to the view of human eyes. Through a perspective view, objects further away seem smaller than objects right in front. Original parallel lines appear centric to a single point a long distance off. This view is the default for file output (see Render Settings).
 Camera and Aim - Creates a separate node for the camera and the aim. Each node is selectable and can be transformed in the viewport. The aim node controls where the camera points. The aim point is the rotational pivot of the aim node. Navigation modes, such as Fly and Orientation, do not align with aim cameras and are disabled. Navigation has certain influences on the aim node. While panning, the aim moves with the camera. Dollying toward the pivot keeps the aim in position, except when the camera moves over the aim, then it moves forward with it.
 Camera, Aim and Up - Creates a separate node for the camera, aim, and up. Each node is selectable and can be transformed in the viewport. The camera calculates its orientation from the aim and up nodes. The camera points to the aim node and its top is oriented towards the up node. The up vector of the camera is determined by the pivot of the up node. Two-Axis navigation reverts to Trackball mode for an Aim and Up camera.
 Orthographic Camera - Creates a camera with an orthographic view, which is a view where all objects have the same size irrespective of distance. Each object’s actual height and width is shown and parallel lines remain parallel.Note:
To see a representation of the camera in the viewport, you will need to make it visible. See the section that follows.
Displaying a Camera
Once you've created a camera, the next step is to make it visible because once it's displayed, you can move it into position. You can show or hide all representations of cameras. When a camera node is selected in the Scenegraph, a highlighted representation appears in the viewport.
In the Menu Bar, select View and enable Show Cameras. Disable it to hide all cameras.
When a camera is not selected, it appears white.
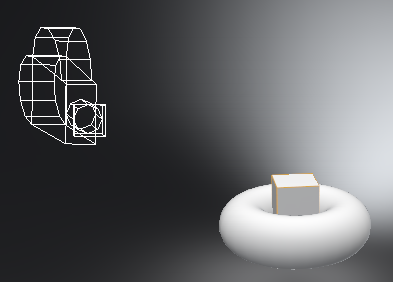
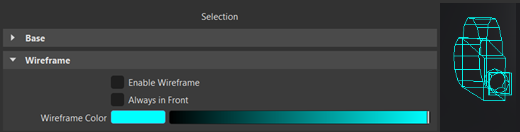
When you hover over it, it takes on the Preselection Color preference color.
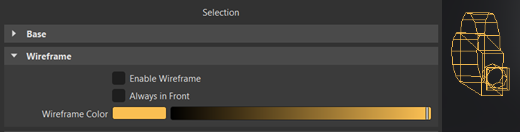
When selected, it takes on the Wireframe Color preference color.
 Note:
Note:To change either the Preselection Color or the Wireframe Color , in the Menu Bar, select Edit > Preferences > General Settings > Selection.
This option is saved in the VRED project file. When importing scenes from previous versions, it is disabled by default. Active camera representations of the current viewport are not drawn and orthographic default cameras are turned off by default. Cameras do not have bounding box representation.
Editing a Camera
There are two ways to edit a camera. To manipulate a camera with normal scene navigation, use the Transform tool. For exact placement, use the Camera Editor Viewing options.
Placing a Camera Using the Camera Editor
In the Menu Bar, click Scene > Camera Editor.
On the left side of the Camera Editor, select the camera you want to edit.
In the Viewing secton to the right, use the Translation and Rotation field.
Note:Cameras are also selectable and can be translated and rotated with the Transform tool.
Placing a Camera Using the Transform Tool
- In the toolbar, click Transform.
- In the Scenegraph (click
 ), select the camera you want to edit.
 - Shift-click and drag the Transform manipulator to position the camera.
Activating a Camera
Want to change the camera used in the viewport? Use ![]() Activate. This activates the selected camera and connects it to the viewport.
Activate. This activates the selected camera and connects it to the viewport.
- In the Camera Editor tree, select the camera you want to activate.
- Right-click and select
 Activate. The view in the viewport changes to that of the activated camera.
Renaming a Camera
Want to change the name of a camera? There are a few ways to do this:
Do one of the following:
- Select a camera in the tree, then triple-click it to make it editable.
- Select a camera in the tree, right-click and select
 Rename.
 - Use the hotkey, Ctrl + R.
Enter a new name and press Enter.
Pasting Camera Attributes
Is there a camera with attributes you'd like to use with another camera? If so, use Paste Attributes.
- In the Camera Editor, select the camera with the attributes, then right-click and select Edit > Copy.
- Select the camera where these attributes should be pasted.
- Right-click, select Edit > Paste Attributes, then select what will be pasted.
Mirroring a Camera
You can mirror any type of camera to display the same viewing angle from a different axis of the scene. Keep in mind, mirroring a camera does not affect animations or camera tracks.
In the Camera Editor, right-click the camera, then select Edit > Mirror and choose X, Y, or Z.
Updating the Viewpoint
Want the viewpoint to match the current position and orientation of the camera? Use ![]() Set To Current View.
Set To Current View.
- Position and orient your camera to set up the shot.
- Click
 Set To Current View to update the selected viewpoint with the current position and orientation.
Resetting the Viewpoint
To reset the viewpoint to what is was, click ![]() Reset View. This resets the view to its initial settings.
Reset View. This resets the view to its initial settings.
Creating a Group
Do you want to group some cameras and/or viewpoints? If so, use ![]() Create Group. It creates a node for grouping cameras, tracks, and viewpoints.
Create Group. It creates a node for grouping cameras, tracks, and viewpoints.
Do one of the following:
- In the Camera Editor Menu Bar, select Create >
 Create Group.
 - Right-click in the tree and select Create Group.
- Use the hotkey, Ctrl + G.
- In the Camera Editor Menu Bar, select Create >
Drag your cameras, tracks, and/or viewpoints onto the group node.
Selecting Camera Nodes
Want a fast way to find and select cameras in the Scenegraph? Use these Selection options.
In the Camera Editor tree, select one or more cameras (Ctrl-click).
Right-click and select one of the following:
 Select Node to select camera nodes in the Scenegraph.
 Select Aim Node to select camera aim nodes in the Scenegraph. Only available when a camera with an aim is selected.
 Select Up-Vector Node to select camera up-vector nodes in the Scenegraph. Only available when a camera with an up-vector is selected.
Tip:These options are also available in the Camera Editor Selection menu.
Opening a Second Tree
Open a second tree for searching and filtering cameras, viewpoints, and tracks. One tree is unaffected by changes in the other.
In the Camera Editor, click-drag
 to expose a second tree list.
Now, use the new tree for searches and filtering.
Drag the slider at the bottom of the tree or click its buttons to expand and collapse the tree list.
Renaming Multiple Nodes
You can rename multiple camera nodes at once, using multi-selection in the Camera Editor. Once the nodes are selected, use either Ctrl + R or Edit > Rename and edit the name to see the name changed across all selected nodes.
Using the QuickActions Bar Tools

Use these tool shortcuts to quickly create, duplicate, or delete a camera, viewpoint, track, or group, as well as toggle different camera and viewpoint attributes.
Creating a Camera, Viewpoint, Track, or Group
In the QuickActions Bar, click ![]() , then select something to create, such as a camera, camera and aim, camera, aim, and up, orthographic camera, viewpoint, track, or group.
, then select something to create, such as a camera, camera and aim, camera, aim, and up, orthographic camera, viewpoint, track, or group.
Duplicating a Camera
With a camera, viewpoint, track, or group selected, press ![]() . This creates a copy of the current selection.
. This creates a copy of the current selection.
Deleting a Camera, Viewpoint, Track, or Group
With a camera, viewpoint, track, and/or group selected, press ![]() . This deletes it from the Scenegraph.
. This deletes it from the Scenegraph.
Setting the Current View
Position and orientation your camera to set up the shot. Click ![]() to update the selected viewpoint with the current position and orientation.
to update the selected viewpoint with the current position and orientation.
Setting the Depth of Field
With a camera or viewpoint selected, press
 .
.In the Lens Attributes section, click the dropdown menu next to Depth of Field and select one of the following:
- Off to deactivate the depth of field.
- Stillframe to enable the depth of field only for stillframe rendering.
- Always to enable the depth of field for real-time and stillframe rendering.
Using Motion Blur
Motion Blur creates the streaking that appears due to the rapid movement of an object or long exposure. The shutter setting controls the strength of the effect.
Do either of the following:
- In the Lens Attributes section, check Enable Motion Blur for the selected camera or viewpoint.
- In the QuickActions Bar, press
 .
.
Toggling Color Grading
In the QuickActions Bar, press ![]() to toggle the color grading attributes for the selected camera on or off.
to toggle the color grading attributes for the selected camera on or off.
Toggling Glow
In the QuickActions Bar, press ![]() to toggle the glow attributes for the selected camera or viewpoint on or off.
to toggle the glow attributes for the selected camera or viewpoint on or off.
Toggling Glare
In the QuickActions Bar, press ![]() to toggle the glare attributes for the selected camera or viewpoint on or off.
to toggle the glare attributes for the selected camera or viewpoint on or off.
Toggling Distance Fog
In the QuickActions Bar, press ![]() to toggle the distance fog attributes for the selected camera or viewpoint on or off.
to toggle the distance fog attributes for the selected camera or viewpoint on or off.
Toggling Height Fog
In the QuickActions Bar, press ![]() to toggle the height fog attributes for the selected camera or viewpoint on or off.
to toggle the height fog attributes for the selected camera or viewpoint on or off.
Toggling Lens Flare
In the QuickActions Bar, press ![]() to toggle the lens flare attributes for the selected camera or viewpoint on or off.
to toggle the lens flare attributes for the selected camera or viewpoint on or off.