Working with Perspective Match
Camera Matching Video Captions: In VRED 2020, we are now able to match a camera against a background image, so the perspective in the backplace matches the camera in the 3D scene. Now, you don't have to guess the right perspective anymore or use external tools for that. The tool can be found in the Camera Editor in the Advanced tab. Just enable Perspective Match and align the vanishing lines accordingly, like shown in this example, using the X, Y, and Z options. The magnifier will help you find the right position. Now, you can adjust the object's position against the background without losing the right camera angle. In Perspective Match mode, you can do pan, zoom, and constrain horizontal mouse navigation around the camera pivot. The vertical navigation is automatically disabled.
How it Works
Use the Perspective Match tool to match the rendering perspective to the backplate image perspective. For this, the focal length and active camera rotation are adjusted by calculating these parameters using the vanishing lines in the image.
The matching of the perspective requires a model in the scene and an activated backplate. In the Camera Editor > Advanced tab, Perspective Match section, click Perspective Match to activate it. Lines will appear in the viewport and other control in the section are activated.
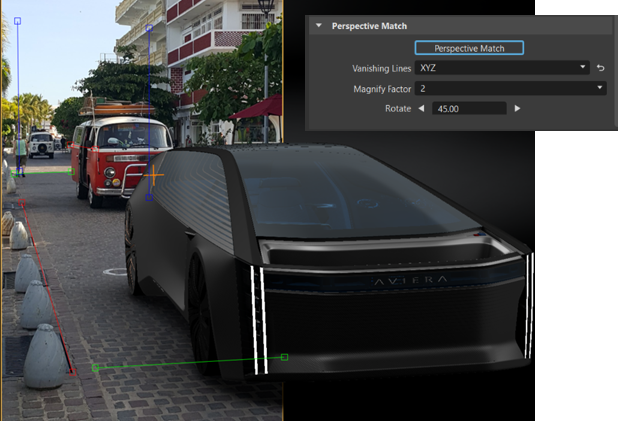
Depending on the image, different types of vanishing lines might be needed and can be selected using the Vanishing Lines option. For two vanishing points select either XY, XZ or YZ. For one or three vanishing points select XYZ.
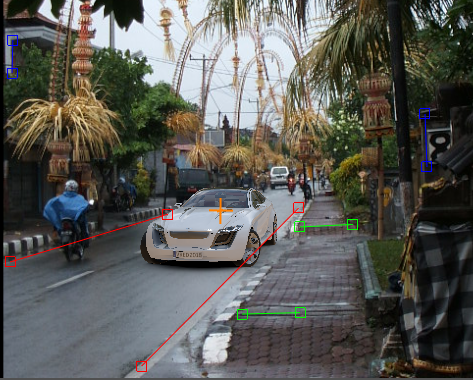
The vanishing points are selected in the viewport by placing two lines of the same color in the image. These lines correspond to vanishing lines that would be parallel in 3D. But in a 2D image, they would cross each other at some point if were long enough due to the perspective distortion. It is not needed to enlarge the lines until they really cross each other, they just need to be placed correctly and the vanishing point is calculated automatically. Every pair of lines corresponds to a world axis in VRED coded by the color, where X is red, Y is green, and Z is blue. In a scene that is set to Z-up that means the blue vanishing lines should be aligned with vertical lines in the image, and the red and green lines should be aligned with two horizontal directions that are orthogonal to each other in 3D. To place the lines, use Shift + LMB on an endpoint to drag only the endpoint or on the line to drag the whole line.
While dragging an endpoint a magnifier will appear for better precision. The factor of magnification can be changed with the Magnify Factor control.
During line placement, the camera parameters will automatically be adjusted to the current matching result. When the placing of the line is finished, it is recommended to select the object that should be rendered in the scene graph and to press F, or use the Zoom To button, which will zoom to the selected object and put it in the center of the camera. The camera translation and its distance to the object can now be changed in the viewport to place the object correctly in front of the backplate.
While Perspective Match is active, VRED restricts the camera rotation in the viewport to a horizontal rotation around the current camera pivot (displayed as an orange cross in the viewport) that does not break the perspective match. In fact, the camera is moved and rotated in a way that it looks as if the scene was rotated on the ground around the camera pivot. The same kind of rotation can be done in the Camera Editor, with the Rotate control in the perspective match section. Clicking on one of the arrow buttons will rotate the view relatively around the camera pivot without breaking the perspective match. The spin box holds the value how many degrees the view will be rotated for each click on one of the arrow buttons.
We recommend creating a new viewpoint for the final matched view, by right-clicking the camera in the Camera Editor and selecting Create > Viewpoint. All settings including the vanishing lines are stored in the viewpoint.
If the horizon in the backplate image is tilted, Perspective Match sets the angle by which the horizon is tilted, into the camera Roll parameter (to be found in the Lens Attributes section). The default Roll value is 0°. Please keep in mind, when using the same camera after the matching for different purposes, to check the Roll parameter and reset it to 0 if necessary.
Helpful Hints
Once you're ready to use Perspective Match, please check out these helpful hints:
Before using Perspective Match, position, scale, and rotate the backplate to your liking. Use the Sceneplate Editor for this.
Choose either a Vertical or Horizontal Field-of-View Mode (FOV mode) option in the Camera Editor.
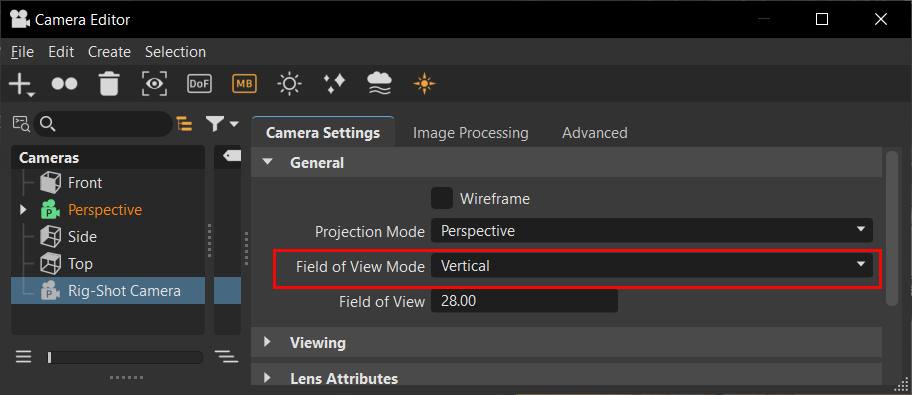
The default Field-of-View Mode is Vertical, which scales the backplate to fit vertically into the current viewport. In Horizontal FOV mode, the backplate is scaled to fit horizontally into the current viewport.
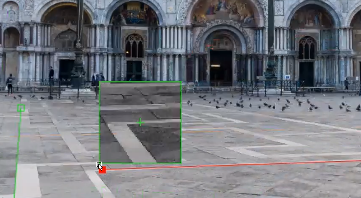
If your image has vanishing lines in it, rely on these when placing the Perspective Match manipulators. In this example, since the tile work has distinct lines along the X and Y axis, select the XY Vanishing Line option.
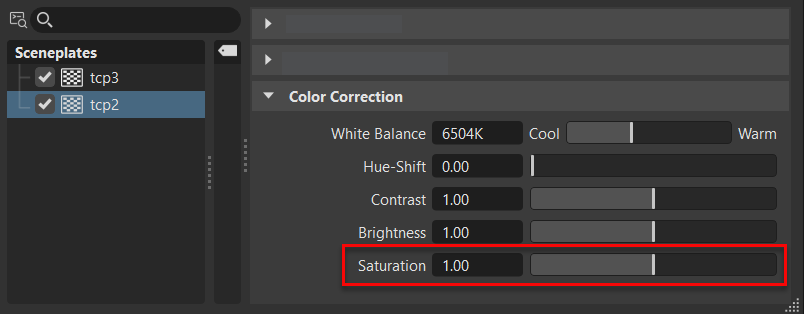
If the colored vanishing lines are hard to see against the backplate, try reducing the saturation of the backplate. In the Sceneplate Editor, select the backplate. Scroll down to the Color Correction settings and change the saturation, while doing the matching.
If you want to see a semi-transparent overlay of your backplate over your model, try reducing the transparency of a duplicate frontplate. In the Sceneplate Editor, select the backplate. Press
 (the Duplicate icon). In the Properties section, change the Type to Frontplate, then increase Transparency.
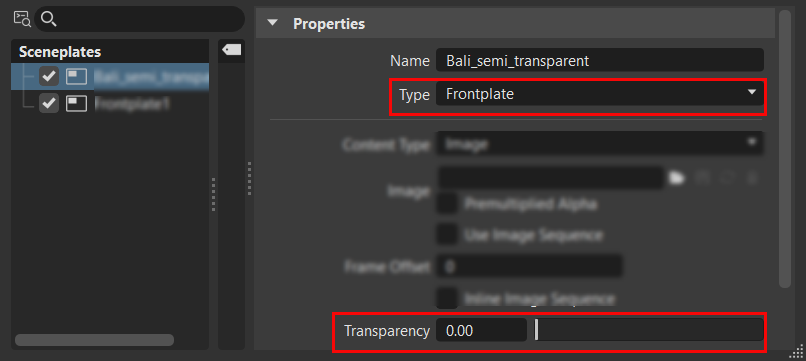
For reference information on Perspective Matching, see Perspective Match.
Correctly Placing Vanishing Lines
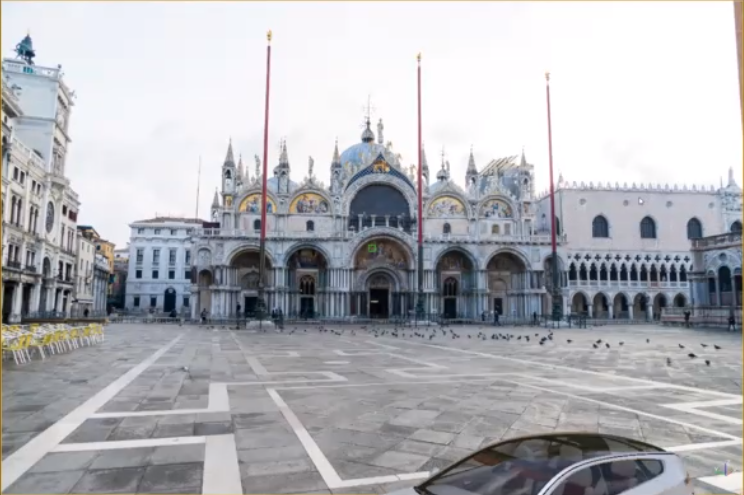
This example image shows how to correctly place vanishing lines in a scene.
How to Use Perspective Match
While Perspective Match is active, VRED restricts camera rotation in the viewport, horizontally, around the current camera pivot (displayed as an orange cross in the viewport).
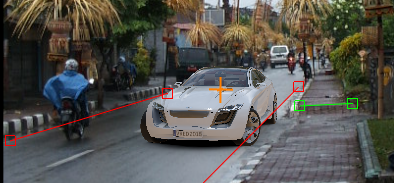
This ensures the perspective match isn't broken by camera navigation in the viewport. In fact, the camera is moved and rotated so it appears as if the scene is rotating on the ground, around the camera pivot. You can also achieve this in the Camera Editor, using the Perspective Match Rotate option. See Rotate (above) for additional information.
We recommend creating a new viewpoint for the final matched view. In the Camera Editor, right-click the camera and select Create > Viewpoint. All settings, including the vanishing lines, are stored in the viewpoint.
In the Menu Bar, select Scene > Sceneplate Editor, then right-click within the editor, select Create Backplate, locate a backplate (could be a .jpg), and click Open to load the backplate.
Note:Position, rotate, and scale the backplate as needed before using the Perspective Match tool.
In the Camera Editor, select the Advanced tab, scroll to the bottom of the parameters, then open the Perspective Match section.
Tap the Perspective Match button to enable the tool.
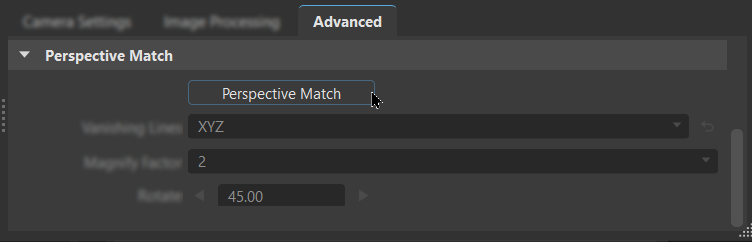
Choose an option from the Vanishing Lines option to set the vanishing lines in your image. By default, the coordinate space is Z-up.
Position the X manipulators along a line in the X-axis, then the Y along the Y-axis. See Position Vanishing Lines Using the Magnifier for how to use Magnify Factor to precisely position manipulator handles.
Now, you can pan with your camera to position your object, move it forwards and backwards.
Use Rotate to rotate the object. Set the number of degrees, then use the arrows to rotate clockwise or counter-clockwise.
Troubleshooting
In this section, find solutions for common issues when using Perspective Match.
My Backplate Image is Tilted
If the horizon in the backplate image is tilted, Perspective Match sets the tilted angle into the camera Roll parameter, found in the Lens Attributes section.
The default Roll value is 0°. Please keep in mind, when using the same camera for different purposes after the matching, check the Roll parameter and reset it to 0, if necessary.
In the Camera Editor, in the Camera Settings tab, open the Lens Attributes section.
Tap-drag to scroll wheel to correct the tilt and see your changes in the viewport.
Note:The default Roll value is 0°. Please keep in mind, when using the same camera after the matching for different purposes, check the Roll parameter. If it was changed, reset it to 0.
Want to make a street or car look more dynamic? Try one of the following:
Tilt the camera while taking the photo to create the final look in the image. Import the image into VRED, and do the Perspective Match (if you have the necessary vanishing lines).
Your photo was taken with a camera held straight, but you want the image tilted to create a dynamic look. Import the image into VRED, then rotate and scale the backplate in the Sceneplate Editor. Now, use Perspective Match. You also get a Roll angle.
Position Vanishing Lines Using the Magnifier
Shift-click a vanishing line to position it.
Shift-click the handle of a vanishing line to access the Magnifier. This provides a magnified view of the area around the handle to aid with placement.
Change the Magnify Factor option if you need more magnification.
Tip:Set a large value to see the area better and precisely place the handle.

My Model is Off Screen
While placing the vanishing lines, the camera parameters automatically adjusted to the current matching result. This repositioned your model off the screen. How do you get your model back? Follow these steps:
- Finish placing of the vanishing lines.
- From the Scenegraph, select the model to be rendered and press Shift + F or use the Zoom To button. This zooms into the selected model and puts it in the center of the camera.
- Now, change the camera translation and distance to the model in the viewport to place the model correctly infront of the backplate.
Python Commands for Perspective Match
These are the functions and types for Perspective Match:
- vrCameraTypes.PasteOption.PastePerspectiveMatchAttributes (Python data, in vrCameraTypes)
- vrdPerspectiveMatch (Python class, in vrdPerspectiveMatch)
- vrCameraTypes
- vrdCameraBaseNode
- vrdCameraNode