Adding Files to Scenes
Files can be opened and added, as well as imported into VRED.
Find the Open option in the toolbar, as well as in the File menu and these two other handy options for opening files:
- Open Examples - Opens the
examplesfolder with sample projects showing how to set up simple constraints, Python scripts, tracking, touch sensors, VR hands, and more. - Open Recent - Provides a list of recently opened projects. Select one to open it. Use the Clear option at the bottom of the list to clear the list of all entries.
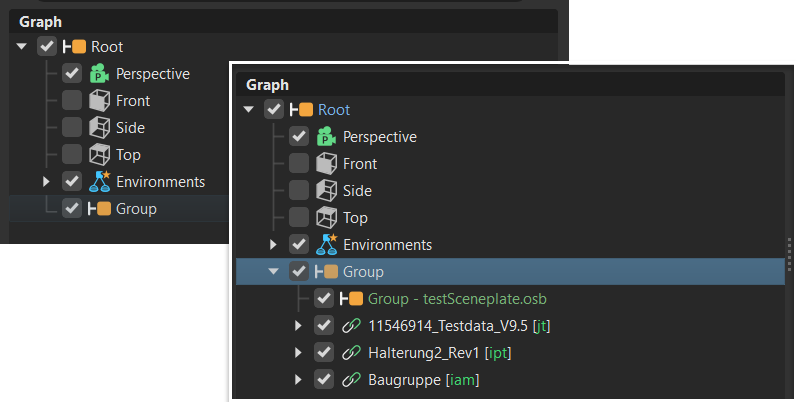
Import native CAD files assembled in the Alias Reference Manager into VRED with a Reference Manager group created in the Scenegraph that mimics the Alias Reference Manager and layers.
Alias can create an assembly structure from various CAD file formats, such as .wire, .iges, .step, etc. It creates an intermediate .wref reference file for modeling and visualization purposes in the viewport, while keeping the link to the original CAD file in the background. When importing an Alias .wire file containing an assembly structure into VRED, the linked CAD files are now imported, as well. Find these imported assembled files under the new Reference Manager group in the Scenegraph.
For a video on how to import data from Alias to VRED, check out Mike Turner's Importing data from Alias to VRED. For general information on importing, see the following:
Learn How to Load and Import Files into VRED
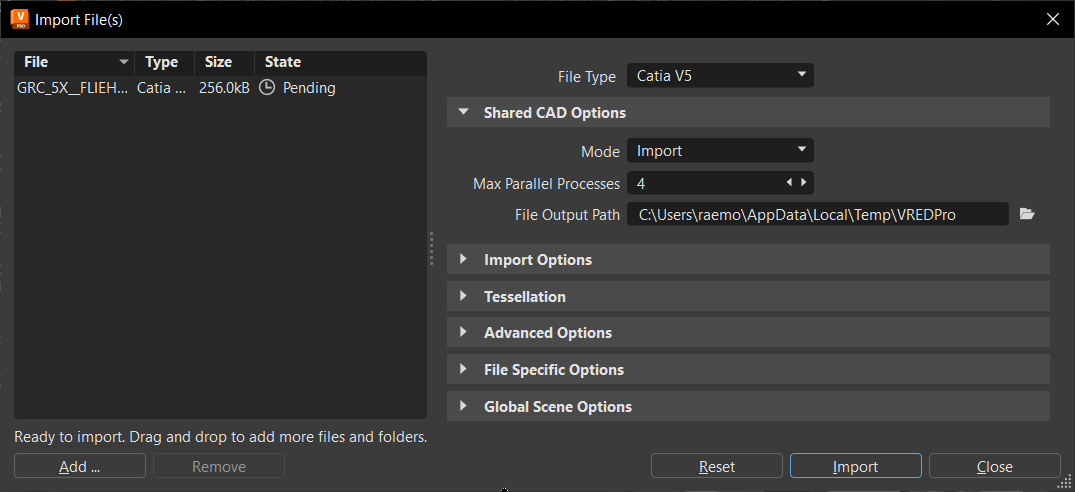
When adding files to scene, choose whether to load or import them. Loading a file uses File > Open and the root node created in the Scenegraph could differ, depending on the type of file loaded. Importing uses File > Import and enables multiple files to be brought into VRED, using the Import File(s) dialog. VRED supports an assortment of file formats and types, this included assembly files with references. Before adding files to VRED, consult the section below.
Support File Formats and Types
Many types of files can be imported and added to VRED scenes. Try other VRED scenes, XML or Python files, and files created by other applications, such as 3ds Max. When importing, if there is an issue with the import, you can abort it at any time during the process.
The documentation for 2016, 2018, and 2019 incorrectly listed OSG as a supported file format. OSG files are not and have not been supported in VRED since 2016.
For a list of supported file formats and types, see the General Overview section of Supported File Formats.
Alias Files
When importing Alias files, first unify all the surface normals to face the camera in Alias. Set Visual normals, rather than Geometric normals, to avoid disturbing the history of the model.
CAD Files
When working with CAD files, import multiple files in one shot. In the Import File(s) dialog, you will see the imported CAD files listed. For a list of the latest supported versions, see the supported file formats for the version of VRED you're running.
Maya Files (Deprecated)
As of 2024.2, the import and export of Maya .ma and .mb files is no longer supported.
Showcase Files
Showcase files are not supported in VRED 2018 and beyond. You can open a Showcase file in a version of VRED before 2018, save the file as a .vpb, then open in VRED 2018 or later.
How to Import a Non-VRED File
When a non-VRED file is imported into VRED, references can be automatically created. These references will appear in the Scenegraph, as well as the Reference Editor.
From the menu bar, select File > Import.
Select the files containing references, then click Open.
In the Import File(s) dialog, set file specific options, such as Import Sub-Referenced Files or Reference Behavior.
Click Import.
How to Add a File to a Scene
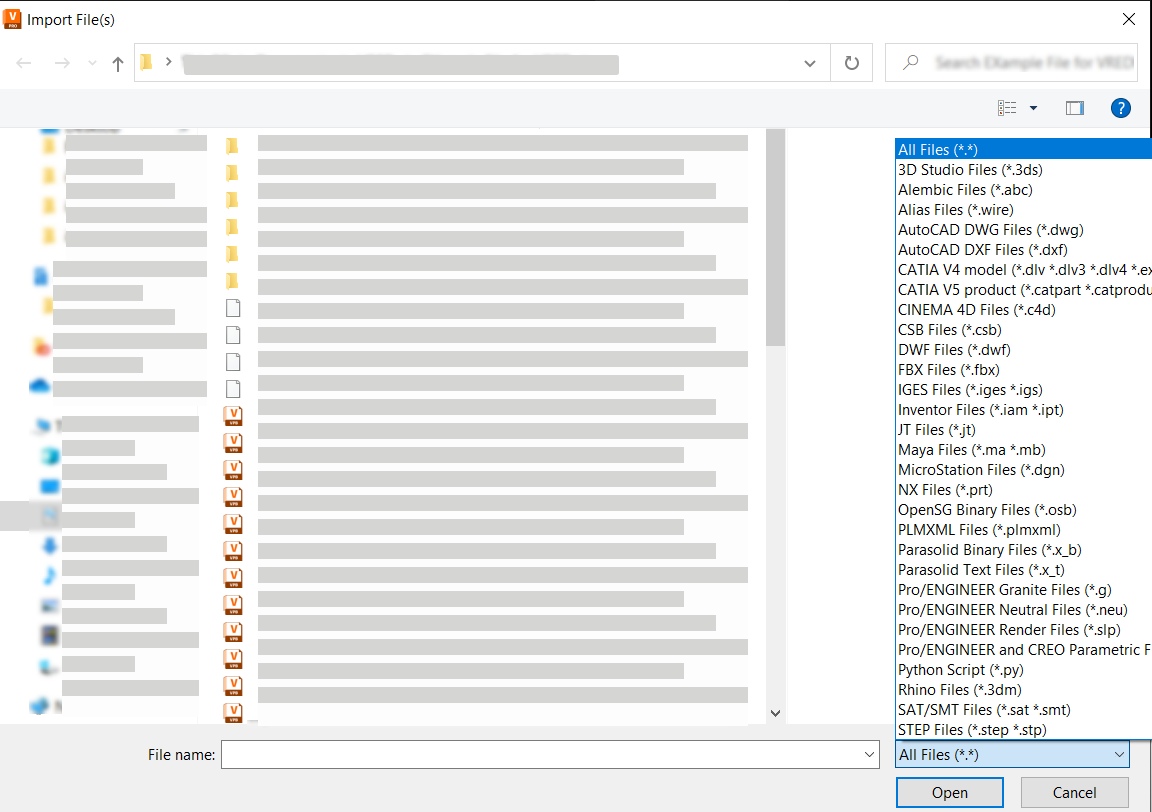
We support the following file formats for import: .3ds, .3mf, .abc, .wire, .dwg, .dxf, .dlv, .dlv3, .dlv4, .exp, .model, .session, .catpart, .catproduct, .cgr, .c4d, .csb, .dwf, .fbx, .ifc, .iges, .igs, .iam, .ipt, .jt, .dgn, .prt, .osb, .plmxml, .x_b, .x_t, .g, .neu, .slp, .asm, .prt, .py, .3dm, .sat, .smt, .step, .stp, .stl, .stla, .stlb, .skb, .skp, .asm, /par, .psm, .pwd, .asm, .prt, sldasm, .sldprt, .vpb, .vpe, .vrml, .wrl, .obj, and .xml.
Optional: Select a node in the Scenegraph below where you want to add the file or animation.
In the Menu Bar, select File > Import.
Select one or more files to add them to the scene and click Open.
Click Import.
The file or files are added to the Scenegraph as child nodes of the selected node.
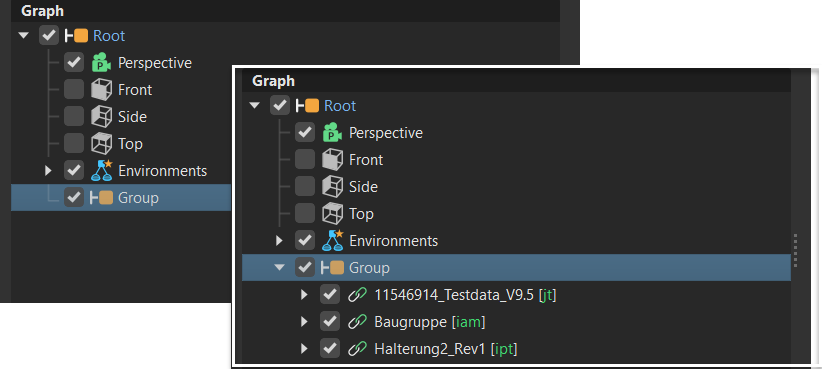
If no node was selected in the Scenegraph, the objects are added as children of the root node.
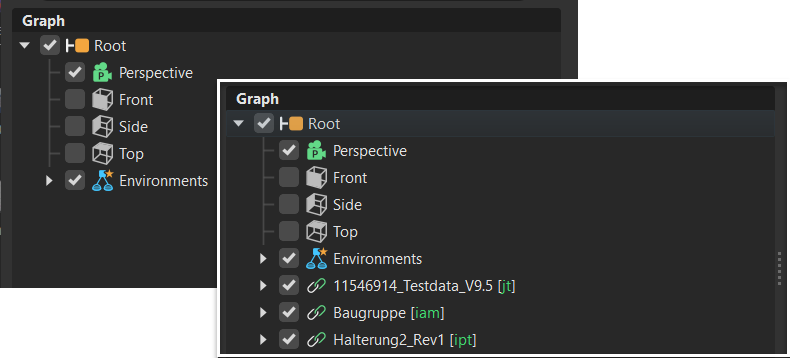
All objects of an added file are grouped in a group node. Imported files are marked green in the Scenegraph.
How to Add an Animation to a Scene
You can add VRML animations to a scene, provided they include the objects being animated.
- In the Menu Bar, select File > Import Scene Data > VRML Animation.
- Select an animation to add to the scene.
- Click Open.
How to Import Information to a Scene
You can import various file types and meta information to a scene.
In the Menu Bar, select File > Import Scene Data.
Select the type of information you want to import, then click Open:
- VRML Animation - Imports
.wrlor.xmlfiles for displaying virtual worlds and their 3D models. - CSB Animation/Variants - Imports
.csbanimation or variant files (.wrlorxml) into the current scene. - Rendering Metadata - Imports images rendered with VRED (
.png,.jpg,.tiff, .exr) containing scene settings, embedded as metadata in the Rendering Metadata. These settings are applied to the loaded scene. - Render Jobs - Imports jobs from the Render module into the current scene. (XML Render Queue Description
.xml) - Sequences - Imports arrangements from the Sequencer module into the current scene (XML Sequencer Description
.xml). A sequence setup for the Sequencer module can be added to the scene. - Variants - Imports variants from the Variant Sets module into the current scene (XML Variant Description
.xml). A variant setup for the Variants and VariantSets module can be added to the scene.
- VRML Animation - Imports
How to Import Image Metadata
When rendering an image, you can output metadata to the image. This enables you to import the image in the future and select what metadata, such as camera, image, animation, renderpass, and raytracing settings, node visibility, switch node states, and switch material states, to apply to the open scene. When the process is complete, a report of the applied metadata is displayed.
Embedding Metadata in a Rendered Image
- In Render Settings > File Output > Metadata, enable the kinds of metadata you want embedded in the image.
- Set a location for the rendered file and click Render.
Importing an Image with Metadata
- In the File menu, choose Import Scene Data > Rendering Metadata.
- Locate the image file and click Open.
- In the Import Metadata dialog, disable any metadata settings to be excluded and click OK.
- Review the report and click OK to close the dialog.