Optimizing, Saving, and Publishing a Scene
File > Optimize Scene
Before saving, exporting, and publishing a scene, why not optimize your scene. Optimizing a scene speeds up rendering and lowers memory use.
For reference information on the Optimize module, see Optimize.
How to Optimize a Scene
Imported FBX files are automatically scene optimized.
We highly recommend against loading .ma and .mb file into VRED. Instead, we suggest the use of .fbx.
In the Menu Bar, select File > Optimize Scene.
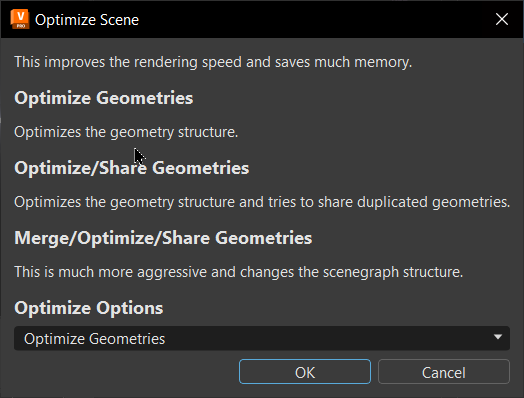
Click Optimize Options and select one of these optimization options:
- Optimize Geometries - Optimizes the structure of the geometry.
- Optimize/Share Geometries - Optimizes the structure of the geometry and tries to share duplicate geometries.
- Merge/Optimize/Share Geometries - Optimizes by changing the Scenegraph structure. This has a significant impact on the geometry.
Click OK.
For more advanced optimization options, in the Menu Bar, select Scene > Optimize to open the Optimize dialog.
How to Save a Scene
From the File menu, select the appropriate saving option, then click Save. This saves the current scene file with a supported VRED file type.
Save or Save As - Saves as you would from other applications, using the supported VRED file format .vpb (VRED Project Binary).
Save Selected - Saves the current selection to a supported VRED file format.
Save Package - Saves the project with textures stored in an
imagessub-folder in the same location as the project, instead of inline. Use this to reduce the size and speed of opening the project file and bundle all textures in the same folder.
How to Publish a Scene
Publish provides a way to limit the period in which a file can be accessed by setting an expiration date and time; however, a file can also be published without an expiration.
RECOMMENDATION: Try VRED Go, which packages a scene and viewer into a single executable you can store on a USB stick and give to someone to view on any machine, without a license. VRED Go uses AES256 encryption and the scene data is never extracted. In conjunction with a password, the encryption is very safe. A time bomb feature is included, so the file expires after a set period of time. The default is 30 days. Render settings from the scene are published and you can set VRED Go to be viewed either by desktop or VR.
With the file saved, in the Menu Bar, select File > Publish.
Designate a location for the published file.
Click Save.
In the Period of Validity dialog, to set a limited period for accessing the file, click Limit period of validity, then enter a start and end date and time. For no expiration, keep Limit period of validity disabled.
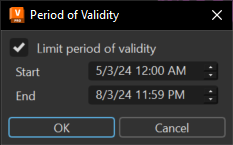
Click OK to publish the file.
How to Export Selected Content
The file format selected will determine the options in the Export Selected dialog. See Export Selected for descriptions of each.
- Select the content to be exported in the Scenegraph.
- In the Menu Bar, select File > Export Selected.
- In the Export Selected As dialog, navigate to a location, name the file, click Save as type and select a file format, then click Save.
- In the Export Selected dialog, set any custom options.
- Click Export.
How to Export Information from a Scene
Export different types of information from a scene, such as geometry, images, sequencer batches, and variants.
In the Menu Bar, select File > Export.
Select the type of information you want to export, then click Save.
Scene - Exports the whole scene. These are the supported export formats:
- 3D Manufacturing Format:.3mf
- CSB Geometry: .csb .iv
- FBX Scene: .fbx
- Jupiter Tessellation: .jt
- OpenSG Binary Geometry: .osb
- Pro/ENGINEER Render Geometry: .slp
- Python Script: .py
- StereoLithography Geometry: .stl .stla .stlb
- VRED Project Binary: .vpb
- VRML Geometry: .vrml .wrl
- Wavefront Geometry: .obj
Note:The introduction of smart assemblies has made the VRED Project File (.vpf) obsolete. It is no longer supported as of version 2021.
Selected - Exports the current selection into one of the supported formats.
Switched Geometry - Exports switched geometry data (*.osb).
CubeImages - Exports the scene to a set of cube images. The export is based around a center point you create, such as with a standard primitive (which you hide using the Scenegraph). CubeImages render settings can be set in Edit > Preferences > Export.
Render Jobs - Exports jobs from the Render module to the current scene (XML Render Queue Description .xml).
Snapshot - Exports a snapshot of the Viewport to the snapshot folder specified in Preferences.
Sequences - Places all sequences set in the Sequencer module into a separate xml file.
Variants - Places all variants and variants sets into a separate xml file.