Adjusting Render Settings and Modes
For reference material on the Visualization Menu, see the following:
- Render Options in the Visualization Menu
- Stereo Options in the Visualization Menu
- Advanced OpenGL Settings in the Visualization Menu
How to Enable Raytracing
Select Visualization > Toggle Raytracing.
When raytracing is on, the indicator
 is enabled in the Toggle Raytracing menu item and on the main toolbar.
Select Visualization > Raytracing Downscale, then select a level of downscaling to speed up interaction time, as necessary.
How to Enable Rendering
Select Visualization > Rendering to toggle Rendering on and off.
When rendering is on, the indicator
 is enabled beside the Rendering menu item and on the main toolbar.
Optional - From the Visualization menu, select a rendering type.
How to Adjust Stereo Settings
Select Visualization > Stereo, then select a stereo option.
How to Use Sceneplates
To add sceneplates (frontplates and backplates) to the scene, see the sections that follow.
To toggle the display of all sceneplates on or off, click Visualization > Sceneplates and uncheck/check Toggle Sceneplates.
Clipping of volumes is not supported.
How to Use Frontplates
To add a frontplate to the scene:
- Select Visualization > Sceneplates > Frontplates.
- Select an image file to use as the frontplate.
- To toggle the frontplate display, click Visualization > Sceneplates and uncheck/check Frontplates.
To delete a frontplate from a scene:
- Select Scene > Sceneplate Editor.
- In the Sceneplate Editor, tap the frontplate you want to delete to select it.
- At the bottom of the Sceneplate Editor, click
 .
.
How to Use Backplates
To add a backplate to the scene:
- Select Visualization > Sceneplates > Backplates.
- Select an image file to use as the backplate.
- To toggle the backplate display, click Visualization > Sceneplates and uncheck/check Backplates.
To delete a backplate from a scene:
- Select Scene > Sceneplate Editor.
- In the Sceneplate Editor, tap the backplate you want to delete to select it.
- At the bottom of the Sceneplate Editor, click .
How to Use Realtime Antialiasing
Antialiasing is a smoothing calculation that builds up the look of surfaces, materials, and textures. Use anti-aliasing options to give surfaces a more realistic appearance, but be aware that frame rate might be affected.
| Antialiasing off | Antialiasing on |
|---|---|
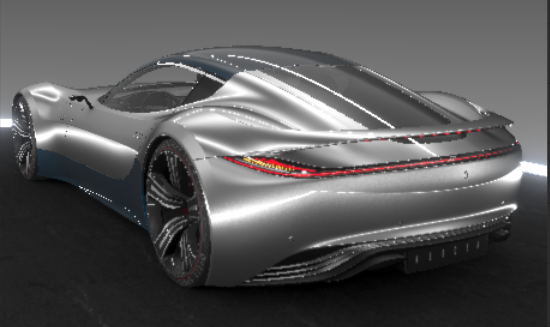 |
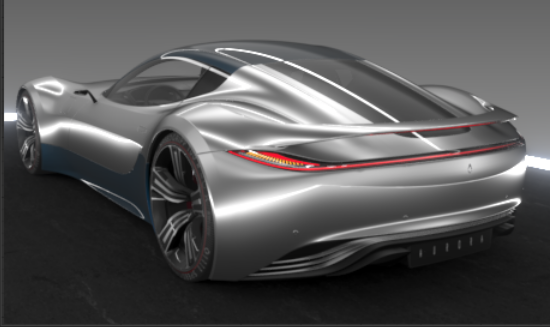 |
Computer screens are made of small square pixels. This is why an illustration of round objects or curved surfaces appears faceted at its edges. Antialiasing makes the edges of rendered objects less pixelated.
When activated, the calculation starts once the camera position has not changed for more than a second. (This is the Preferences > Render Options > Render Window > Still Frame AA default setting.) The progress is shown in a clockwise growing circle around the mouse pointer. If the circle is complete and closed, the calculation is finished.
Select Visualization > Realtime Antialiasing, then select one of the available options; in Raytracing mode, different levels of samples per pixel are applied.
Off - No antialiasing is used
Low - 4 samples per pixel
Medium - 8 samples per pixel
High - 16 samples per pixel
Ultra High - 32 samples per pixel
How to Enable Deep Learning Supersampling
Use DLSS RR or DLSS to upscale and antialias a rendered image with little performance impact, taking a lower resolution image and producing an image that looks higher resolution from it. This is very useful for VR content.
For DLSS, an NVIDIA RTX GPU with a 471.68 or later driver is recommended. The Deep Learning Supersampling option will be greyed out if your graphics card and driver don't meet the requirements.
What is DLSS RR?

The NVIDIA DLSS RR provides "close to noise free" images at much higher frame rates in raytracing. In comparison to the previous version of DLSS, the current version requires more performance, due to the rendering of additional buffers. However, the results in the 3D viewport are comparable, if not better, than Optix Denoising. Something to keep in mind, though, is that DLSS RR does not support alpha channels; therefore, it does not work with backplates.
For DLSS-RR, which was added in 2024.2, an NVIDIA RTX GPU with a v.537.02 driver or above is required. If you have an earlier NVIDIA driver, VRED will default to DLSS 2.4, the version in 2024.1.
Enabling DLSS RR or DLSS
Your graphics card will be used to determine whether DLSS RR or DLSS is enabled.
Select Visualization > Realtime Antialiasing > Deep Learning Supersampling.
Select from the following:
- Off - Turns DLSS off and image detail is not altered.
- Ultra-Performance - Renders the scene at 1/3 the original resolution and is intended for 8K displays.
- Performance - Renders the scene at 50% of the original resolution.
- Balanced - Renders the scene at 58% of the original resolution.
- Quality - Renders the scene at 66.6% of the original resolution.
How to Set Variable Rate Shading
Variable Rate Shading enables you to set the shading rate per material, which is useful for materials with fine patterns that are prone to the moiré effect, such as carbon or HMI textures with thin lines that appear aliased.
This can be used in VR and desktop mode, but if your graphics card isn't supported, this option is disabled.
Select Visualization > Realtime Antialiasing > Variable Rate Shading, then one of the following global variable rate shading options:
Off - Disables variable rate shading.
Screen and Materials - Enables variable rate shading. The default quality for the whole image is native 1x1 shading, but can be changed using Realtime Antialiasing settings. Per material shading is active.
Note:The material setting in the Material Editor will overwrite any global setting.
Materials - Enables variable rate shading. The quality for the whole image is ALWAYS native 1x1 shading. Per material shading is active.
Note:The material setting in the Material Editor will overwrite any global setting.
Setting Variable Rate Shading per Quality Settings
To define different quality levels, from low to ultra, select Edit > Preferences > Rendering > Render Window > Visualization Advanced (tab) > Realtime Antialiasing Presets, then for each quality setting, set variable rate shading.
Ensure Off is selected for Visualization > Realtime Antialiasing > Variable Rate Shading.
How to Adjust Advanced OpenGL Settings
Select Visualization > Advanced OpenGL Settings and choose from the available options. See Advanced OpenGL Settings more more details.