New projects are created based on a project template. When creating a new project that will be built into a DLL assembly that will be loaded into AutoCAD, use the Class Library template that comes with Microsoft Visual Studio or one of the AutoCAD Managed project application templates that get installed with the AutoCAD .NET Wizard. Both types of templates are available for the VB.NET and C# programming languages. After a new project is created, you will need to reference the files that make up the AutoCAD .NET API.
Procedures
- In Microsoft Visual Studio, click File menu
 New Project (or click File menu New Project).
- In the Create a New Project dialog box, from the Language drop-down list, select Visual Basic.
- From the Platforms drop-down list, select Windows.
- From the Project Types drop-down list, select Library.
- In the Templates list, select VB Class Library (.NET Framework).
Note: Make sure to not select the Class Library or Class Library (Universal Windows) template.
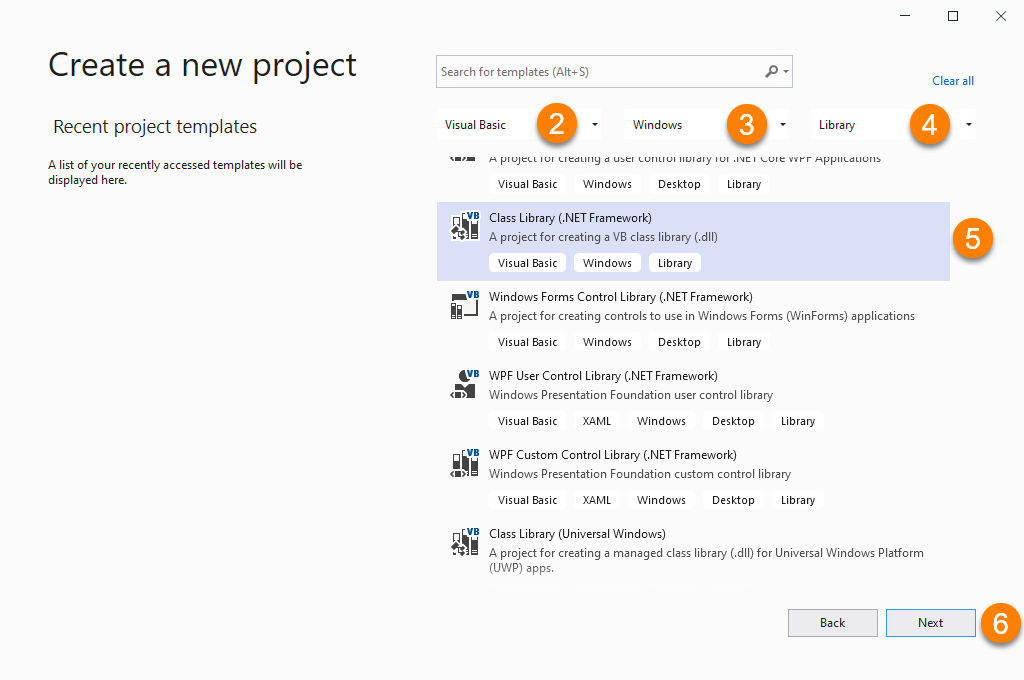
- Click Next.
- In the Configure Your New Project dialog box, click in the Project Name box and enter a name for the new project.
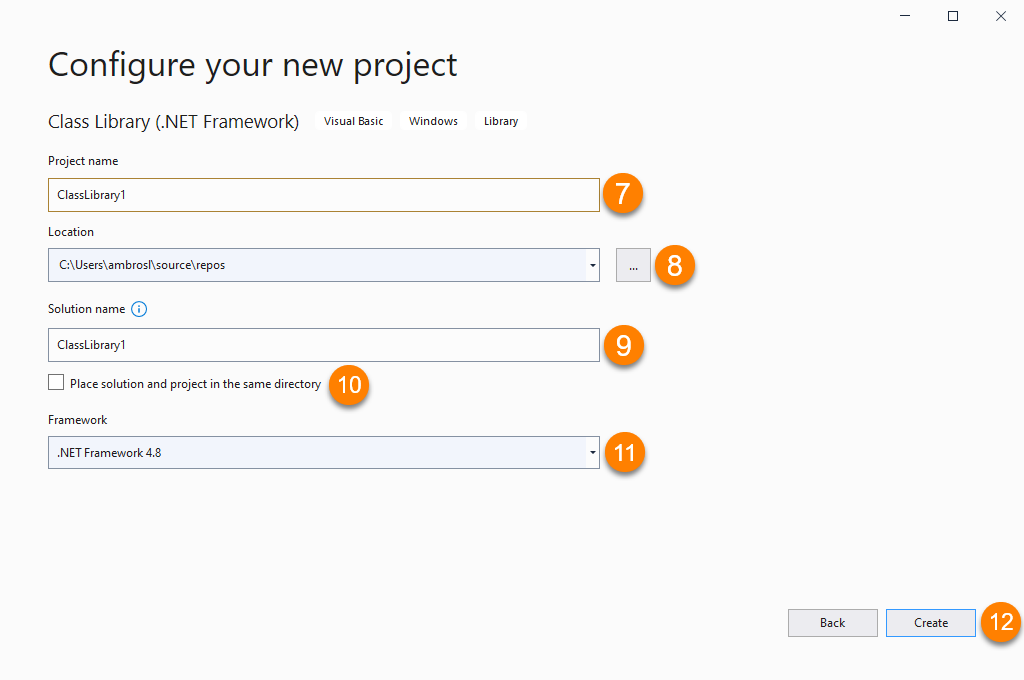
- In the Location box, enter a location or click Browse to select a folder for the new project.
- In the Solution Name box, enter a name for the new solution that the project will be added to.
- Optionally, clear the Place Solution and Project in the Same Directory check box to create a sub-folder under the solution for the project.
- From the Framework drop-down list, select .NET Framework 4.8.
- Click Create.
To create a new project using a standard template
- In Microsoft Visual Studio, click File menu New Project (or click File menu New Project).
- In the Create a New Project dialog box, click in the Search box and enter AutoCAD.
- From the Templates list, select AutoCAD <release> VB Plug-in or AutoCAD <release> C Sharp Plug-in.
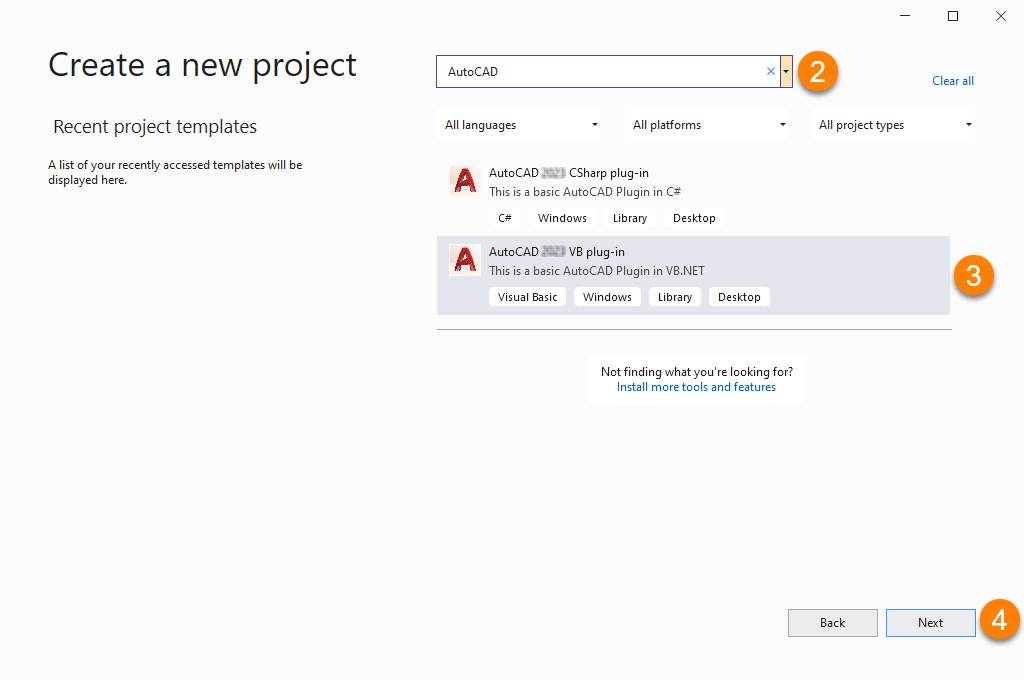
- Click Next.
- In the Configure Your New Project dialog box, click in the Project Name box and enter a name for the new project.
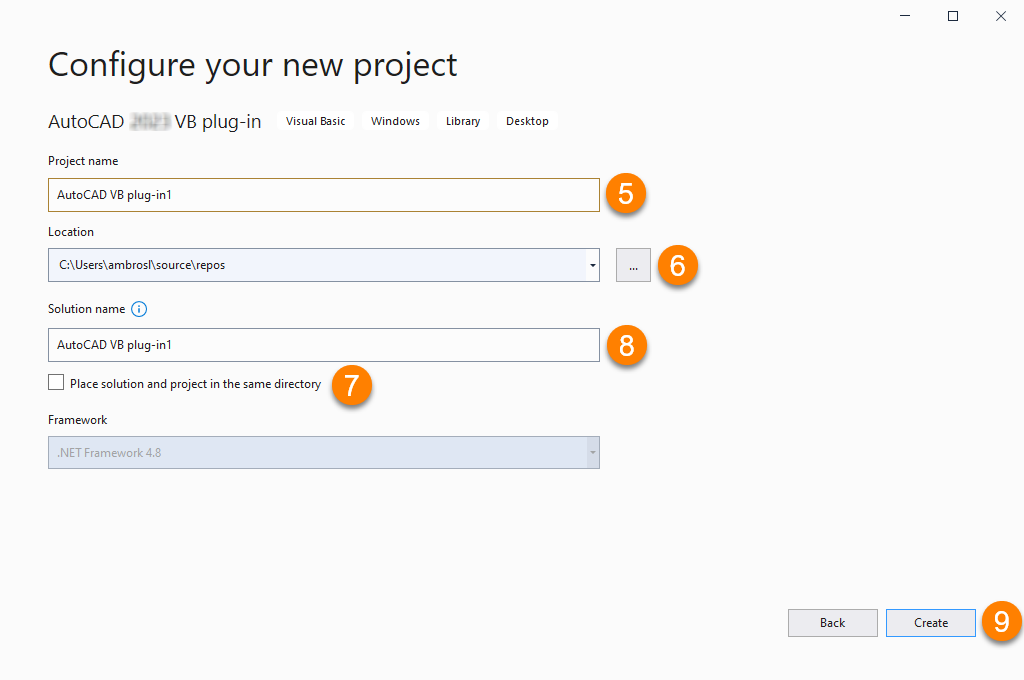
- In the Location box, enter a location or click Browse to select a folder for the new project.
- In the Solution Name box, enter a name for the new solution that the project will be added to.
- Optionally, clear the Place Solution and Project in the Same Directory check box to create a sub-folder under the solution for the project.
- Click Create.
- In the AutoCAD .NET Wizard Configurator dialog box, specify the libraries to reference to the project.
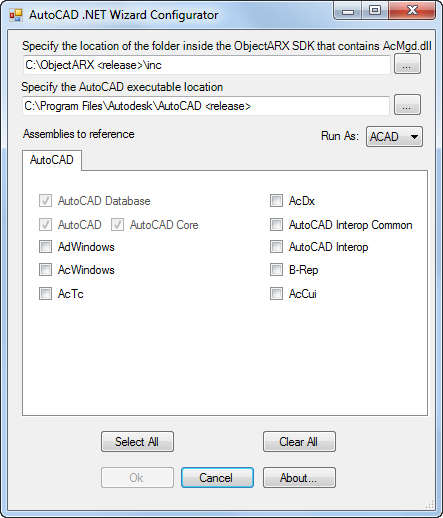
- Click OK.
To create a new project using an AutoCAD Managed template
Before using one of the AutoCAD Managed templates, you must first download and install the latest release of the ObjectARX SDK.