Introduction
Quick start tutorials have been specifically designed with the new user in mind. Each procedure page begins with a video demonstrating how to perform the described steps, which are listed immediately below the video. Additional images and guidance have been provided relative to the main set of tutorials. However, the quick start tutorials are also applicable to the more experienced user.
Why do the results vary among different software versions?: As part of the ongoing development of the simulation software, adjustments are made to the meshing routine, element formulations, contact algorithms, default parameters, and so on. These refinements can lead to small differences in the results when comparing the output of different software versions. The images and animations within the tutorials are not necessarily revised to reflect insignificant changes in the results.
Model Datasets
You must download a dataset archive in order to complete a quick start tutorial. The download link is provided within the tutorial instructions. Open or locally save the target ZIP file and extract the model files to the folder of your choice on your hard drive. The folder containing the model dataset will be your working folder for the quick start tutorial.
Command Reference Convention
When ribbon commands are referenced within a quick start tutorial, the following convention is used:
Ribbon_Tab_NamePanel_Name
Command_Name
(Example: Autodesk NastranMesh
Update All)
Either an icon or a partial image of the ribbon accompanies each command reference.
Default Settings
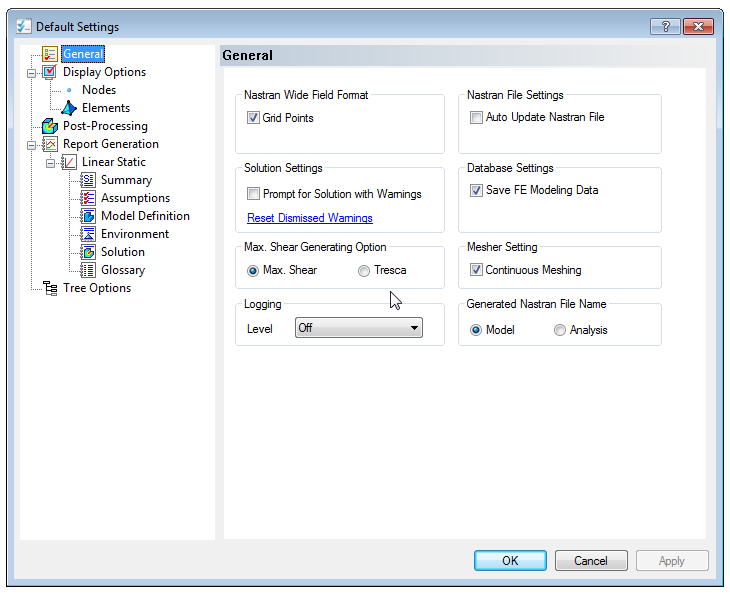
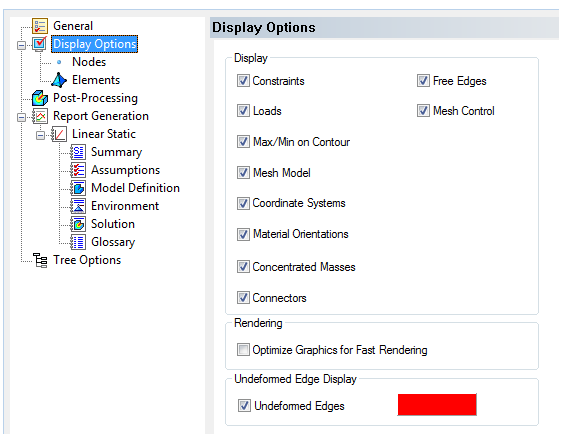
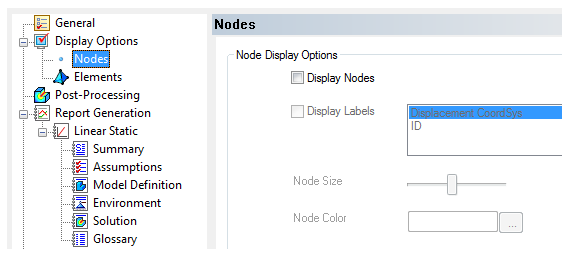
Several program settings are global and influence the behavior of every model. The following default settings were in effect when the tutorials were created. To ensure that the tutorial steps remain valid, maintain the settings as shown below. To access these settings, first enter the
Autodesk Inventor Nastran environment (Environments Autodesk Inventor Nastran). Then, click
System
 Default Settings from the
Autodesk Nastran
ribbon tab.
|

|
|

|
|

|
|

|
|

|
|

|