The Report tab, at the bottom of the Graphics window, enables you to create a detailed breakdown of the measurements taken during an inspection. You can display the information using the report templates supplied with PowerInspect, or you can create your own templates and use different layouts for different applications.
To display the measurement results in a report:
- At the bottom of the
PowerInspect window, click the
Report tab.

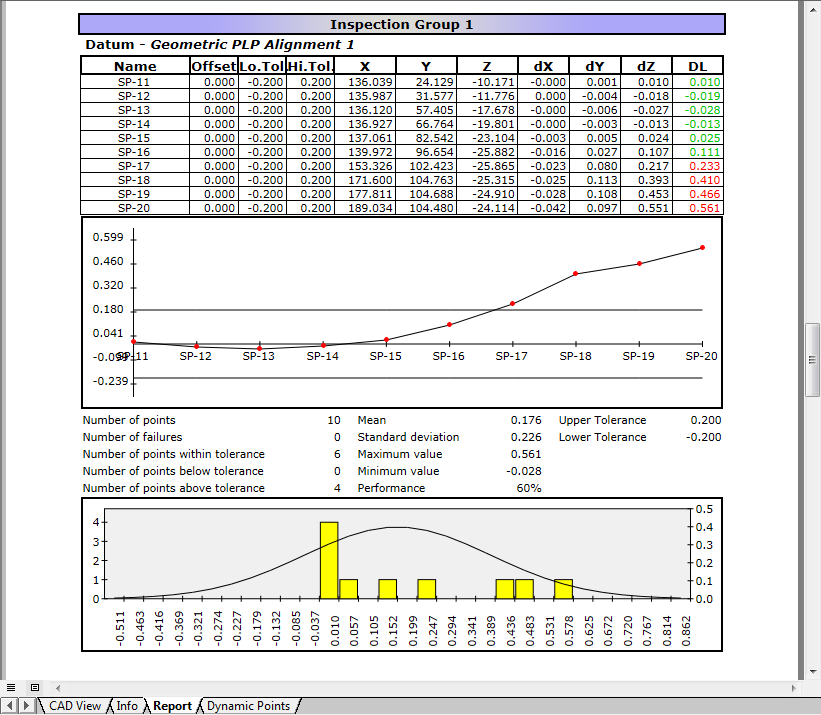
The measurement results are displayed.
- Use the scroll bar on the right of the report to display all the details.
Reports can be made customizable. This enables you to specify inspection-specific information, such as the part number and the name of the person who carried out the inspection.
To customize your report, click Report tab > Control panel > Report Parameters.
- Choose a template for the report:
- Click Browse. The Template File dialog is displayed.
- Select the HTML folder, followed by the folder in which the template is located, and then select the .pxm file for the required template.
- Click Open to select the template and close the Template File dialog.
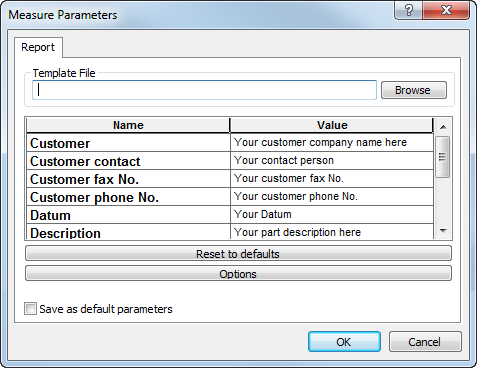
- To change a setting in the report, select its entry in the Value column, and then type the new text.
- To revert to the original template values, click Reset to defaults.
- To set the currently selected template as the default, select the Save as default parameters check box.
- To display probed points in the CAD view:
- Click the
Options button.
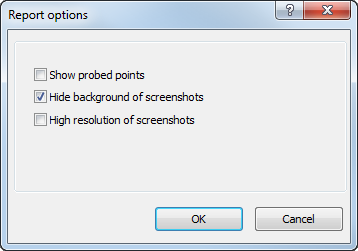
- Select the Show probed points check box.
- Click OK to close the Report Options dialog.
- Click the
Options button.
- In the Measure Parameters dialog, click OK to close the dialog and update the report.
- Display the report again, and check it contains the changes you made.