In this exercise, you will adjust the tessellation of the arcs around the ramp, which will result in a more accurate representation of the ramp.
Modify feature line arc tessellation
- Click the right viewport to make it active.
- Click
View tab
 Visual Styles panel Visual Styles drop-down 3D Wireframe.
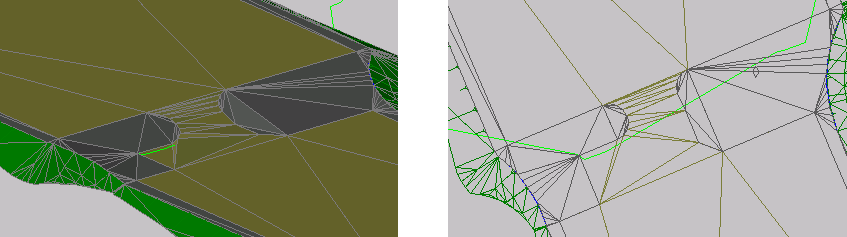
The grading triangulation is displayed in the 3D Wireframe visual style. It is helpful to observe the triangles as you use the feature line to break the surface.
- Click
tab panel drop-down Find.
- On the
Grading Creation Tools toolbar, click
 Grading Group Properties.
Note: If the Select Grading Group dialog box is displayed, select the Grading - Building Pad site and the Slope Grading With Feature Lines group and click OK. Then click the Grading Group Properties icon again.
Grading Group Properties.
Note: If the Select Grading Group dialog box is displayed, select the Grading - Building Pad site and the Slope Grading With Feature Lines group and click OK. Then click the Grading Group Properties icon again. - In the Grading Group Properties dialog box, on the Information tab, select the Automatic Surface Creation check box.
- In the
Create Surface dialog box, click
OK.
To adjust the arc tessellation, a surface must be created from the grading group. This surface is temporary. You will delete it after you have adjusted the arc tessellation.
- In the Grading Group Properties dialog box, on the Information tab, change the Tessellation Spacing setting to 1.000’. Click Apply.
- Clear the
Automatic Surface Creation check box. When asked if you want to delete the Slope - Projection Grading surface, click
Yes. Click
OK.
Now that you have updated the arc tessellation, you must update the grading infill areas to apply the new setting. The easiest way to update the infill areas is by using the AutoCAD Move command.
- On the command line, enter MOVE.
- Click the original, interior feature line (the blue building pad). Press Enter.
- Press Enter again to select the default Displacement selection.
- Press Enter again to accept the default displacement of <0.0000, 0.0000, 0.0000>.
In the left viewport, notice that the triangulation of the arcs along the ramp has improved.
This exercise uses Grading-6.dwg with the modifications you made in the previous exercise, or you can open Grading-7.dwg from the tutorials drawings folder.
To continue this tutorial, go to Exercise 2: Adjusting Grading Triangulation with a Feature Line.