To edit a pipe network using the layout tools
The editing commands are the same commands you use for creating a pipe network.
- In the drawing, right-click a part in a pipe network. Click Edit Network.
- Click a button in the Network Layout Tools dialog box to add, change, or delete pipe network parts, or change the surface, alignment or parts list that are referenced.
To edit a pipe network using the Pipe Network Vistas
You can use the Pipe Network Vistas to display all the components that are part of the pipe network.
- Select a pipe network part in the drawing. Right-click the part and click Edit Network.
- On the
Network Layout Tools toolbar, click
 .
Note: You can edit only values that are available, you cannot edit data in disabled (shaded) cells.
.
Note: You can edit only values that are available, you cannot edit data in disabled (shaded) cells.
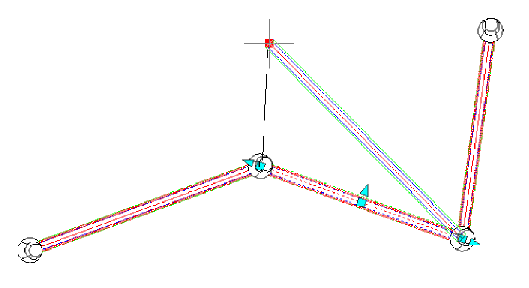
To use grips to edit a pipe
- In the drawing, click a pipe in a pipe network.
The following illustration shows grips for a pipe in a pipe network:
- Do one of the following:
- Use the end grips to adjust the pipe length.
- Use the center grip to move the location of the pipe.
- Use the midpoint resize grip to change the width of the pipe.
To use grips to edit a structure
- To move the location of a structure that has pipes connected to it, in the drawing, click the center grip of the structure and move it to a new location.
- While viewing structures in a profile view, use the structure’s rim or sump depth grips to adjust the elevation of either.