Analysis Settings
Use the Analysis settings before clicking Analyze.
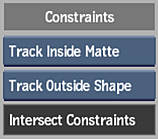
Constraints Settings
Use the constraint settings to pass information to the analyzer about any mattes or masks in the scene.
Matte Media box
Select whether the Action matte is used for tracking. Not available if Back media is being analyzed.
| Select: | To: |
|---|---|
| Ignore Matte | Not use a matte. |
| Track Inside Matte | Use a matte to delimit the tracking results. White areas of the matte are considered for calculating the solution, and black areas are ignored. |
| Track Outside Matte | Use an inverted matte to delimit the tracking results. Black areas of the matte are considered for calculating the solution, and white areas are ignored. |
GMask Option box
Select whether to track inside or outside of an attached GMask shape.
While in an Analyzer view, you can add a GMask node and instantly draw the constraining mask. If added while in Analyzer view, the GMask and Axis nodes are automatically connected to the image as part of the Analyzer tree. If you want to use an existing GMask node, make sure that you parent the Surface (mono analyzer) or Stereo Object (stereo analyzer) to the Axis of the GMask in the schematic.
If the area to be constrained is moving, you can perform planar tracking from within the GMask menu. See Tracking a Mask.
Intersect Constraints field
Displays that the intersection of the two constraints above are used as the tracking region. Non-editable.
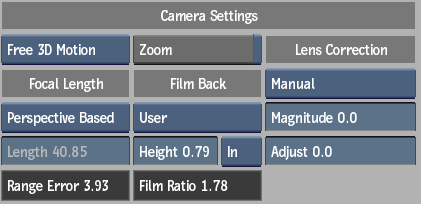
Camera Settings
Before analysing the 3D motion, define your camera properties. The camera represents the device used to acquire the sequence of images you are tracking. For each camera parameter, you can choose to let the auto 3D tracker calculate the value automatically, you can specify the value yourself, or you can set a perspective grid to estimate the focal length. This information can help the automatic 3D camera tracker calculate better results.
Camera Type box
Select the type of camera motion in the tracking shot.
| Select: | To: |
|---|---|
| Free 3D Motion | Track a clip shot with a free-moving camera. |
| Pan and Tilt | Track a rotating clip shot with a camera on a tripod. |
| Auto Detect Motion | Automatically detect the camera type and track accordingly (default value). |
Focal Length box
Select Auto to let the 3D tracker calculate the camera values automatically. Select Manual to specify the values yourself. Select Perspective Based to use the perspective rectangle in the image to automatically determine the focal length of the camera.
Length field
Displays the focal length of the camera, in millimeters. Editable.
Range Error field
Displays the error of the estimate for the focal length. This should be a small number relative to the focal length. Non-editable.
Zoom button
Enable to calculate the zoom value of the reconstructed camera for each frame.
Film Back box
Select the film back size of the camera that shot the scene.
Height field
Displays the height of the film back. Editable.
Film Back Units box
Select the unit of measurement (inches or millimeters) for the film back height.
Film Ratio field
Displays the film aspect ratio of the camera. Non-editable.
Lens Correction Settings
You can apply lens correction before or after your initial analysis. If you make any changes after analysis, you'll need to update or refine the track. While not necessarily required, performing a lens correction may give better tracking results.
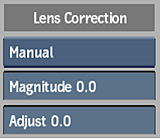
Lens Correction Mode box
Select Manual and set the Magnitude and Adjust fields if you want to apply lens correction during analysis.
Magnitude field
Displays the magnitude of lens correction. Editable.
Adjust field
Displays the level of secondary adjustment of lens correction. Editable.
Stereo Analysis Settings
The Stereo Analysis settings display information about the 3D camera after a stereo analysis is performed. These are locked fields, and are meant as informational only.
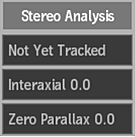
Stereo Mode field
Displays the stereo mode of the 3D camera after a stereo analysis. Non-editable.
Interaxial Separation field
Displays the interaxial distance between the left and right cameras of the 3D camera after a stereo analysis. Non-editable.
Zero Parallax field
Displays the distance on the camera view axis (where the zero parallax place occurs) of the 3D camera after a stereo analysis. Non-editable.