Motion Vectors Menu Settings
The Motion Vectors menu is divided into two tabbed sections: Controls and Texture.
Controls Tab
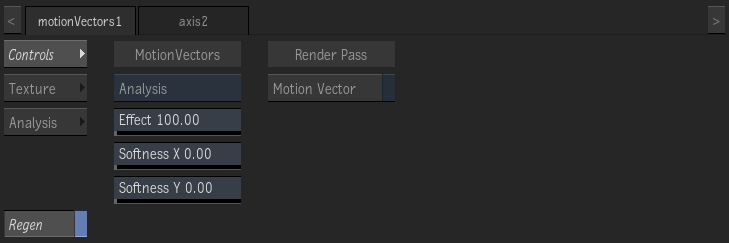
Motion box
Use Analysis to analyse in Action the media assigned to the map by using the Analysis tab. To use motion analysis data from outside Action, use the other options. Forward/Backward: In the map, the forward motion is in the media front, the backward motion in the media back. Forward or Backward: Either forward or backward motion is available in the assigned media. Batch Motion Analysis provides Forward and Backward motions.
Effect field
Displays the amount of displacement applied. Editable.
Softness X field
Displays the amount of X-axis blur applied to the Motion Vectors map. Editable
Softness Y field
Displays the amount of Y-axis blur applied to the Motion Vectors map. Editable
Motion Vector button
Enable to have this Motion Vector map contribute to the Motion Vector render pass output by Action.
Texture Tab
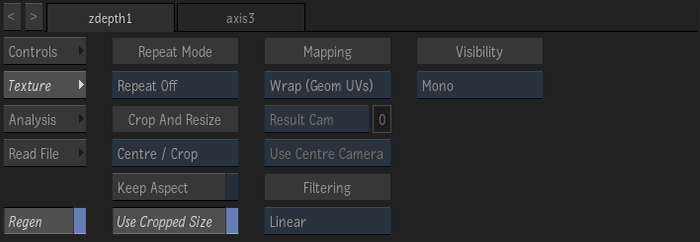
(a) Repeat Mode box (b) Mapping box (c) Camera Type box (d) Fit Method box (e) Filter box
Repeat Mode box
Select how the parallax map pattern is repeated on the surface.
Fit Method box
Select a fit method option to be applied to the parallax map.
Keep Aspect button
Enable to preserve the aspect ratio of non-square pixels (not available for the Fill fit method).
Use Cropped Size button
Enable to replace the parallax map with the cropped size of the parallax media. Disable to use the cropped parallax media as is.
Mapping box
Select the type of texture mapping.
| Wrap (Geom UVs) Wrap mapping completely envelops the 3D model with the texture map according to the object’s texture coordinates. To use this option, you must import a model that has its own texture coordinates. When using Wrap mode, you can also apply UV mapping settings from the Geometry menu. |
| Plane Planar mapping applies the map without distorting the front plane of the 3D model, similar to a movie projector casting an image onto a screen. All 3D coordinates of the geometry are mapped to this plane to generate the texture values. Planar mapping positions the lower-left corner of the map on the 3D model’s axis. When you apply planar mapping, any surfaces on the 3D model perpendicular to the front plane cause the pixels at the edge of the texture to project along the “sides” of the object. |
| Perspective Perspective mapping is similar to planar mapping, except that it performs a perspective transformation of the map based on the selected camera’s field of view (FOV). When you select Perspective as the mapping type, the Perspective Camera box becomes active, allowing you to specify the active camera. The FOV of the camera has an impact on the resulting effect of any transform applied to the parent axis of the texture. On stereo cameras, the interaxial distance between left and right cameras also has an effect on the resulting perspective transform. |
| Projection The texture behaves as if it is projected by the selected camera. Projection mapping is useful as an alternative to projecting textures using the Projector node, especially when it is necessary to project while preserving a specific camera POV. |
Perspective Camera box
Specify which camera's FOV to take into account when using perspective or projection mapping.
Perspective Camera field
Displays the active perspective or projection camera number. Non-editable.
Stereo Camera Projection box
Select whether to use the centre, left, or right camera from a stereo camera rig when projection mapping.
Filter box
Select the type of filtering to apply to the parallax map.
| Select: | To apply: |
|---|---|
| Nearest | No filtering — the pixel of the texture closest to the screen pixel is displayed. |
| Linear | Basic bilinear filtering. |
| Anisotropic | Non-proportional filtering between X and Y (faster to process than EWA, but with a lesser quality). |
| Aniso+Linear | A combination of Anisotropic and Linear filtering. |
| EWA | A high-quality elliptical weighted average filter to produce enhanced rendering results (slower to process than other filters). |
| EWA+Linear | A combination of EWA and Linear filtering (offers the most advanced filter processing). |
Camera Type box
Select the camera type visibility for the parallax map. For example, you can use this setting to apply a Left Eye and Right Eye camera type for two maps that are children of the same surface or geometry in a stereo scene.
Analysis
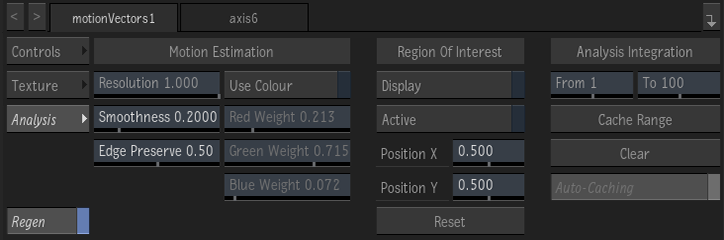
Motion Estimation
Resolution field
Defines the scale of the image to consider in the analysis, 1 being full resolution.
Smoothness field
Controls the spatial coherence of the generated movement.
Edge Preserve field
Constrains the motion analysis to respect the edge information.
Colour button
Enable to use colour information. When disabled, RGB weights are used to compute the luminance of the input images.
Red Weight field
Controls the contribution of the Red pixels.
Green Weight field
Controls the contribution of the Green pixels.
Blue Weight field
Controls the contribution of the Blue pixels.
Region of Interest
Display Region of Interest button
Display the Region Of Interest (ROI). The ROI can only appear in a viewport set to Object (F8) view.
Enable Region of Interest button
Enable to analyze only the region defined by the region of interest. Defining an ROI improves performance and caching by considering a smaller area of the media. Vectors in an ROI can differ in precision from the vectors of the full image analysis.
ROI X Position field
Set the X coordinate of the center of the ROI.
ROI Y Position field
Set the Y coordinate of the center of the ROI.
Caching
Caching Start field
The first frame of the interval to consider when using motion vectors for tracking. Also used as the first frame to cache when Caching Range.
Caching End field
The last frame of the interval to consider when using motion vectors for tracking. Also used as the last frame to cache when Caching Range.
Cache Range button
If the map is set to Analysis, Cache Range analyses the motion of its assigned media, and caches the results. If the map is set to Forward or Backward, it caches the vectors of the provided motion vectors map. Caching is performed only on the interval defined by the To and From fields. Disables Motion Estimation and Region of Interest options.
Clear button
Clear the cached motion analysis. Enables sections Motion Estimation and Region of Interest.
Auto-Caching button
Enable to analyze and cache the analysis as you play back or scrub each frame. Turn off Auto-Caching if you run out of space on your framestore.