Create iMates
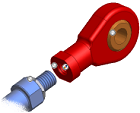
You can define constraint pairs in parts, called iMates, that tell parts how to connect when inserted in an assembly. In the browser, an iMates folder contains all iMate definitions defined in the file. Pause your cursor over an iMate to highlight it in the graphics window.
You can define maximum, minimum, and resting position limits for an iMate.
You can select two or more iMates to create a composite iMate. When matched with another composite iMate with the same name and number of members, all iMates in the group are solved at once ( iMate result ).
You can also convert constraints between components in an assembly and automatically create multiple single iMates or a single composite iMate. These iMate definitions are saved with the part file.
Create an iMate
On the ribbon, click Manage tab
 Author panel iMate
  .
.In the Create iMate dialog box, the Mate constraint is automatically selected. Use the default or click Angle, Tangent, or Insert.
Click the Assembly tab to create a stationary constraint or the Motion tab to create a motion constraint.
On the Assembly tab:
- Enter Offset or Angle, if appropriate.
- Check the Suppress box to suppress constraints, if appropriate.
- In the Solution box, click the result, according to the constraint type. There is no pictured solution for an Angle constraint.
- Optionally, click the More button to set maximum, minimum, or resting position limits.
- In the graphics window, select the geometry to constrain.
On the Motion tab:
- Click Rotation or Rotation-Translation.
- Enter Ratio or Distance, as appropriate.
- In the Solution box, click the result, according to the constraint type.
- In the graphics window, select the geometry to constrain.
Click the button to expand the dialog box. Autodesk Inventor uses iMate names as the first criteria for matching iMates in an assembly. If no names match, iMate properties are used to match.
In the Name box, enter an iMate name, or leave blank and a default name is automatically created.
Optionally, click in the Limits tab to set the maximum, minimum, and resting position limits.
- Check Use Offset As Resting Position and enter the required value in the Offset value box to specify the resting position. Clear the check box to disable.
- Check Maximum and enter a value to specify the maximum limit position. Clear the check box to disable.
- Check Minimum and enter a value to specify the minimum limit position. Clear the check box to disable.
In the Matching tab, select from the listed names, if available, or click Add Name to List and enter a name. Optionally, delete a name or use the up or down arrows to move the name in the list.
Click Apply to create the iMate. Continue to create iMates as needed or click OK to quit.
Save the file.
If you use the default iMate name, consider changing it to something more meaningful. Choose a name to correspond with the matching iMate in another part, and then use the browser to rename the iMate. For example, to identify the geometry, rename Mate1 to Axis1. Rename a secondary iMate, named Mate2, to Face1.Create a composite iMate
- Create multiple single iMates in a part or assembly.
- In the browser, click to expand the iMates folder.
- Hold down CTRL, and then click each iMate you want to include in the composite iMate.
- Right-click, and then select Create Composite.
- Optionally, click the composite iMate label, and then give it a name to describe its purpose or placement.
- Save the file.
Infer iMate definitions from existing components containing one or more constraints
Place constraints between components in an assembly.
In the browser, select a component that has constraints.
Right-click, and select Component
Infer iMates.Note: iMate definitions cannot be inferred from assembly features.If the selected component is one of multiple placements of the same part (or assembly), indicate how to convert the constraints:
- To convert constraints contained on the selected occurrence only, select the Selected Occurrence Only check box.
- To convert constraints contained on all occurrences, clear the Selected Occurrence Only check box.
Select the Create Composite iMates check box to group multiple inferred iMate definitions into one or more composite iMate definitions.
A composite iMate definition is created for each group of constraints that constrain the same two occurrences.
Click Apply.
Optionally, continue to select components for converting additional constraints, and click Apply after each one.
Save the file.
Infer iMate definitions from existing constraints
Place constraints between components in an assembly.
In the browser, select a constraint.
Right-click and select Infer iMates.
Enter a name for the iMate in the browser, giving it a name to describe its purpose or placement.
Select the Create Composite iMates check box to group multiple inferred iMate definitions into one or more composite iMate definitions.
A composite iMate definition is created for each group of constraints that constrain the same two occurrences.
Click Apply.
Save the file.
Infer iMate definitions for existing features
You can infer iMates on hole, revolve, and circular extruded part and assembly features. Inferred iMate definitions are placed only on closed loops.
Autodesk Inventor places the inferred iMate on the edge most likely to be useful. If you want the iMate placed on a different edge, delete the inferred iMate and manually create an iMate.
In the browser, right-click a feature, and then select Infer iMates.
In the Infer iMates dialog box, do one:
- Enter a name to apply to all inferred iMate definitions.
- Leave the Name field blank. A name is automatically assigned according to the constraint type, such as iMate:1 or iMate 2.
Tip: Give the iMate definition a name to describe its purpose or placement.Click OK to close the dialog box.
Save the file.
Infer iMates for a new feature
When you create a part or assembly feature, you can infer iMates on circular edges of extrusions, revolves, and holes. A closed loop is required.
Autodesk Inventor places the inferred iMate on the edge most likely to be useful. If you want the iMate placed on a different edge, delete the inferred iMate and manually create an iMate.
Create the profile sketch required to create a feature with a circular edge.
Click the icon for Extrude, Revolve, or Hole.
Select values and geometry as needed.
 Select the check box for Infer iMates.
In the Infer iMate dialog box, enter an iMate name or leave blank and click OK. If blank, a name is automatically created according to the constraint type, such as iInsert1.
Click OK to create the feature and automatically create the iMate.
Save the file.