To Work with Faces in Sheet Metal
You use Face to create a face from a sketched profile. (You can use a shared sketch as a profile.)
What's New: 2025
The sketch shape and any bends or seams between a new sheet metal face and existing sheet metal faces control the shape. If desired, you can use a shared sketch as a profile for a face.
You can also override default sheet metal styles in the Face property panel as you create your sheet metal face. These settings include how the flat pattern unfolds, and the bend relief settings between faces.
Create a Sheet Metal Face
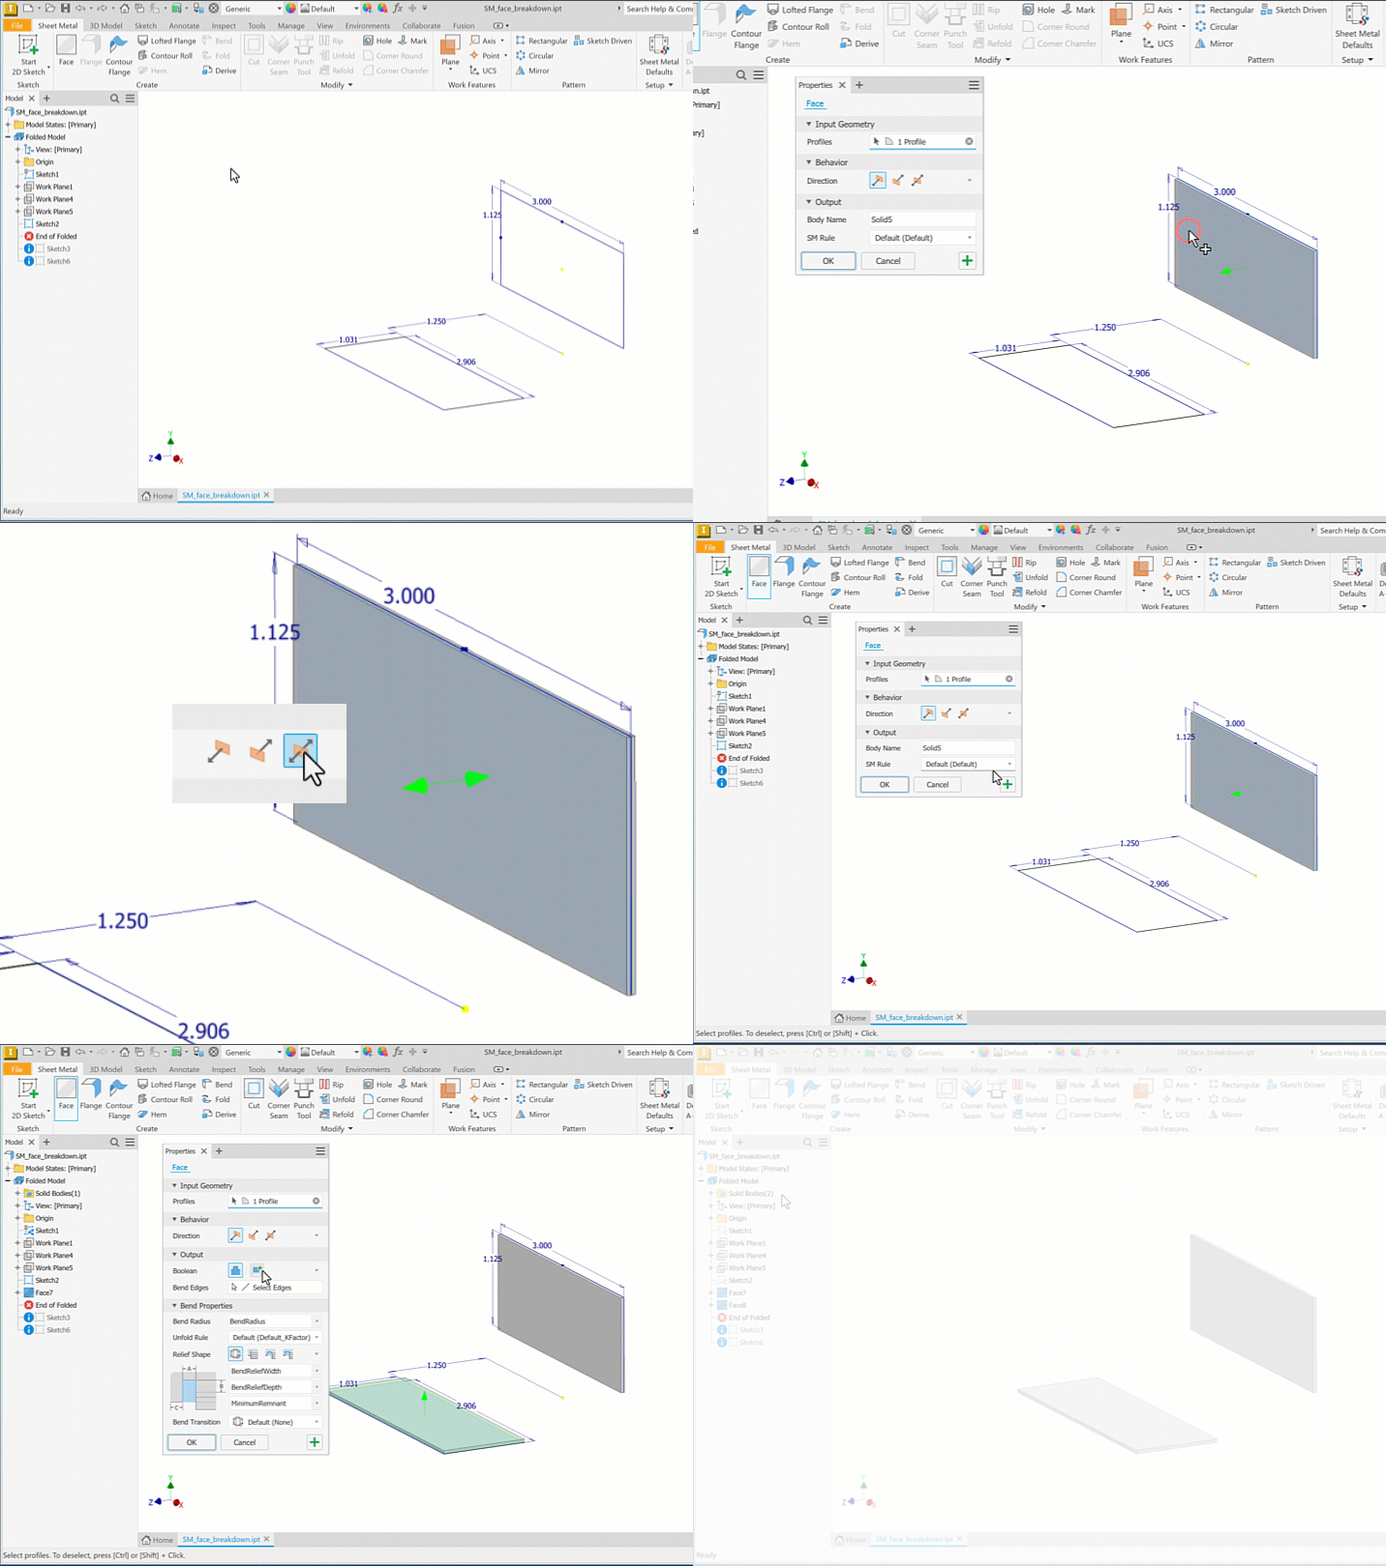
Add thickness to a sketch profile to create a sheet metal face. The following illustrates creation of a base feature and a separate solid sheet metal face.

The first feature that you create is the base feature. For subsequent sheet metal faces, when one line in the profile is coincident with an existing sheet metal edge, a bend is created automatically.
Sketch a profile that represents the shape of the sheet metal face you want to create.
On the ribbon, click Sheet Metal tab
 Create panel
  Face
Face  . Input geometry selection is automatically on when the command starts.
Input Geometry
- If only one closed profile is available it is automatically selected.
- If there are multiple closed profiles, select a profile for the sheet metal face.
Behavior specifies where the solid geometry is created relative to the sketch plane. An arrow on the face indicates the selected direction.
 Default: The face thickness direction is set by the software.
 Flipped: Directs the material thickness to the other side of the selected profile.
 Symmetric: Offsets the material thickness equally to both sides of the selected profile.
Output
Boolean: Displays if another solid exists in the model.
 Join: The new face becomes part of the selected solid.
 New Solid: Creates a new solid separate from the others.
Solids: When multiple sheet metal solids exist, the selector displays enabling the selection of the desired solid.
Body Name: Specifies a name for the body that is created, accept the default name or enter one.
SM Rule: Select a sheet metal rule to use or accept the default.
Do one of the following:
- Click OK to create the face and close.
- Click
 Apply if you want to create more sheet metal faces.
Add Faces to Existing Solids
The Sheet Metal Property panel displays additional parameters when adding face features to existing sheet metal features. Single bends are created by default when you use the Face command.
Sketch a profile that represents the shape of the sheet metal face you want to create.
On the ribbon, click Sheet Metal tab
 Create panel
  Face
Face  . Input geometry selection is automatically on when the command starts.
Input Geometry
- If only one closed profile is available it is automatically selected.
- If there are multiple closed profiles, select a profile for the sheet metal face.
Behavior specifies where the solid geometry is created relative to the sketch plane.
 Default: The face thickness direction is set by the software.
 Flipped: Directs the material thickness to the other side of the selected profile.
 Symmetric: Offsets the material thickness equally to both sides of the selected profile.
Output
Boolean:
 Join. The new face becomes part of the selected solid.
Solids: If multiple sheet metal solids exist, the selector displays enabling the selection of the desired solid.
Bend Edges: Select a parallel edge on the solid where the new face is to join. If the profile is not coincident with an existing edge, or if more than one line in the profile is coincident with an existing face, select an edge.
Face Extension: Displays when the face profile and solid do not a coincident edge. Choose between
 Match Shape: Extends the shape of the existing and/or new faces along the side edges as needed to satisfy the selected options.
 Uniform: Extends the shape of the new face to satisfy the selected options.
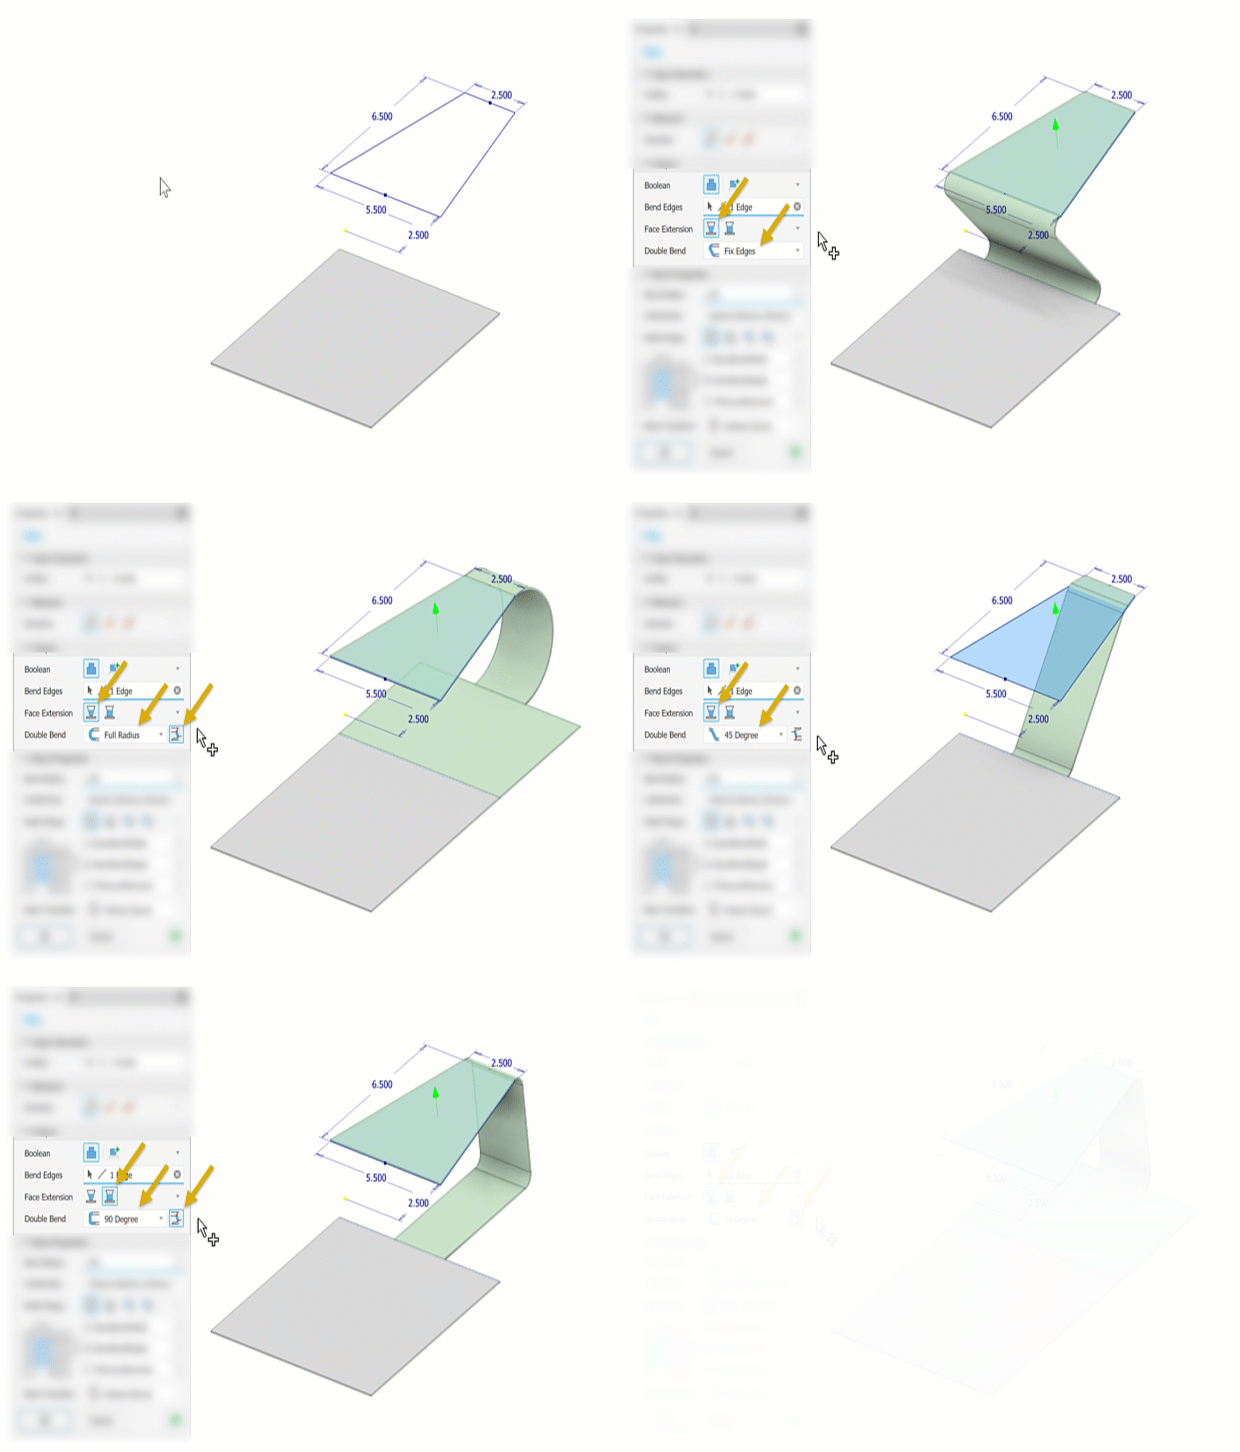
Double Bend: Displays when sheet metal faces are parallel but not coplanar. Click an edge on the existing face where the bend joins. Then, specify a method for creating a Double Bend between the sheet metal faces. Choose from
 Fix Edges
 Full Radius
 45 Degree
 90 Degree
 Flip Fixed Edges: Click to trim or extend the selected edge while the matched edge is fixed. When not selected, the order is reversed.
The following image depicts the various Output options.

Bend Properties
Initializes with the preset defaults. You can use custom rules you create or enter a value to override the rule.
Bend Radius, do one of the following:
- Accept the default bend radius specified in the active sheet metal style.
- Enter a value, or on the drop-down list, select Measure, Show Dimensions, or List Parameters to enter a different value.
Unfold Rule: Specifies the unfold rule to apply to the bends.
Relief Shape: Specifies the bend relief shape to use. Choose from
 Default (Straight)
 Tear
Tear Round
Round Straight
Relief Shape defaults display based on the selected relief shape. The default values come from the Sheet Metal Rule, but can be overridden. The rule fields are:
- Bend Relief Width
- Bend Relief Depth
- Minimum Remnant
Bend Transition: Specifies the bend geometry condition to show in the flat pattern. Choose from
 Default (None)
 None
None Intersection
 Straight Line
 Arc
Arc Trim to Bend
Do one of the following:
- Click OK to create the face and close.
- Click
 Apply if you want to create more sheet metal faces.