New modeling updates in Maya include Smart Extrude, Bevel Filtering Attributes and Boolean intersections as a bevel input.
Smart Extrude in Maya
Originally introduced in 3ds Max 2021, Smart Extrude is now available in Maya.
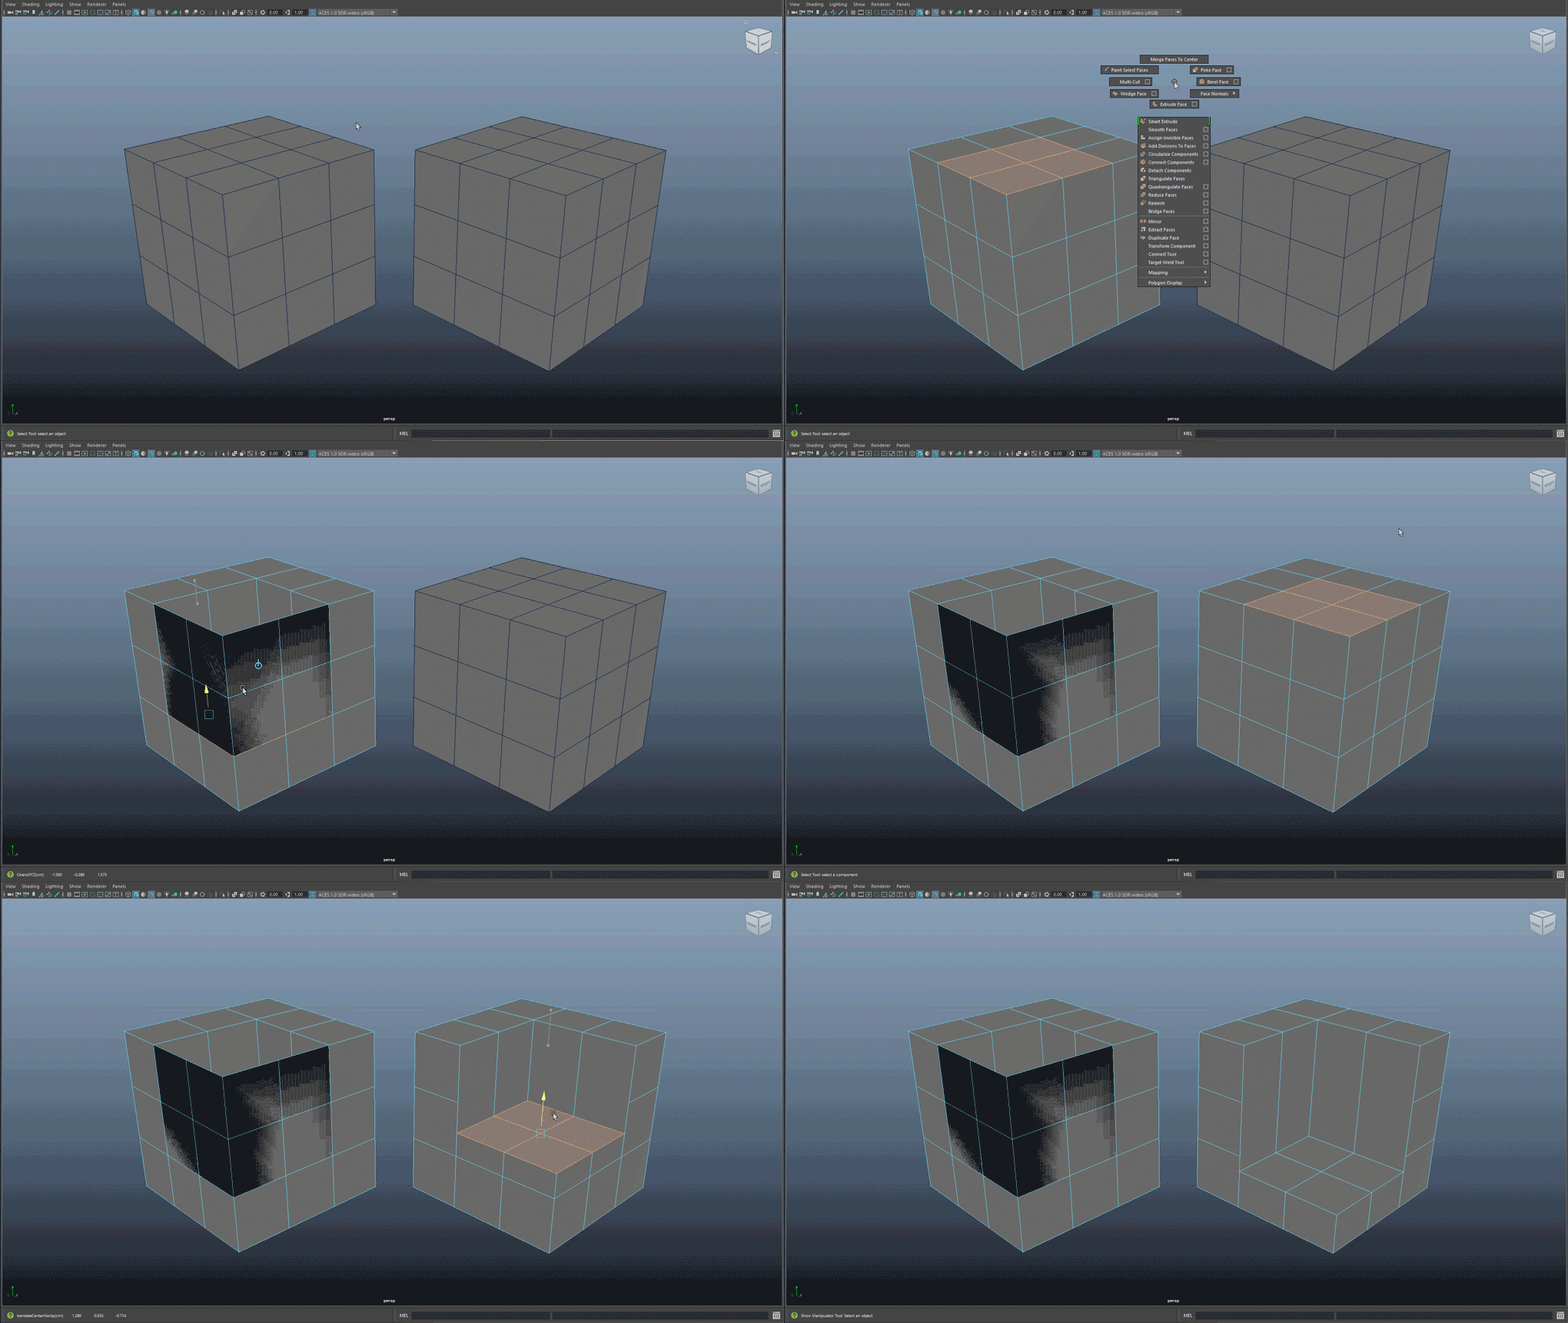
Smart Extrude is a powerful new extrude functionality for Maya, which lets you interactively extrude faces in the viewport and eliminates the need to manually repair double faces and unwelded results that occur during a traditional Extrude operation. With Smart Extrude, faces that are fully, partially cut-through or overlapped by the operation results are interactively rebuilt and stitched together, creating new manifold geometry, eliminating the need to manually repair hidden faces or geometric data. Therefore, you can freely explore and modify polygonal mesh topology on your object.
To activate Smart Extrude, first make a component selection of faces in the viewport. Then, select Edit Mesh > Smart Extrude and use the manipulator to drag faces in the Viewport. Any overlapping faces are automatically stitched and rebuilt into the mesh for clean topology results.
- Smart Extrude can also be accessed with the new button and icon in the Poly Modeling shelf as well as the Shift + RMB marking menu for face-centric modeling operations.
- By default, Smart Extrude will be aligned to the component selection that you have selected. To align it to another orientation, use the Orientation Marking Menu, which is accessible using the standard Shift + Ctrl + RMB hotkey.
- After running Smart Extrude, the G hotkey will repeat the action. Use this method to run multiple Smart Extrude actions one after another.
- A basic marking menu exists for the Smart Extrude manipulator that will automatically set the
Pivot Orientation based on the following options:
- Set to Object
- Set to World
- Set to Component
- Outward extrusions can be used to grow or join to other existing geometry, while inward extrusions are used to carve into the object.
- Inward traveling Smart Extrude can be applied across multiple edge segments, partially, or completely into/ through a mesh (including corners). In these cases, geometry will be deleted and removed where they intersect.
- If you attempt to run Smart Extrude from a Vertex or Edge component, your selection will be turned into a Face component and then Smart Extrude will be applied.
- An outward traveling Smart Extrude selection will join and stitch together with other polygonal data on the same Mesh object that it intersects with.
- Choose Edit Mesh > Extrude to use the general extrude implementation if you want unwelded results. Switch between Smart Extrude and Extrude actions as necessary for your modeling needs.
- The result of your Smart Extrude operation can be self-intersecting or across multiple contiguous shells of the Mesh object. Your resultant geometry will still be clean topology.
Note: This new Smart Extrude functionality is not to be confused with the legacy "Smart Extrude" functionality, now known as Shift Extrude.
When extruding faces inward, Smart Extrude cuts through and deletes faces on any part of the mesh to allow the result to completely extend through. The resulting hole is restitched to the surrounding faces. This is similar to a Boolean Difference (A-B) operation. When extruding faces outward into another face on the mesh, any intersection is stitched together to produce a clean result. This is similar to a Boolean Union operation.

To learn more about Smart Extrude and other modeling updates, get involved with development by providing feedback and join the Autodesk Beta community.
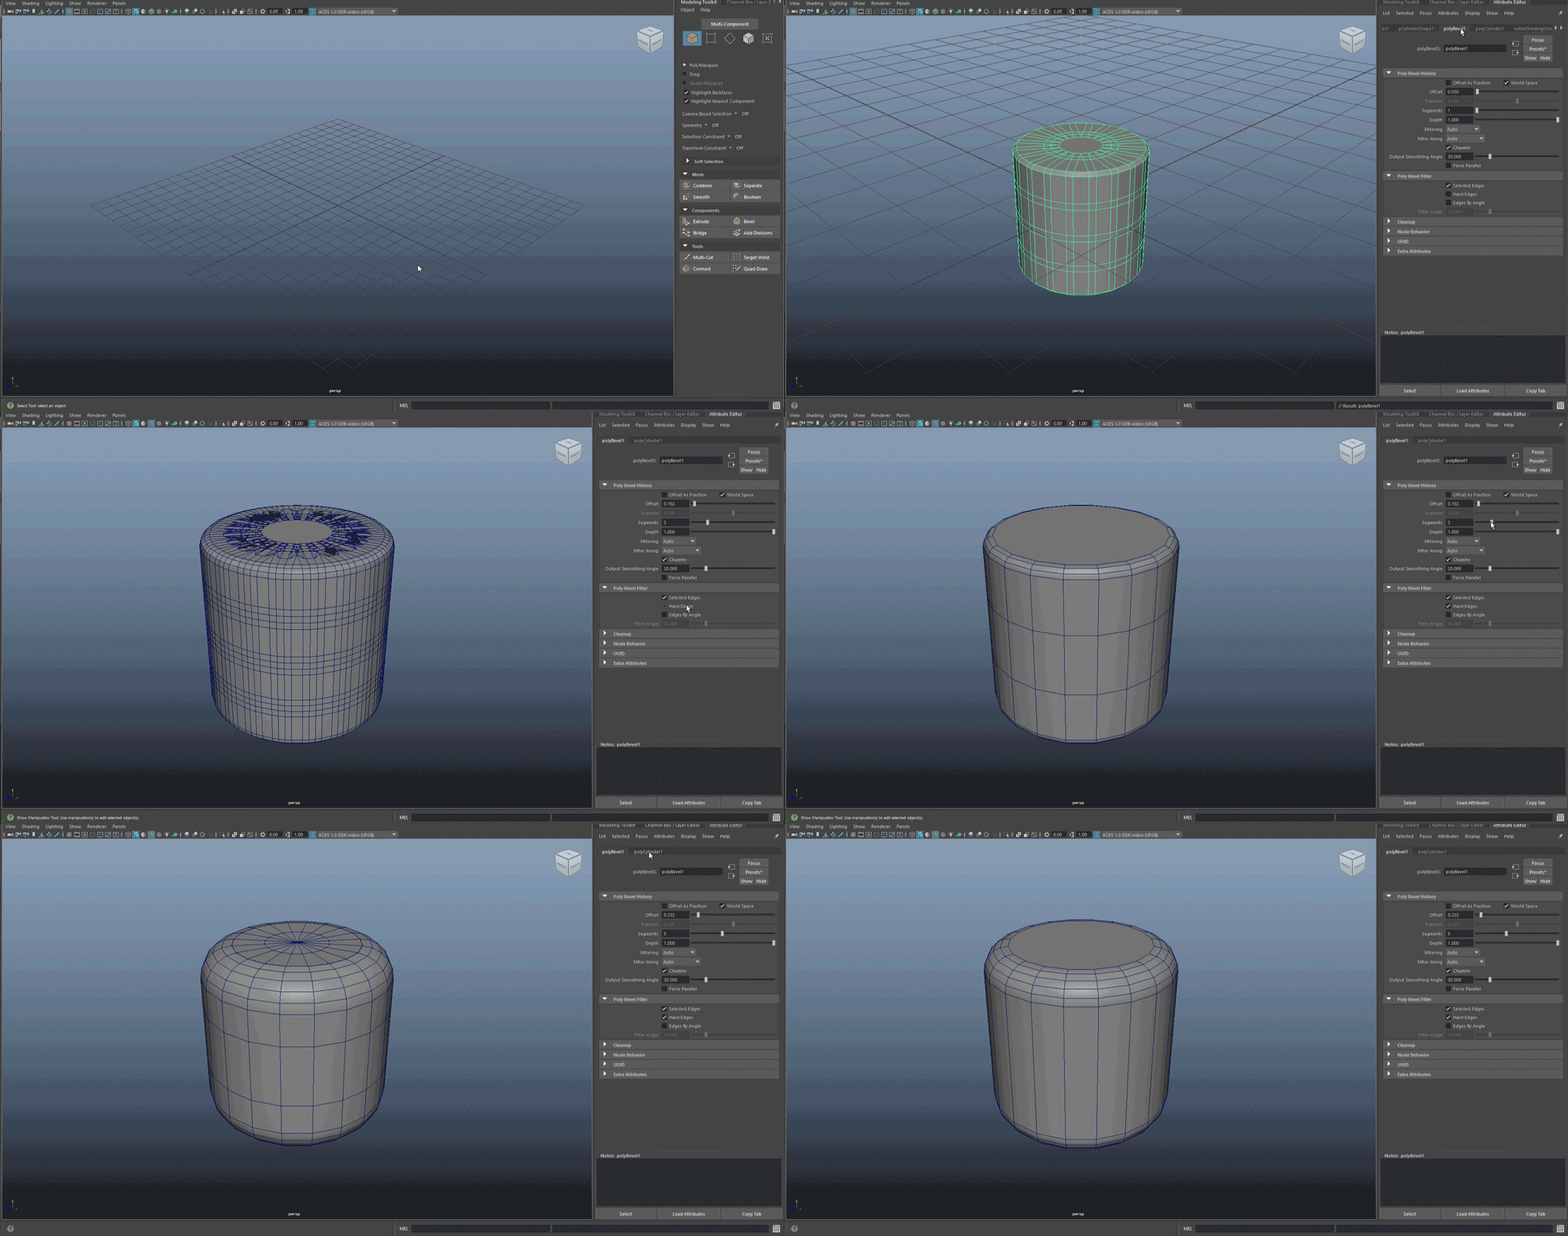
Bevel Filter Attributes

For example, the corners of a cube or the caps of a cylinder could be what you filter to bevel. Thus, interior edges that are not hard or do not meet the angle threshold will not be affected. In this image, you can see how Bevel is applied to a primitive cylinder and then filtered to only affect the hard edges. This way, you can change the input of the cylinder to add more divisions to ensure the Bevel procedurally updates (only affects the hard edges at the top and bottom of the cylinder).
Boolean Intersections as Bevel Input
When applying a Bevel to a mesh that was created as a result of a Boolean operation, it will now only affect the edges created at the boolean intersection by default. This means that if you modify the input meshes of the Boolean node the Bevel will procedurally update, only affecting the new intersection edges as they are updated.

With this feature, you can use Boolean and Bevel nodes together. In this example, the Bevel is applied to the output of the Boolean operation so the bevel only affects the boolean intersection. This can be toggled on with the Selected Edges attribute.
Tip: If you add new objects to the boolean stack, it updates with additional boolean intersection edges procedurally.
Extrude Edge Improvement
Extrude Edge will now automatically create UVs for the newly created edges/faces. The new UVs will be offset from the original UVs in UV space, requiring less manual cleanup, saving you time, and giving you a more predictable result when UVs have already been created for an existing model.