Actor Finger Settings and Properties
To display the Actor Finger Settings in the Navigator window, select an Actor from the Navigator window > Actors folder, and then select the Actor Finger Settings pane.
The Finger representation is used to add markers or sensors containing motion data to a Marker set. You also use this representation to view selected markers in the Marker table (see Marker Table).
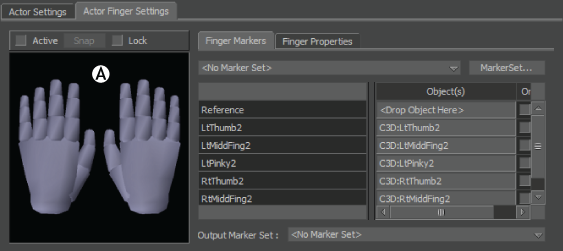
Actor Finger Settings A. Finger representation
When you first import a marker set, the Actor Finger representation cells are empty. These cells indicate the number of markers that affect each part of the fingers. As with markers on the body, you can assign up to five markers per cell.
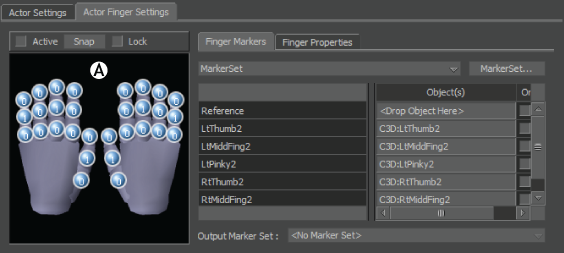
Actor Finger Settings A. Finger markers
To add Finger markers to a marker set:
Choose the marker set to which you want to add marker data:
- From the marker set context menu, select the marker set you want.
- Click Marker Set and either create or import the marker set.
Select a marker from the Viewer window, and Alt-drag it into the corresponding finger cell.
Dragging assigns the marker to the cell. If a cell already has a marker in it, the new marker is added to the list of markers for that cell.
These options work the same way they do for the actor body:
If you change the position of an Actor finger and click Snap, the finger pops back to place which appears more like selecting Active instead of Snap. See Snap
Finger properties
The properties you can change for finger data pertain to:
Control — You can create relationships between fingers on the same hand to control movement. You can nominate which data (from other fingers) controls the animatable rotation of a finger, specified as a percentage of the total rotation value.
Finger-solving — You can change multiplier values using the sliders to increase or decrease FK interpolation for the rotation of all fingers on both hands. These values work with the Actor-solving to extrapolate forward kinematics (FK).
Human Finger Limits — This option imposes limits, for both hands, to control unnatural rotation. If this option is not activated, the plane of rotation is still considered along with an internal set of limits for the off-axis rotation.
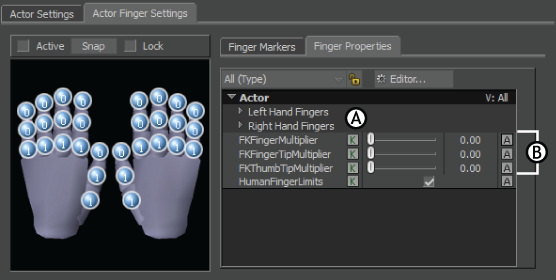
Actor Finger properties A. Finger controllers B. FK multipliers
To modify finger data control:
Select the Finger Properties tab.
Expand the Left or Right Hand Fingers menus.
Choose the finger you want to control.
Note:Each controller is identified by
labels. For example, LeftHandIndexMiddle means you are using data from the middle finger of the left hand to influence the rotation of the index finger of the left hand. Position the slider to the value amount that you want to apply control to the finger, for example a value of 100 controls the finger completely.
Note:The default values are that each finger drives itself 100% with no influence from other fingers.
Enable animation on this finger by clicking “A”, and then add a keyframe by clicking “K”. For more information, see Keyframe (K) and Animate (A) buttons.
To modify finger FK Multiplier values for interpolation:
- Select the Finger Properties tab.
- Choose the multiplier whose interpolation you want to modify:
- FK Finger and Thumb Tip works specifically on the last phalange
- FK Finger Multiplier works on the movement of the second phalange and does not affect the thumbs
- Position the slider to the value amount that you want to apply FK interpolation for the finger (for example a value of 1 gives total FK interpolative movement).