Explore the options for applying different PRM files to parts and supports.
Video length (1:56).
Sample files for use with the tutorials are available from the Downloads page. Expand the downloaded ZIP archive into a convenient directory from which you can import files into Local Simulation as you need them.
In early releases of Local Simulation, the same process parameter (PRM) file had to be used for all parts and supports in a simulation. Now there are several different strategies for assigning PRM files separately to parts and supports.
- Click .
- In the Open model dialog, browse to the sample folder Example_14, and open file Example_14.tivus.
- Click
Machine.
Note the three available options for Processing parameters selection.
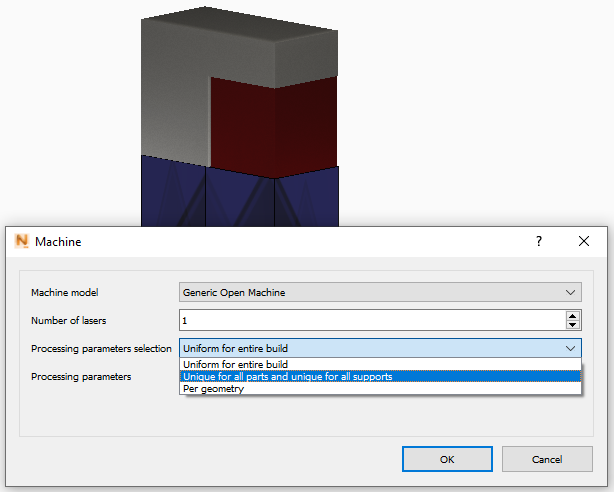
- Uniform for Entire Build is the original option for applying a single PRM file to all parts and supports in the build.
- Selecting
Unique for all parts and unique for all supports opens separate Processing Parameters selection menus for parts and supports.

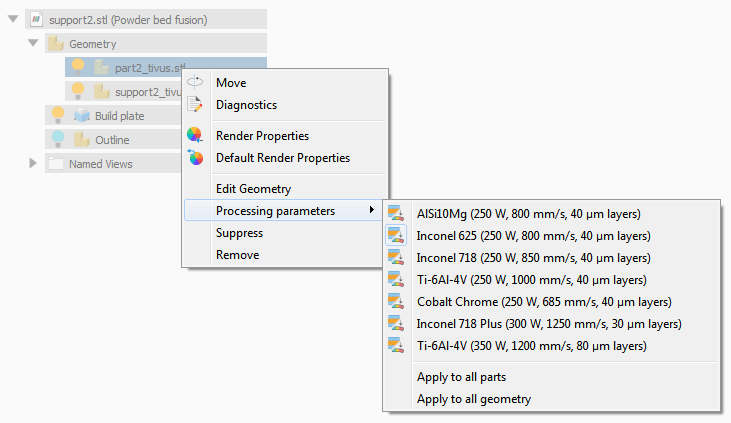
- The
Per geometry option provides the freedom to assign PRM files separately to each part and each support in the build by right-clicking the geometry in the Browser.
Note: Using multiple PRM files requires both PRMs to have the same material properties. For PRM files that include Lack of Fusion and Hot Spot information, the number and value of the Lack of Fusion temperatures, Hot spot temperatures, and Interlayer temperatures must be identical between the files.
These options provide users with both convenience and flexibility for assigning PRM files to simulation builds.