Use the command line to run a series of simulations.
Video length (4:24).
This tutorial guides users through the process of exporting input files from the graphical interface to run a batch job from the command line.
Sample files for use with the tutorials are available from the Downloads page. Expand the downloaded ZIP archive into a convenient directory from which you can import files into Local Simulation as you need them.
Follow the step-by-step instructions below.
- Click
Simulation menu
 > New.
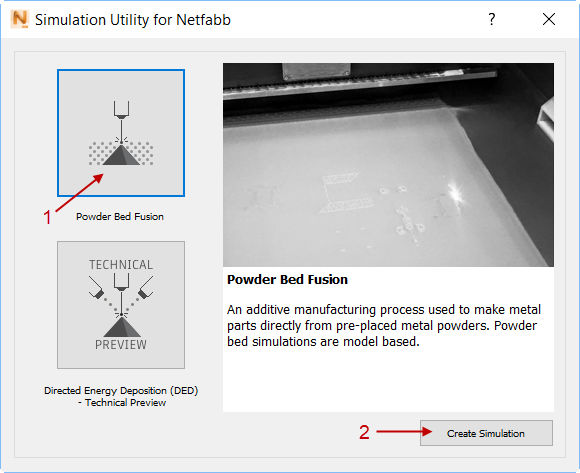
- In the dialog that opens, click
Powder Bed Fusion and then
Create Simulation.
- In the Import Model dialog, browse to the sample file Example_11\Example_11al.stl, and open it.
- Click OK in the Import dialog and in the Converted model units dialog.
- In the dialog, for Processing parameters, select the generic AlSi10Mg, and then click OK.
- Click
.

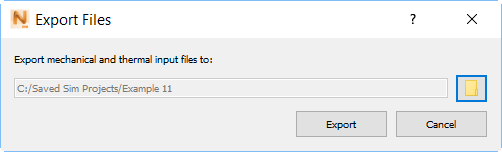
- In the
Export Files dialog, click the Browse button, create a new folder in a good location and name it
Example 11. Select this folder, and back in the
Export Files dialog, click
Export to save the input files.
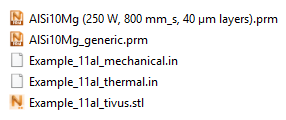
The Example 11 folder opens so that you can see the exported files.
- Create another new project, importing the file Example_11ti.stl.
- In the Machine dialog, for Processing parameters, select the generic Ti6Al4V, and then click OK.
- Export the new project to the same folder created earlier, Example 11.
- Also in the Example 11 folder, right-click in an empty space, select , and name the new document Batch.que, deleting the default .txt extension.
- Open
Batch.que in a text editor.
Simulations executed from a Batch.que file proceed serially through the list. The input, PRM, and STL files for each simulation must all be in the same folder as the Batch.que file.
- Type or copy/paste the names of the 4 exported input files, without the .in file extension, into the
Batch.que file, ensuring that each
*_thermal
file precedes the corresponding
*_mechanical file. The resulting batch file should look like this:
Example_11al_thermal
Example_11al_mechanical
Example_11ti_thermal
Example_11ti_mechanical
- Save and close the batch file, and then open the command terminal. The most efficient method to do this is to click the cursor in the Windows navigation bar in the Example 11 folder, which selects the file path, then type cmd and press Enter to execute. This will bring up the command prompt starting in the Example 11 directory. Alternatively the command prompt can be opened from the start or run menu, and you can navigate to the Example 11 directory using the cd command.
- To execute the batch command, type
pan -q Batch from the command prompt, and then press Enter.
pan is the solver executable, -q indicates a batch file will be used for the inputs, and Batch is the name of the file, without the .que extension. The execution and output returned from the solver should look similar to the following (with updated product version numbers):
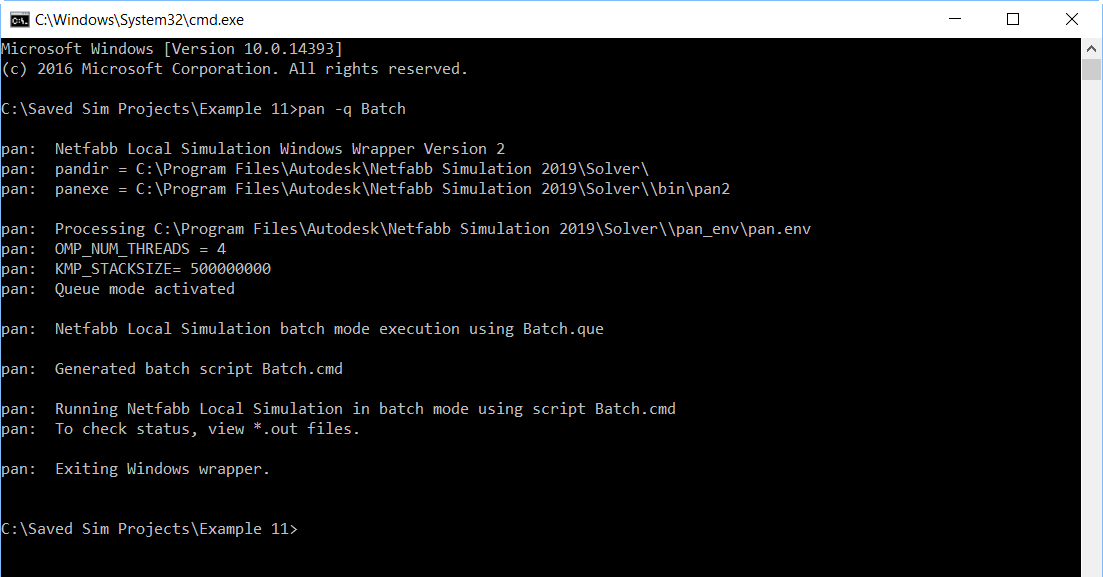
The solver ran the four simulations in sequential order. In the Example 11 folder, you should see .out, .case, and other output files for each simulation.
Two recommended methods to review the simulation progress are as follows :
- From the terminal, use the type command to print to the command window the contents of the .out log files. For the first simulation, this would be: type Example_11al_thermal.out
- Open the .out files in a text editor. It may be necessary to refresh the file in the text editor to update the log file information.