Produce a laser vector (LSR) file in Netfabb for powder bed moving source modeling.
Video length (3:26).
Important: A subscription to
Local Simulation is required to simulate moving heat sources. Moving heat source simulation is not supported on
Simulation Utility, which is provided as part of
Netfabb Ultimate.
Sample files for use with the tutorials are available from the Downloads page. Expand the downloaded ZIP archive into a convenient directory from which you can import files into Local Simulation as you need them.
- Open Netfabb Premium or Ultimate.
- Click
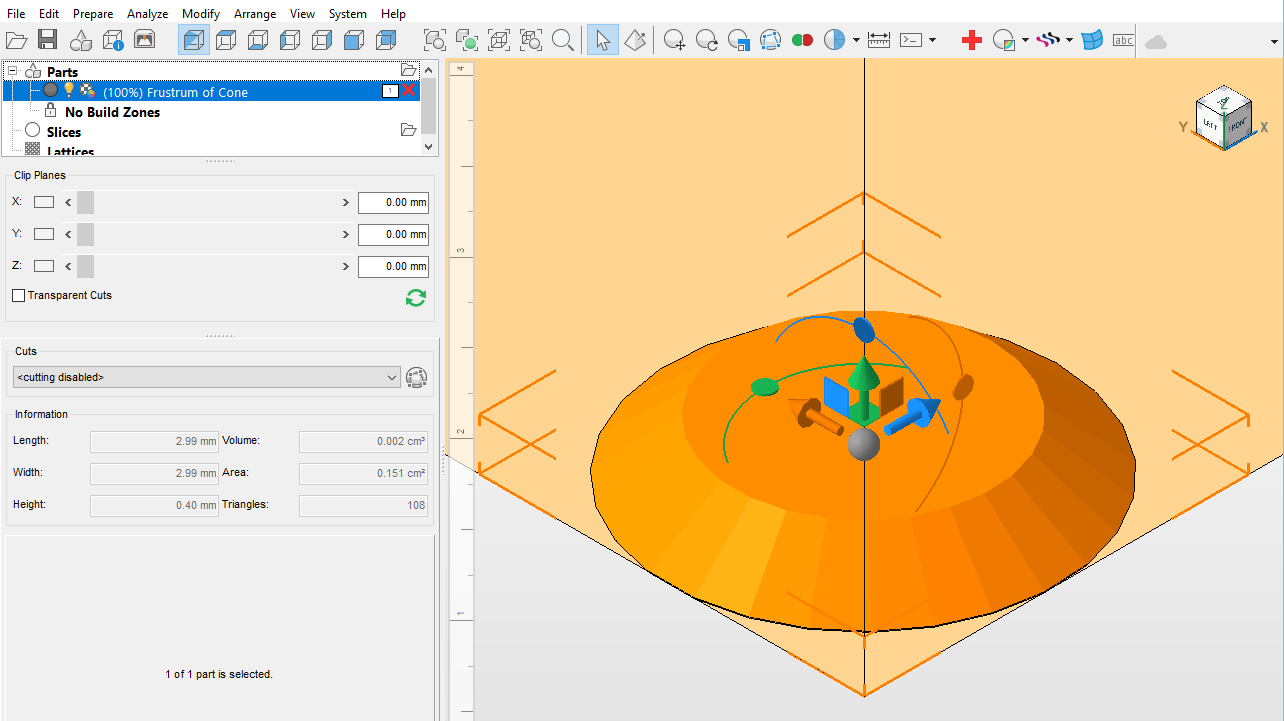
and from the sample files subfolder Example_20, import the file
Frustum of Cone.stl as shown below:
- On the Project Tree,
Parts node, drag and drop the Frustrum of Cone file under the
Slices node. The
Slice Part dialog opens.
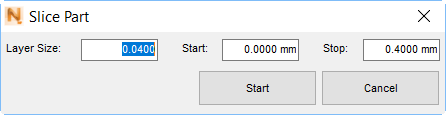
- Set Layer Size to 0.0400 mm and click Start to run the slicing operation.
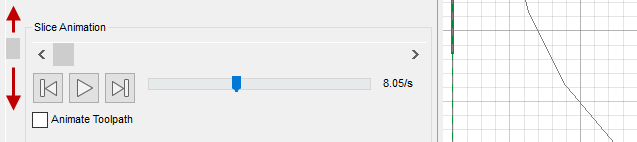
- To see the slices, use the Slice Animation controls. Drag the vertical marker to the bottom of the scroll bar and then click the
Play button
 to see the contours of each slice:
Slicing produces only the outside contour of each slice. Hatching must be added to create the laser vectors.
- Under Project Tree, Slices node, right-click Frustrum of Cone, then select .
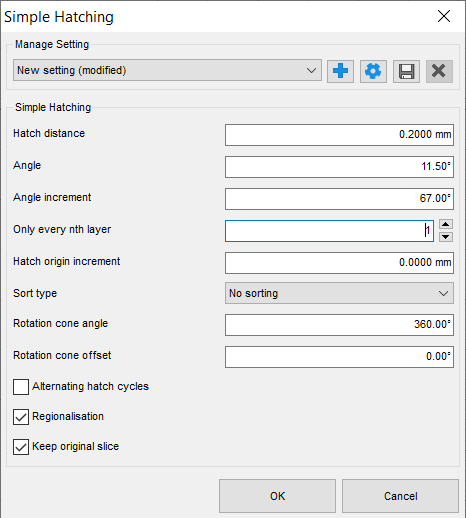
- In the
Simple Hatching dialog, check that the following values are set:
- Hatch Distance: 0.2 mm
- Angle: 11.5°
- Angle increment: 67°
Leave the other options at default values, and click OK.
- This operation fills in the contours with hatches. Again use the Play button and the vertical scroll bar to review the hatches created.
- Under the
Slices node, right click the
Frustrum of Cone (filling) item that was created in the last step, and select
. The
Export Slices dialog opens. The critical part of the dialog is shown below.
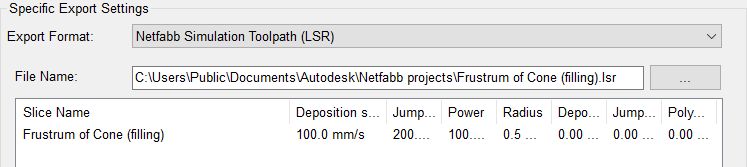
- In the File Name field, browse to a suitable directory and name for later use of the LSR file.
- In the large field below File Name, double-click the name under
Slice Name to open the
LSR Export Settings dialog. Adjust the settings as follows:
- Deposition speed: 800 mm/s = rate at which laser is rastered
- Jump speed: 800 mm/s = travel speed of laser between laser passes
- Power: 250 W = Nominal laser power
- Radius: 0.1 mm = Melt pool radius, nominally equal to laser diameter
- Deposition delay: 100 ms = Interlayer dwell time
- Jump delay: 200 ms = Dwell time between laser passes
- Polygon delay: 500 ms = Dwell time added after directional changes
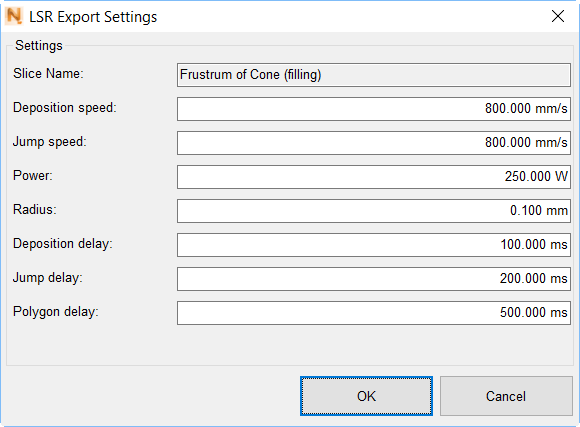
- Click
OK to accept these options, then click
OK in the
Export Slices dialog to save the LSR file in the specified directory.
To use the LSR file for a moving heat source powder bed fusion model, you can adapt the instructions provided in the following command-line-based solver examples for Local Simulation: