Create a new material by loading an aluminum alloy from the material library.
- In the Model tree, right-click on Materials and choose New.
- In the dialog, click on Select Material.
- The Material DB dialog will become populated with the available libraries. Click Load Database.
- The material tree is populated with the available materials. Under the
Aluminum Alloys category, select
Aluminum 1060 Annealed Wrought.
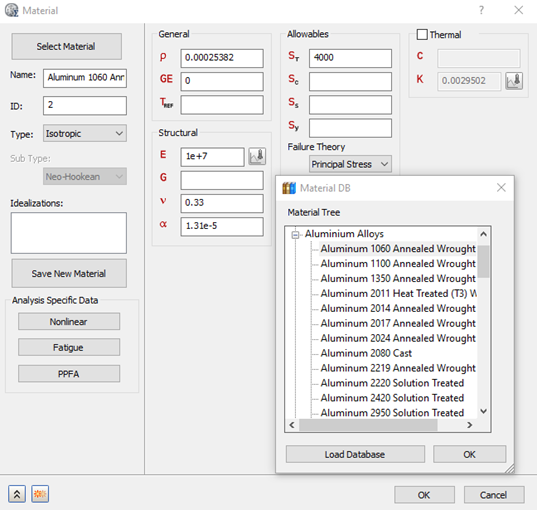
- Click OK to close Material DB and OK to close the Material dialog box.
- In the Model tree, right-click on Idealizations and choose New.
- Select
Shell Elements from the
Type drop-down menu.
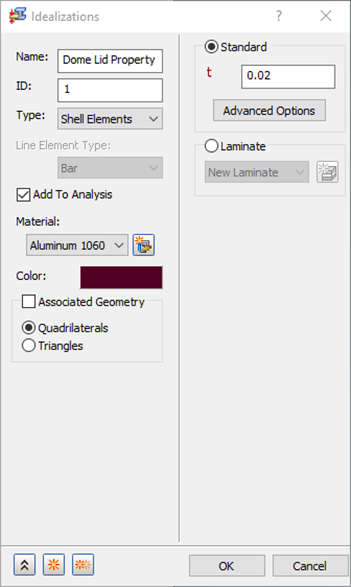
- Change the name to Dome Lid Property.
- Make sure Add to Analysis is checked, and Material is set to Aluminum 1060 Annealed Wrought.
- Enter 0.02 in the t (thickness) field, and make sure Quadrilaterals are selected under Associated Geometry.
- Click OK to create the property.
 Associated Geometry is not needed in this case. When associated geometries are not defined, all the shell elements will then have this property defined. This is used when there are multiple shell properties (i.e. multiple shell thicknesses) throughout a model.
Nonstructural mass can be added to each element in case there is an attached mass that you don’t want to physically model, but want to include in calculations.
Define the Mesh
- Right-click on Mesh Model and choose Edit.
- Type
0.03 in the
Element Size field.
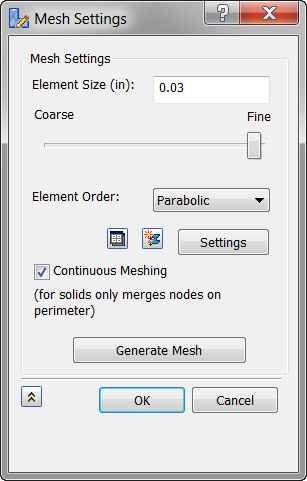
- Click the Settings button.
- Change the
Refinement Ratio to
1.0.
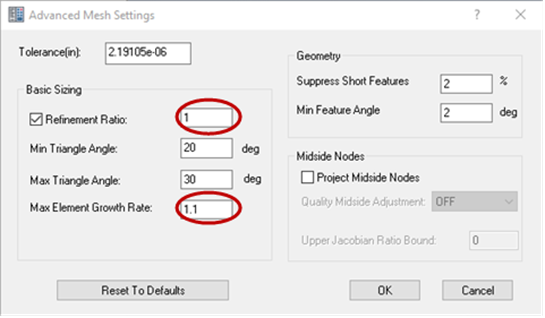
- Change the Max Element Growth Rate input to 1.1.
- Click OK in the Advanced Mesh Settings dialog.
- Click
OK once more in the
Mesh Settings dialog. The meshed model should look as shown below.
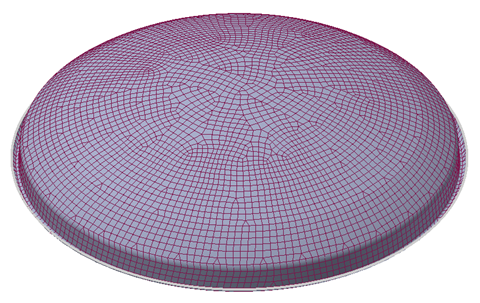
The advanced settings allowed you to get a more uniform mesh density without having extra refinements and element growth.