To select the points along a section drawn through a point-cloud:
- Display the point cloud in the CAD view and project the points.
- Click Point-Cloud tab > Select panel > Pick Mode > Section.
- In the CAD view, left-click the model to specify the start location of the section plane, then move the cursor to specify the plane's position.
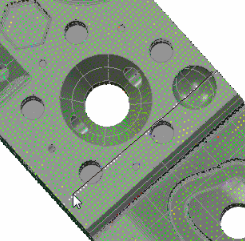
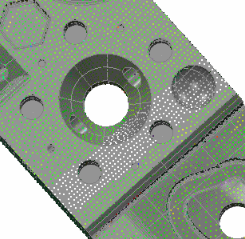
- Left-click again to create the section and select the points. The selected points are displayed in white.
Click Invert to select the points outside the section and deselect the points within the section. To cancel the selection, press the Esc key.
- To adjust the width of the section:
- Right-click the CAD view, and select Change Section Boundary from the context menu. The Section Boundary dialog is displayed.
- In the Boundary distance box, type the maximum distance from the section at which points are selected. You can also change the default Boundary distance using the Section boundary box in the Point cloud settings page of the Options dialog.
- To use the specified Boundary distance for all new section, select the Set as default value check box.
- Click OK to close the dialog.
You can now paste the points into another point cloud. Alternatively, to paste the points into a section group, right-click the CAD View and select Create Section Group from the context menu. PowerInspect creates a section group containing the points you selected.