The Probe Change Wizard enables you to search all Probe and Parameters items for a probe tool and replace it with an alternative. This enables you to quickly change an existing inspection document if you need to run the inspection on another measuring device, or with an alternative probe tool.
To change a probe tool in an inspection document:
- Click Probe Path tab > Tools panel > Probe-Change Wizard. The Probe Change Wizard is displayed.
- If you are editing a document for use on CNC machines, the Probe Change Wizard asks you to select the type of change you want to make. Select Change probe tools and click Next to specify the tool you want to replace.
If you are editing a document for use on OMV machines, you cannot change probe angles, and the Wizard automatically skips to asking which tool you want to replace.
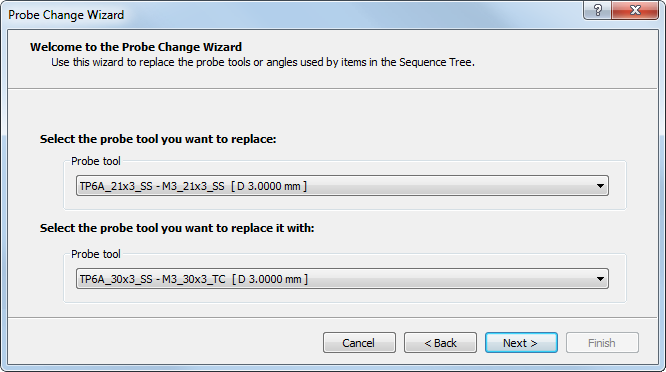
- Under Select the probe tool you want to replace, select the probe tool you want to change.
- Under Select the probe tool you want to replace it with, select the substitute tool.
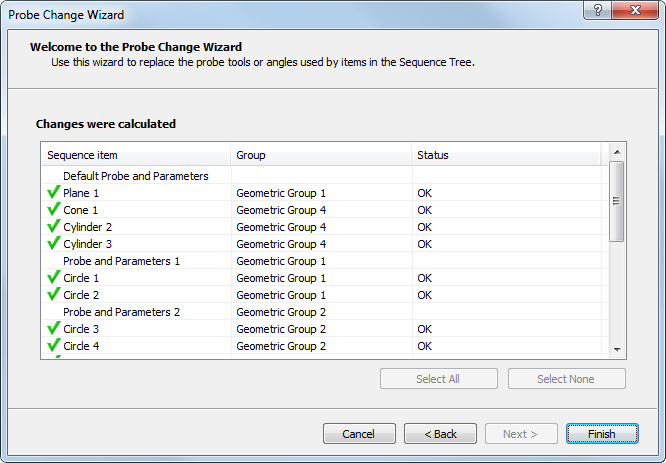
- Click Next. The Wizard lists the Probe and Parameters items that use the current probe tool and the probing items affected by the change.

- Deselect any items you do not want to update, then click Next. The Wizard lists the changes it has made.
- Click Finish to close the wizard.